To set up my internal Certificate Authority (CA), I installed and configured Active Directory Certificate Services on my domain-joined Windows Server. Here’s how I did it:
✅ Prerequisites:
- Domain-joined server with a static IP
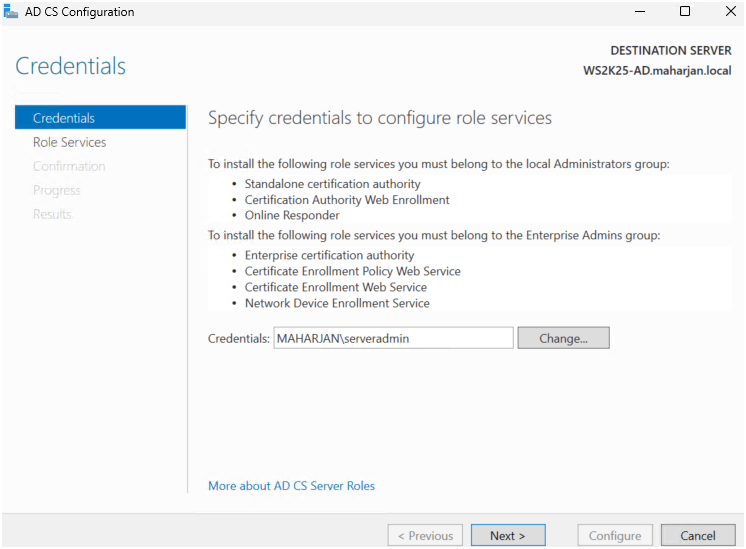
- Domain Admin or Enterprise Admin rights
🔹 Step: Install and Configure AD Certificate Services (CA)
Step1: Install AD CS Role and Services
Option1: On a domain-joined server, install AD CS:
Install-WindowsFeature AD-Certificate -IncludeManagementTools

Option2: Add the AD CS Role
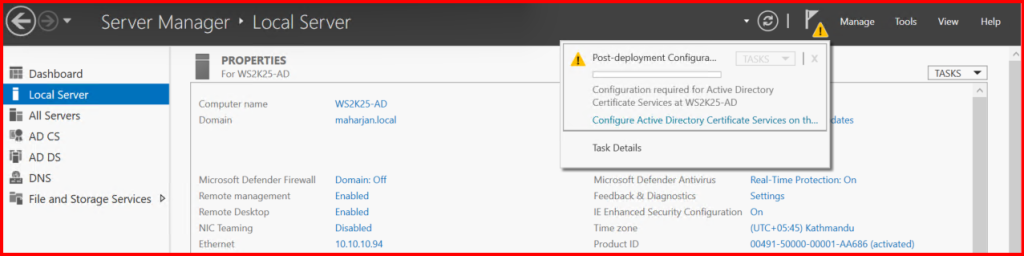
- Opened Server Manager > Clicked Add Roles and Features.
- Selected Role-based or feature-based installation.
- Chose the local server and checked Active Directory Certificate Services.
- Added required features and continued.
- After installation, clicked “Configure AD CS on the destination server”.
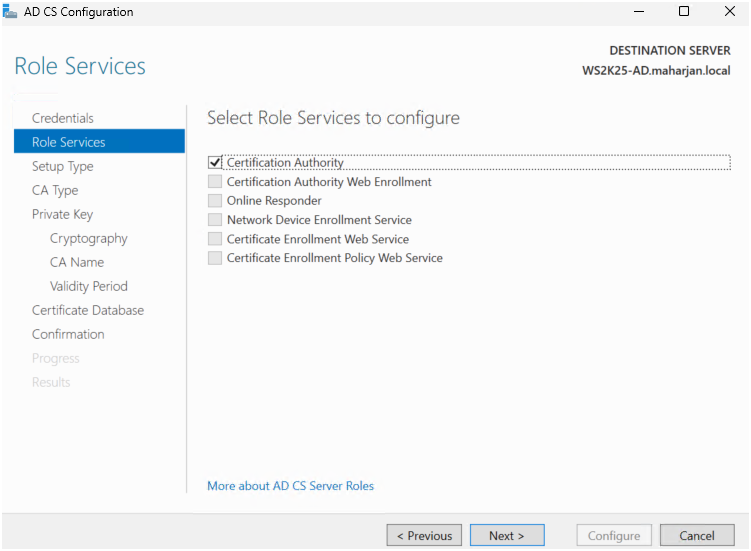
- Selected Certification Authority as the role service.
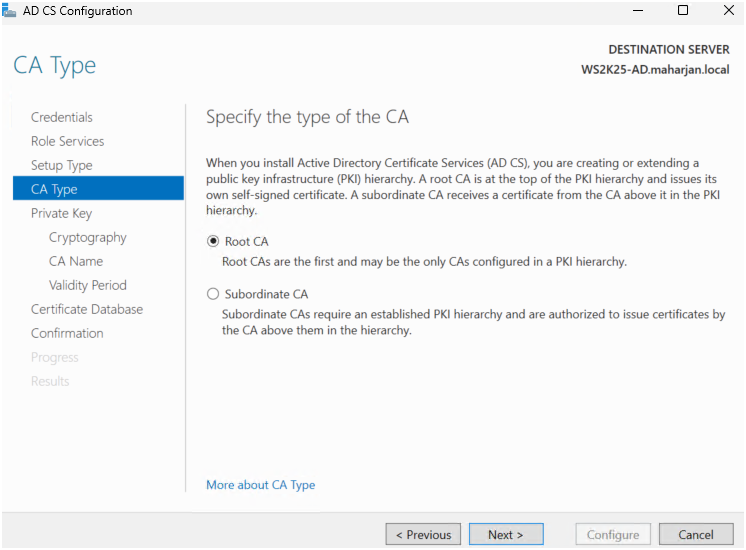
Step2: Configure the Certification Authority
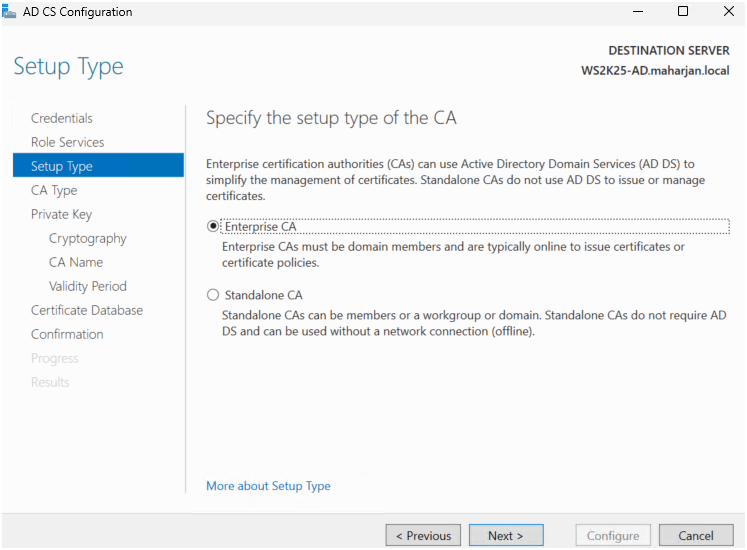
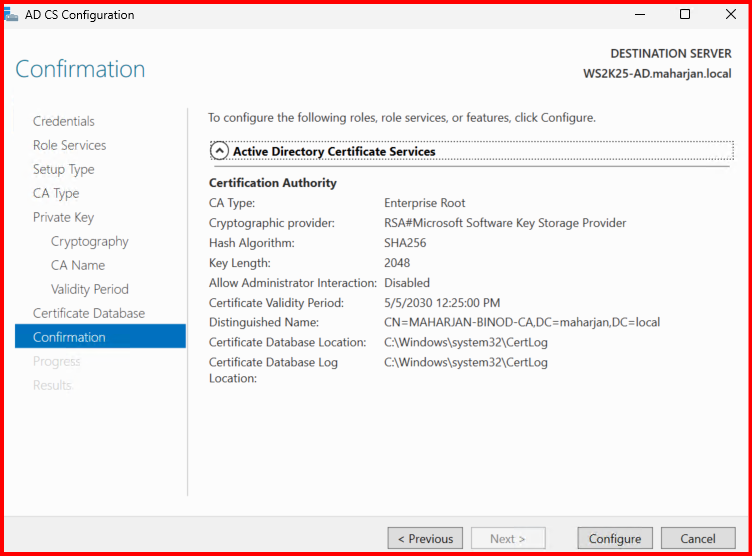
- Chose Enterprise CA (for integration with Active Directory).
- Selected Root CA (since it’s my first CA).
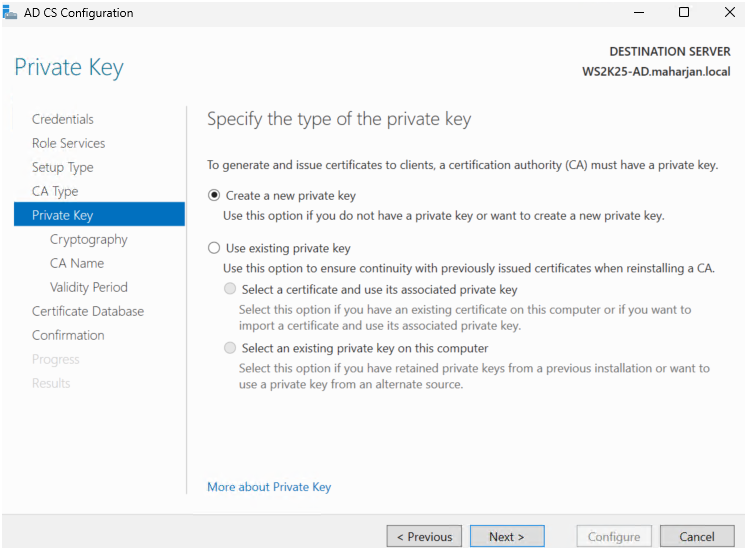
- Created a new private key.
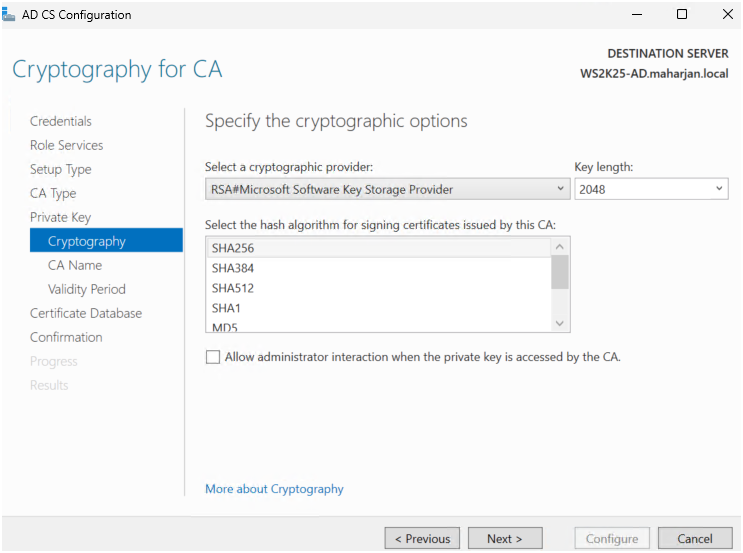
- Used default settings: 2048-bit key, SHA256.
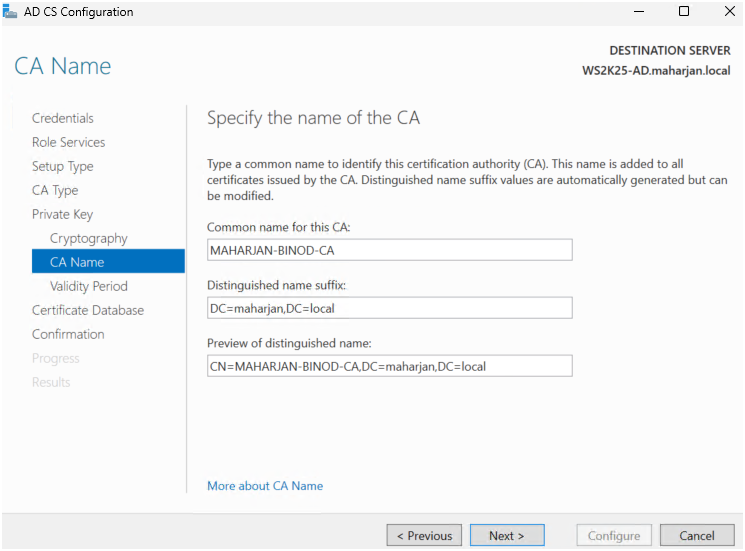
- Gave my CA a name (e.g.,
MAHARJAN-BINOD-CA).
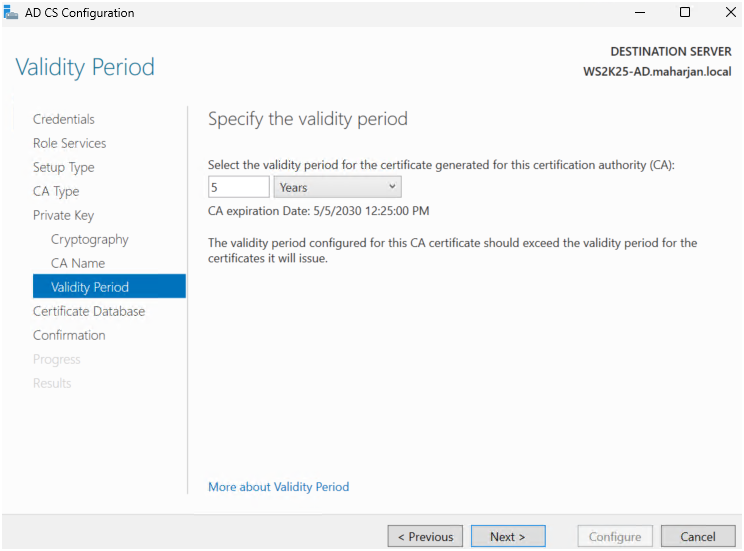
- Set the validity period to 5 years.
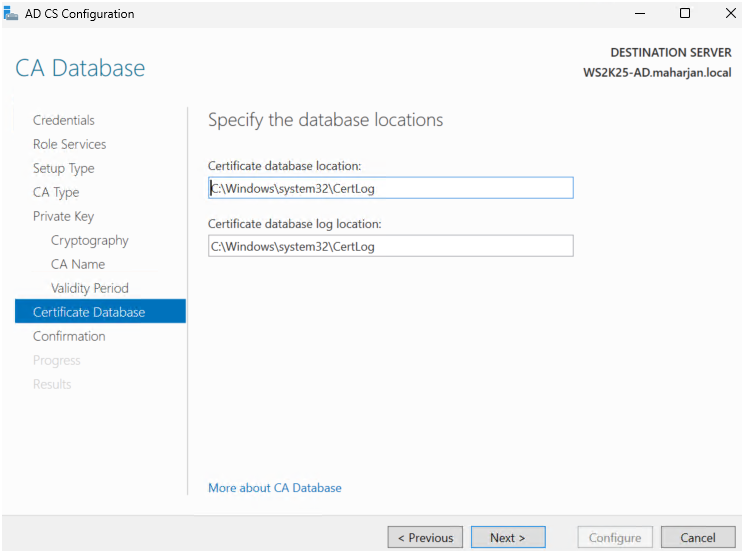
- Accepted default database and log file locations.
- Reviewed the configuration summary and clicked Configure.
- Waited for the setup to complete successfully.
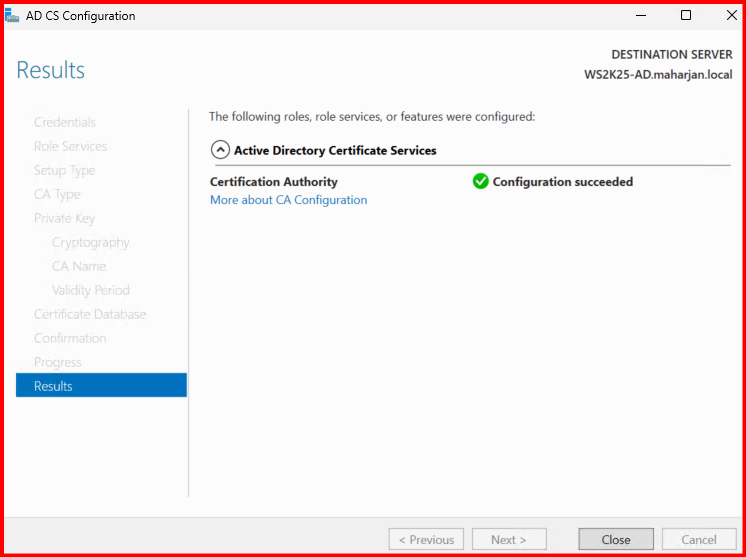
3. Verify the Installation
- Opened the Certification Authority console (
certsrv.msc) to check that the CA is running. - Confirmed the service status and readiness to issue certificates.

Now my Root CA is ready to issue certificates to users, computers, and services in my domain.