✨ Observation
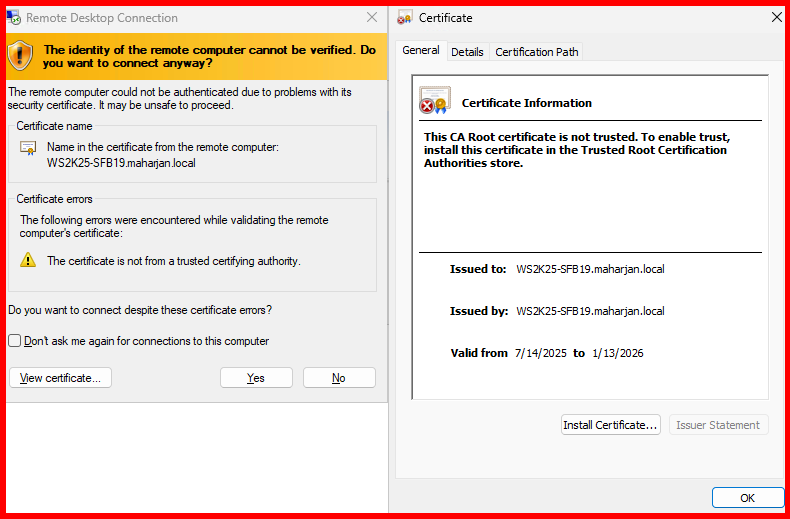
While connecting to a server using Remote Desktop Protocol (RDP) via IP address, a warning appears:
⚠️ “The identity of the remote computer cannot be verified. Do you want to connect anyway?”
❗ “The certificate is not from a trusted certifying authority.”
However, when connecting using the hostname (FQDN), no such warning appears. This usually means:
- A certificate is present, but not trusted by the client.
- The certificate doesn’t include the IP address in its Subject Alternative Name (SAN).
- The RDP service isn’t using a certificate issued by your internal Certificate Authority (CA).
In enterprise environments, this kind of certificate mismatch can cause confusion or concern, especially when users are presented with security warnings during routine connections. To resolve this, we can issue a proper RDP certificate from our internal Certificate Authority, include both the FQDN and IP in the SAN, and ensure it’s trusted on all client devices.
This blog outlines the exact steps I followed to fix this in a secure and scalable way.
✅ Step 1: Create a Certificate Template for RDP
- Log in to your Certificate Authority server.
- Open Certification Authority → Expand your CA → Right-click Certificate Templates → Click Manage.
- Find and duplicate the Computer template.
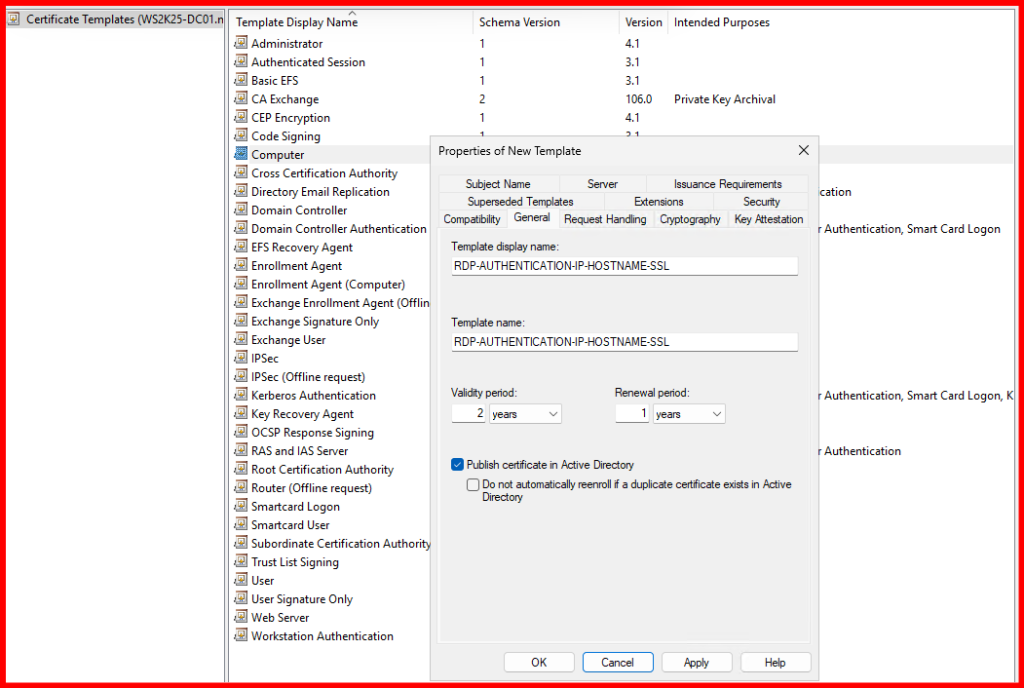
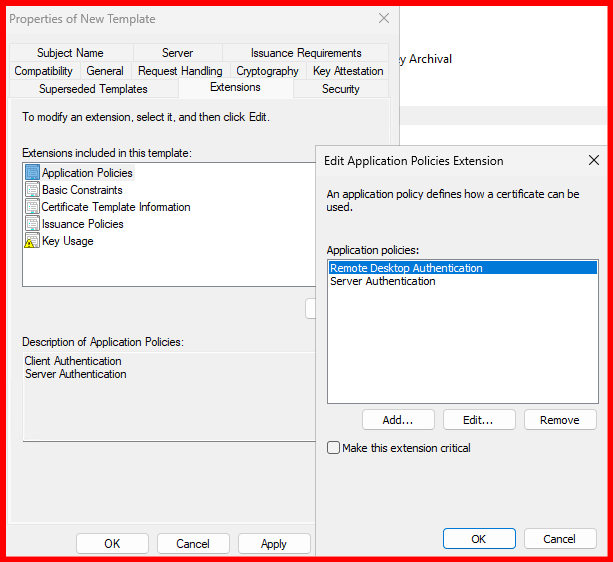
- In the duplicated template:
- General tab: Name it,
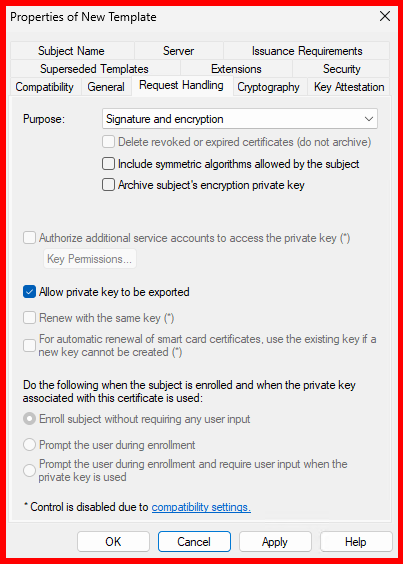
RDP-AUTHENTICATION-IP-HOSTNAME-SSL - Request Handling tab: Ensure Allow private key to be exported is checked.
- Subject Name tab: Select Supply in the request.
- Security tab: Add Domain Computers with Read & Enroll permission.
- General tab: Name it,
- Close and publish the template:
- Go back to Certification Authority Console, right-click Certificate Templates → New → Certificate Template to Issue.
- Select your
RDP-AUTHENTICATION-IP-HOSTNAME-SSL
Follow the steps below and refer to the configuration screenshot for guidance.


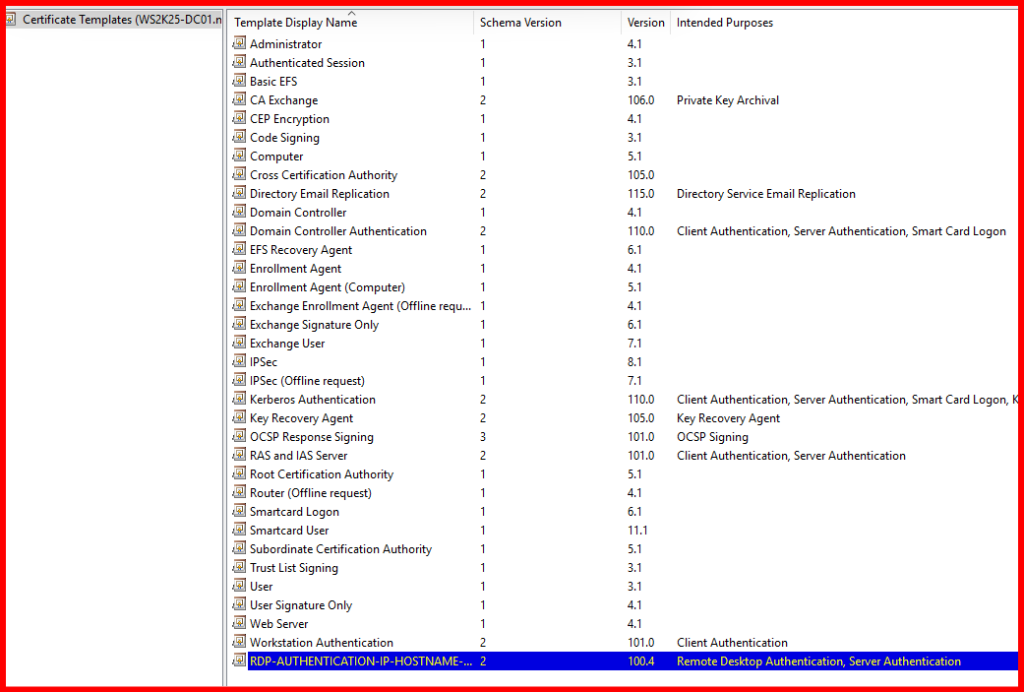
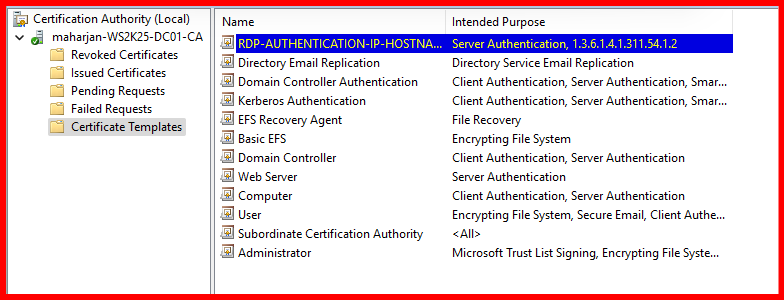
The RDP certificate template has been successfully created and issued via the Internal Certificate Authority. You can verify its issuance under the ‘Issued Certificates’ section of the Certification Authority console.

Note: No certificate has been issued for the target server yet.
✅ Step 2: Request the Certificate from Target Server
- On the target server (e.g.,
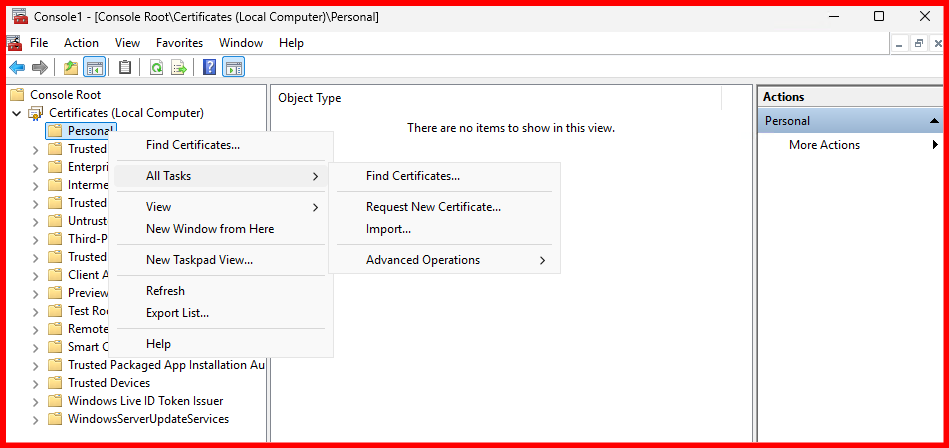
WS2K25-SFB19.maharjan.local):- Open MMC → Add Certificates → Select Computer account.
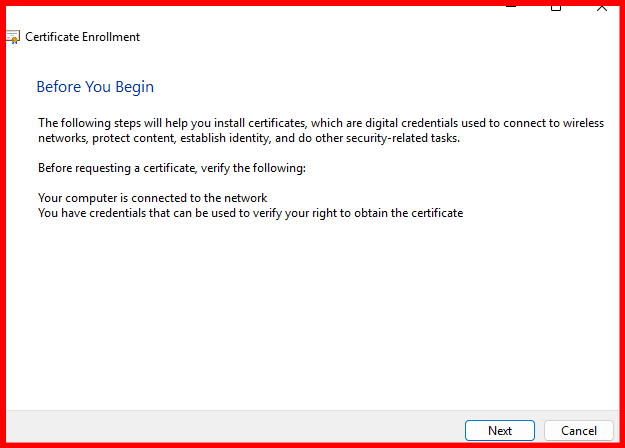
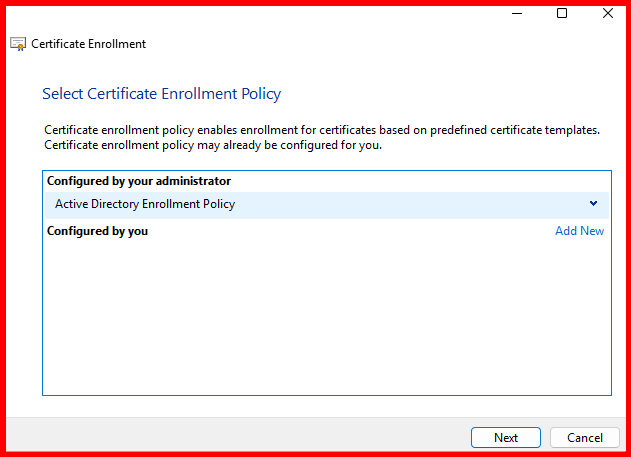
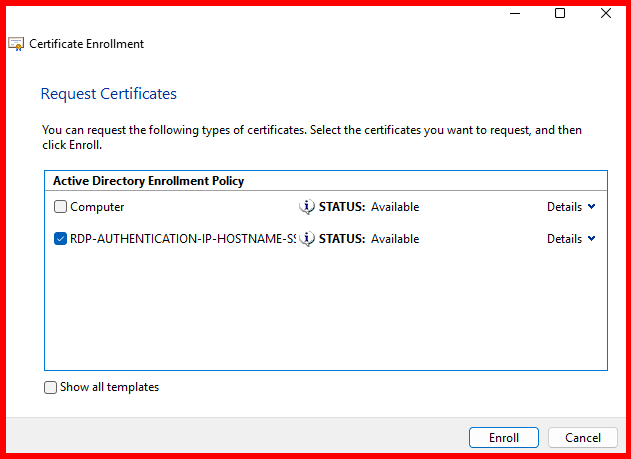
- Navigate to Personal → Certificates → Right-click → All Tasks → Request New Certificate.
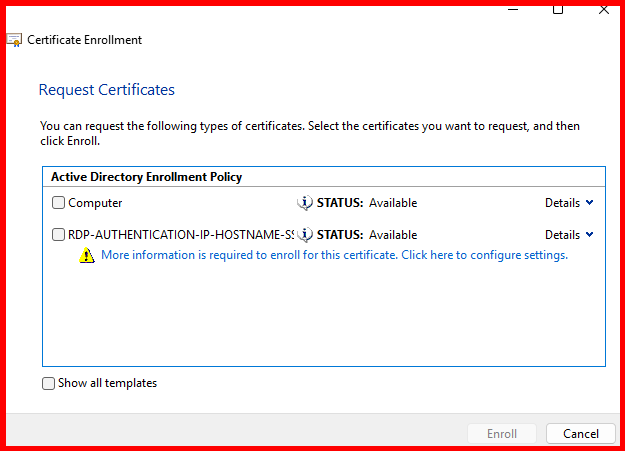
- Select the
RDP-AUTHENTICATION-IP-HOSTNAME-SSL - Before completing:
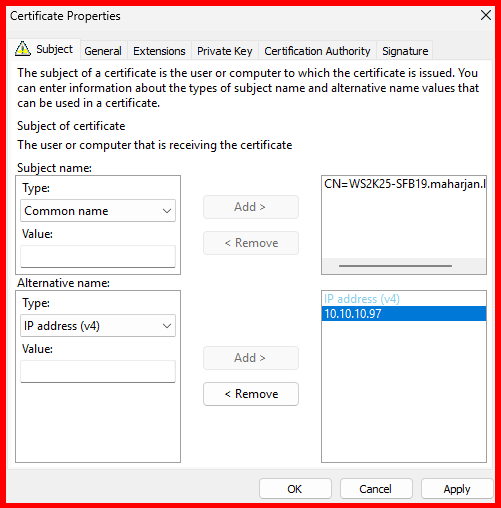
- Click Details → Properties.
- In Subject Name, add:
- Common Name (CN): FQDN (e.g.,
WS2K25-SFB19.maharjan.local)
- Common Name (CN): FQDN (e.g.,
- In Alternative Name, add:
- DNS:
WS2K25-SFB19.maharjan.local - IP Address: IP of the server (e.g.,
10.10.10.97)
- DNS:
- Finish the request and ensure the certificate appears in Personal → Certificates.
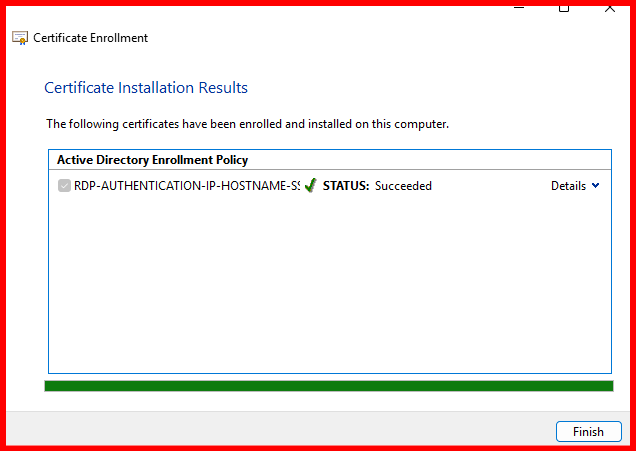

In my case, the RDP certificate has been successfully enrolled for the SFB-Server. Let’s now verify this by checking the ‘Issued Certificates’ section on the Internal CA server.

Once the RDP certificate has been successfully enrolled, restart the target server to ensure the certificate is properly bound to the Remote Desktop service.
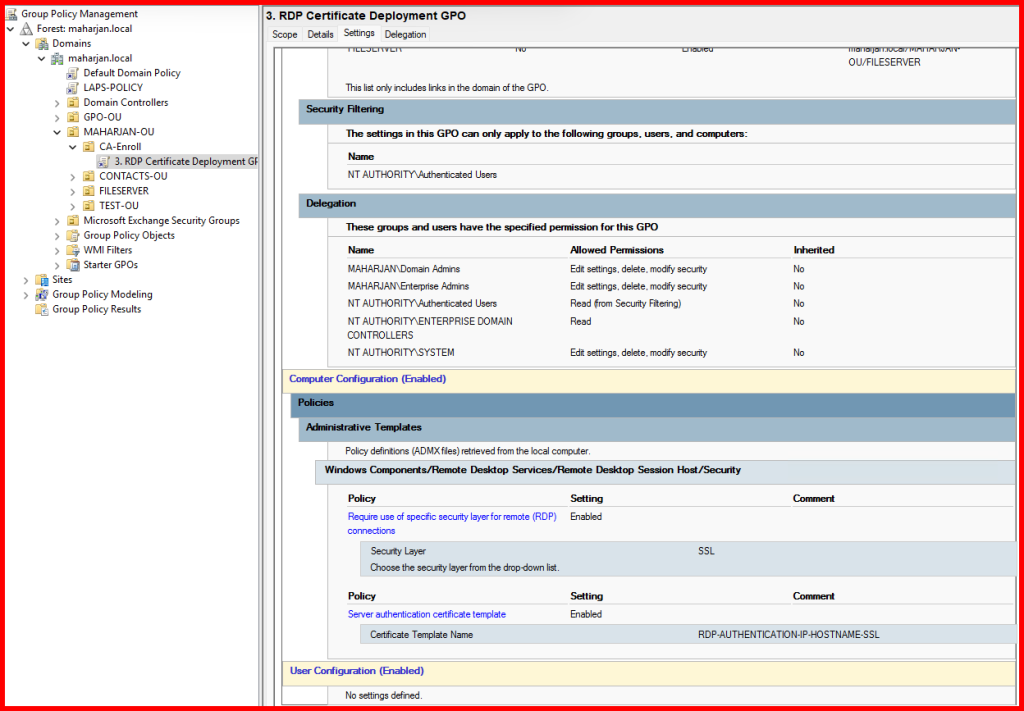
✅ Step 3: Apply GPO
1. Set RDP Security Layer to SSL (TLS)
This enforces secure RDP connections using SSL/TLS instead of the default (less secure) settings.
Computer Configuration → Administrative Templates → Windows Components → Remote Desktop Services → Remote Desktop Session Host → Security
Setting to Configure:
- “Require use of specific security layer for remote (RDP) connections” →
Enabled- Security Layer:
SSL
- Security Layer:
2. Specify the Certificate Template Name for Server Authentication
This setting ensures the server uses the correct certificate template when auto-enrolling for a Remote Desktop certificate.
Computer Configuration → Administrative Templates → Windows Components → Remote Desktop Services → Remote Desktop Session Host → Certificates
Setting to Configure:
- “Select the certificate to be used for Remote Desktop Gateway server authentication” →
Enabled- Template Name: Enter the exact name of the issued certificate template
- (e.g.,
RDP-AUTHENTICATION-IP-HOSTNAME-SSL
📝 Ensure the template is published on your Internal CA and that the target servers have permission to enroll.
3. Apply the GPO
- Link the GPO to the appropriate OU containing your RDP-enabled servers.
Run the following command on a target server to apply the policy immediately:
gpupdate /force
Note: Computer policy changes require a system reboot to be fully applied.
✅ Step 4: Test RDP Connection
Now try RDP using the IP address. You should not see the certificate warning if:
- The certificate is trusted.
- It includes the correct SAN entries.
- It’s correctly bound to the RDP service.
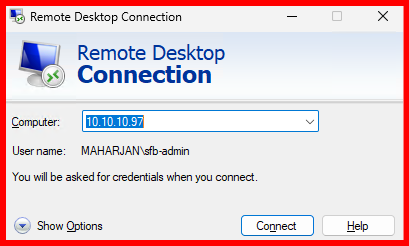
After applying the certificate and policy settings, the RDP session now connects seamlessly without displaying any certificate warning.
✅ Step 5: Key Task Performed
🔹 Option 1: Use Hostname or FQDN for RDP
If a domain computer or server connects using its hostname or Fully Qualified Domain Name (FQDN), the RDP certificate warning does not appear, and the session connects smoothly.
This is the recommended best practice for secure connections.
However, in real-world environments, it’s often more convenient to connect via IP address—especially for quick access or in cases where DNS resolution is not available.
🔹 Option 2: Resolve Certificate Warning for IP-based RDP
To eliminate the certificate warning that appears when connecting via IP address—which can be both inconvenient and a potential security concern—I implemented the following solution:
I issued a certificate from the Internal Certificate Authority (CA) using a custom RDP template.
🛠️ Steps Performed
Step 1: Created a dedicated RDP certificate template in the Internal CA.
Step 2: From the target server (the one accessed via RDP), requested the certificate, including both its IP address and hostname in the Subject Alternative Name (SAN).
Step 3: Applied a Group Policy to automatically issue the RDP certificate template, followed by a system reboot to apply changes.
That’s it — after these steps, the RDP connection is now trusted and secure, even when using the IP address.
✅ Conclusion
By issuing a certificate from your internal CA that includes both the FQDN and the IP address in the Subject Alternative Name (SAN), you not only secure your RDP sessions but also eliminate those frustrating trust warnings. This approach strengthens your remote administration security and aligns perfectly with enterprise best practices. Implementing this solution today paves the way for a more seamless, trusted, and professional environment—empowering your team to work confidently and securely into the future.