When I first created a Virtual Machine (VM) in Azure, I used the default network settings. Azure automatically created a Virtual Network (VNet) with the following:
- Address space:
10.0.0.0/16 - Subnet:
10.0.0.0/24
This worked fine at first. But as I started planning for a more structured environment—maybe with multiple subnets or peered VNets—I realized I needed to move everything to a custom network space. I decided to use 10.10.10.0/24.
🧩 My Goal
- Move my existing VM to a new subnet (
10.10.10.0/24) under the custom address space. - Keep the same VM and OS disk, but associate it with the new subnet.
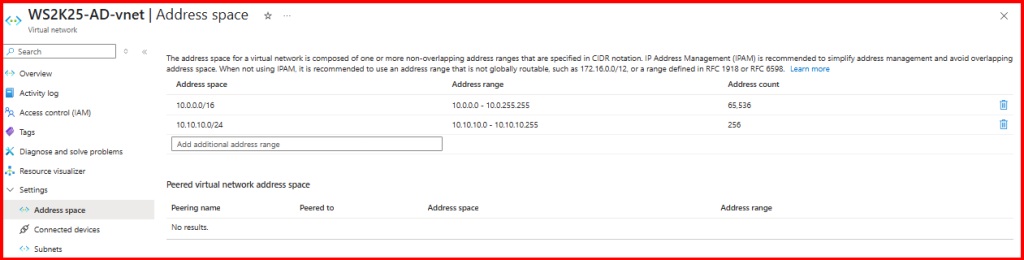
✅ Step 1: Added a New Address Space to the VNet
Azure doesn’t allow you to change the existing address space if it’s in use, but you can add another.
- In Azure Portal, I navigated to:
- Virtual Networks > [my VNet] (WS2K25-AD-vnet)> Address space
- Clicked + Add and entered:
10.10.10.0/24
- Clicked Save
Now my VNet had two address spaces:
10.0.0.0/16(original)10.10.10.0/24(new)
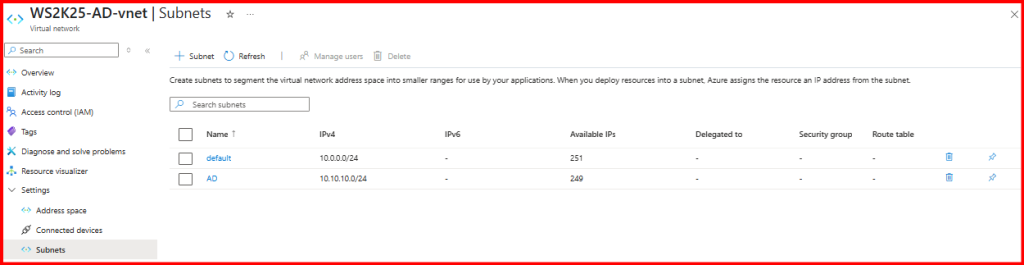
✅ Step 2: Created a New Subnet in 10.10.10.0/24
- Still inside the VNet, I went to Subnets.
- Clicked + Subnet
- Gave it a name (e.g.,
AD) and set:- Subnet address range:
10.10.10.0/24
- Subnet address range:
- Clicked Add
✅ Step 3: Changed the Subnet from the NIC Settings
Instead of recreating the VM or NIC, I followed a simpler approach by modifying the subnet directly from the NIC settings. Here’s how I did it:
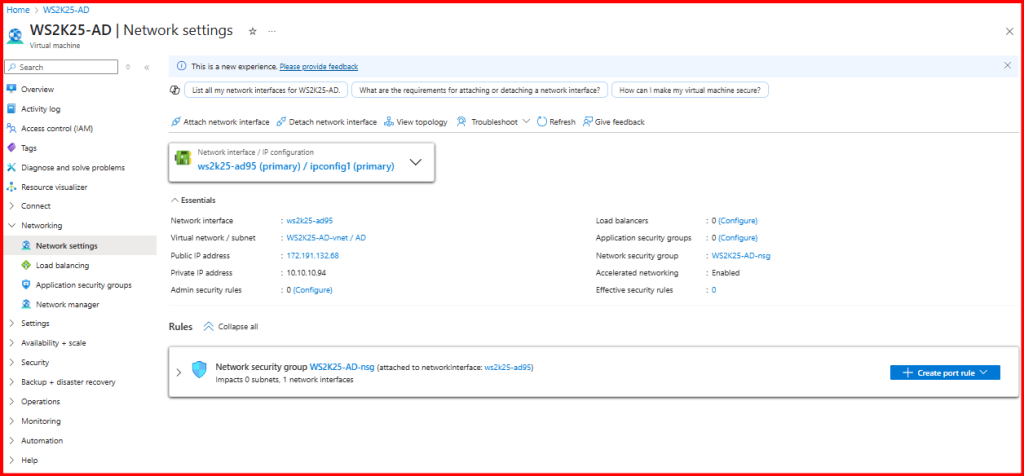
🔍 1. Checked Where the NIC Was Attached
First, I went to Azure Portal > Virtual Machines and opened the VM I wanted to reconfigure.
- Under the Networking tab, I noted the Network Interface (NIC) name.
- I clicked on the NIC name to open its properties.
🛠 2. Changed the Subnet in NIC Settings
Inside the NIC blade:
- I clicked on IP configurations under the Settings section.
- Selected the IP configuration name (usually
ipconfig1). - Under Subnet, I clicked Edit, then selected the new subnet:
"AD"(10.10.10.0/24)
- Clicked Save and after saved, I changed my private ip address to Static required IP address.
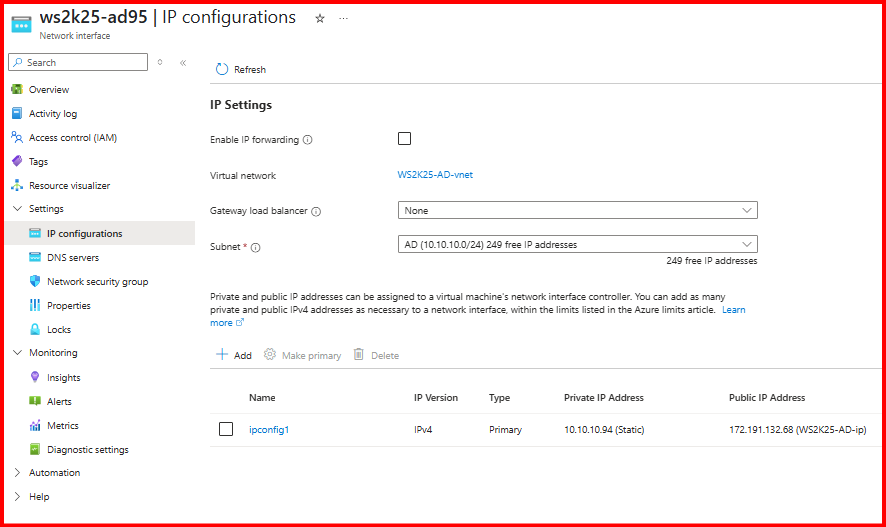
Azure applied the change without requiring me to delete the VM or NIC.
▶️ 3. Restarted the VM (if needed)
Although the change was applied, I restarted the VM just to make sure the network stack picked up the new configuration properly.
🧪 Verification
After the change, I verified:
- The new private IP was in the correct subnet.
- The VM retained connectivity.
- NSG rules applied to the new subnet or NIC were working.
✅ Why I Liked This Method
This was by far the easiest and cleanest method—no need to recreate anything. However, this only worked because:
- The NIC wasn’t locked by any dependent services (like a Load Balancer backend pool).
- The VNet had the new subnet (
10.10.10.0/24) already created.