Hey everyone! In this post, I’ll cover how to attach and resize both OS and data disks in Azure Virtual Machines. These are essential tasks if you’re managing virtual machines in the cloud — especially when you run into storage or performance issues.
🔷 What’s the Difference?
Before jumping in, here’s a quick reminder:
- OS Disk: Holds the operating system (required for every VM)
- Data Disk: Optional disk used to store application data, databases, logs, etc.
Now let’s look at both tasks: attaching and resizing these disks.
📎 Attaching a Data Disk to an Azure VM
You can’t attach a second OS disk, but you can attach multiple data disks.
🔹 Step-by-Step via Azure Portal:
- Go to Azure Portal
- Navigate to your Virtual Machine
- Under Settings, click Disks
- Click + Add data disk
- Choose:
- Create a new disk or
- Attach an existing managed disk
- Configure the size, performance tier, and encryption
- Click Save

The disk is now attached to your VM!
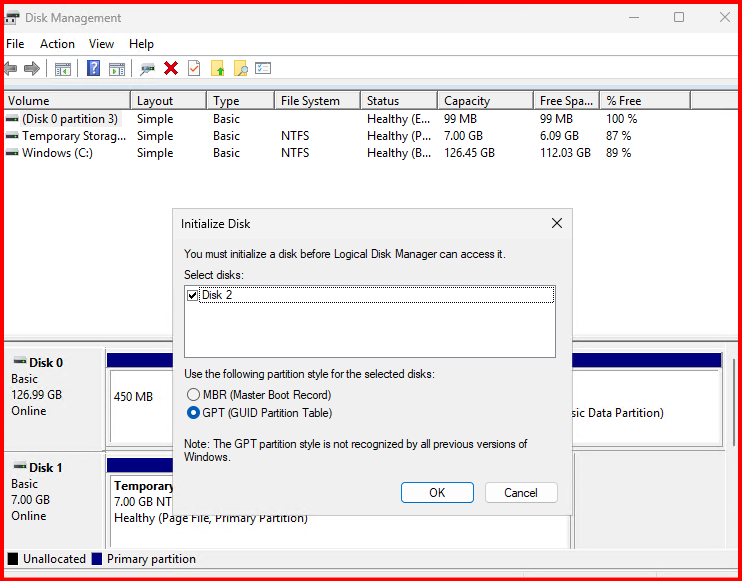
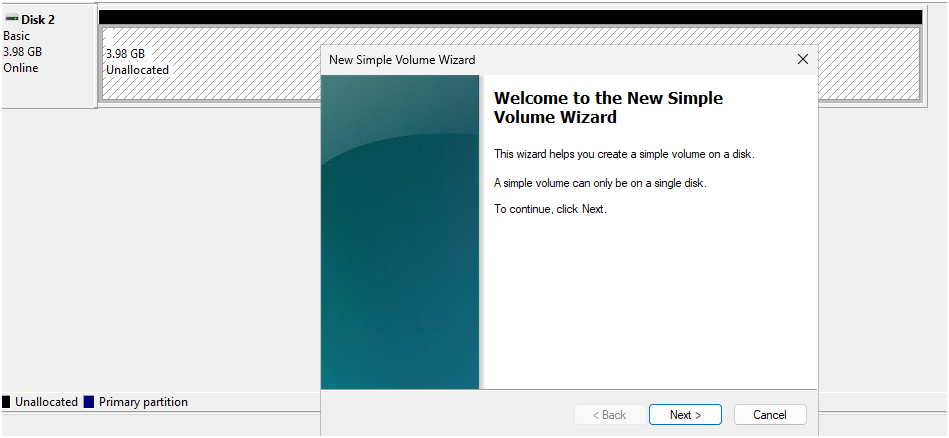
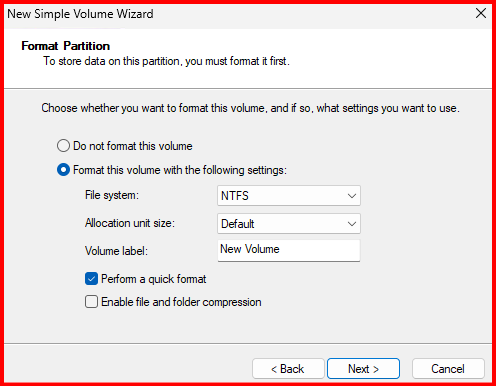
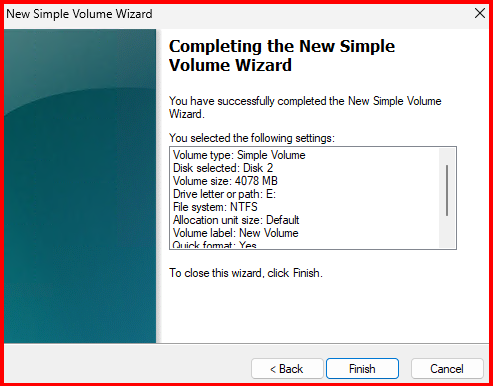
🖥️ Inside the VM: Format the Disk
For Windows:
- RDP into the VM
- Open Disk Management
- Initialize the new disk (GPT recommended)
- Create a New Simple Volume and assign a letter

How to Expand a OS & Data Disk in Azure VM?
I’ll show you how to expand a data disk attached to your Azure VM — and then resize the partition inside the OS so you can use the new space.
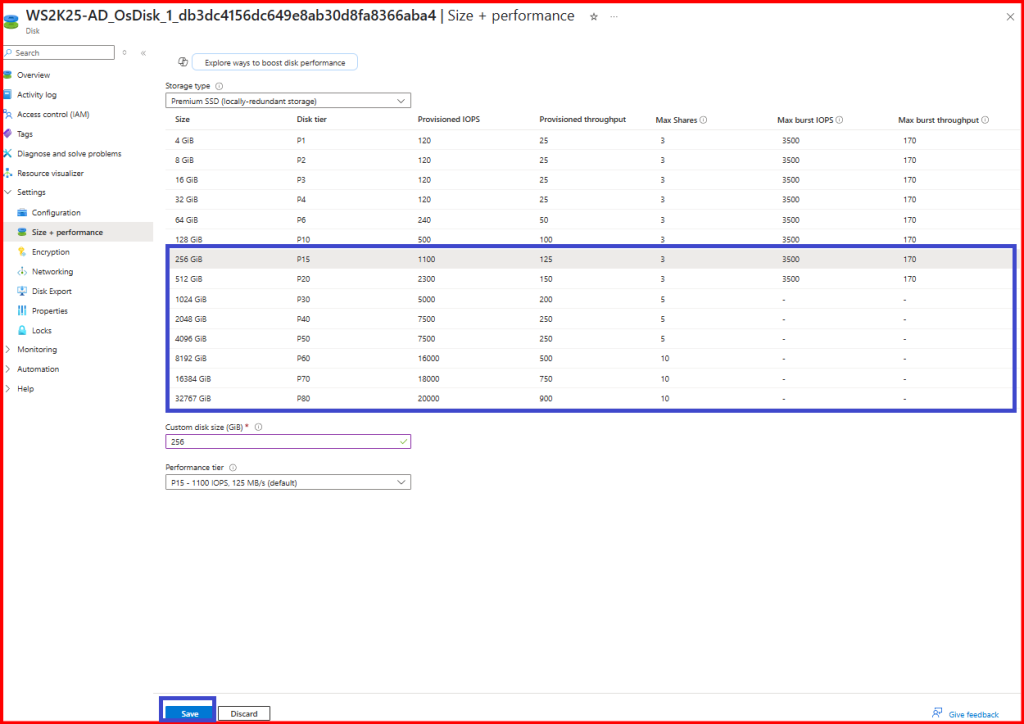
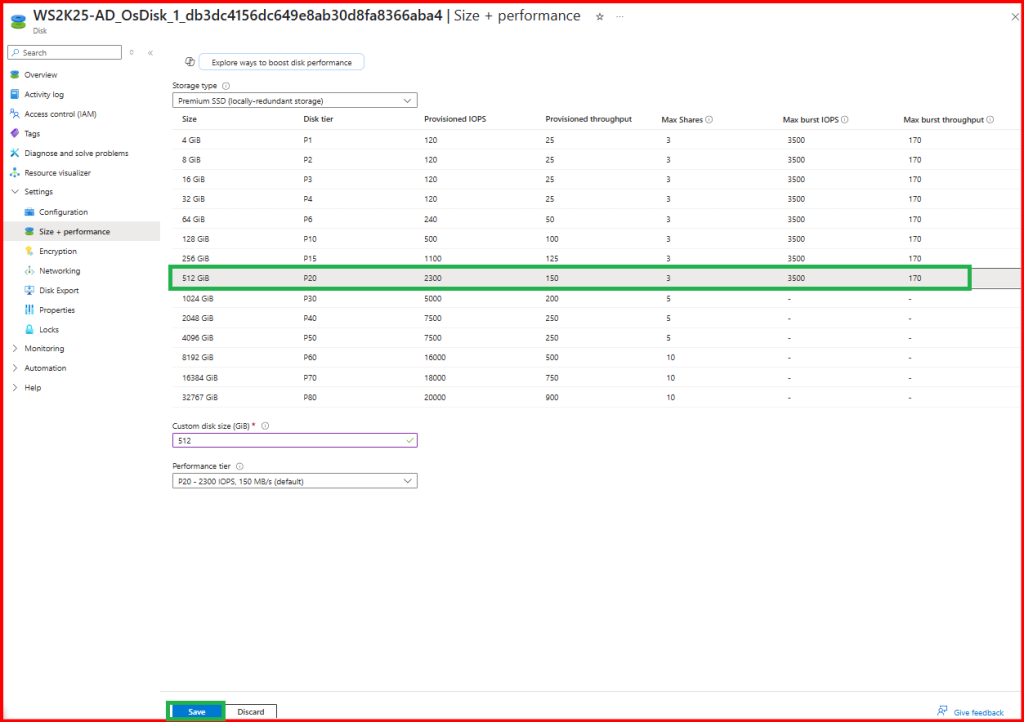
Step 1: Resize the Disk in Azure
🟦 Via Azure Portal
- Go to your Virtual Machine
- Under Settings, click Disks
- Select the data disk you want to expand
- Click on Size + performance
- Increase the disk size (e.g., from 128 GB → 256 GB)
- Click Save
✅ Disk is resized. Now the OS needs to recognize the extra space.
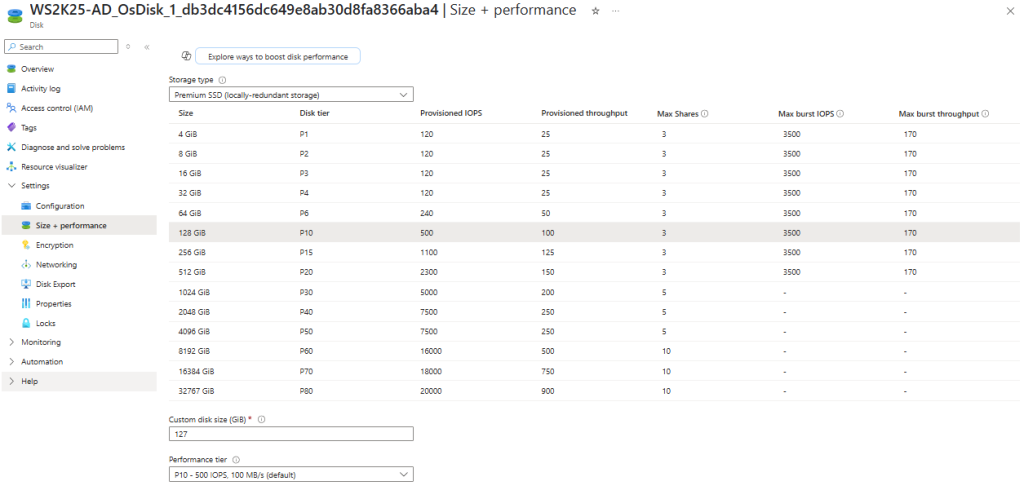
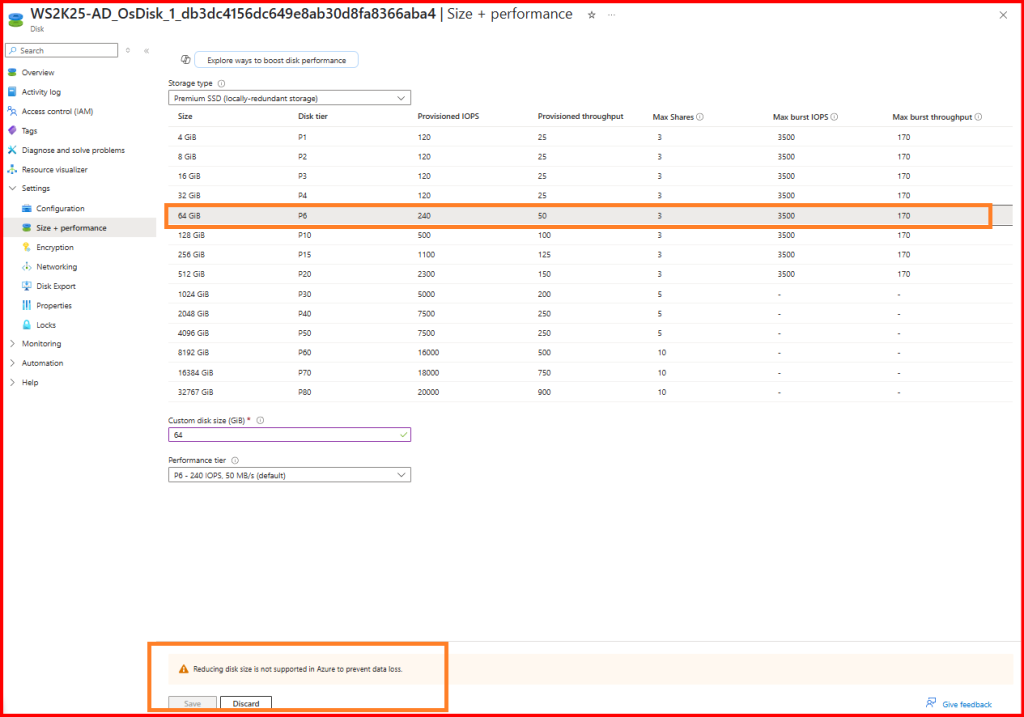
OS Disk cannot be reduced and is not supported.
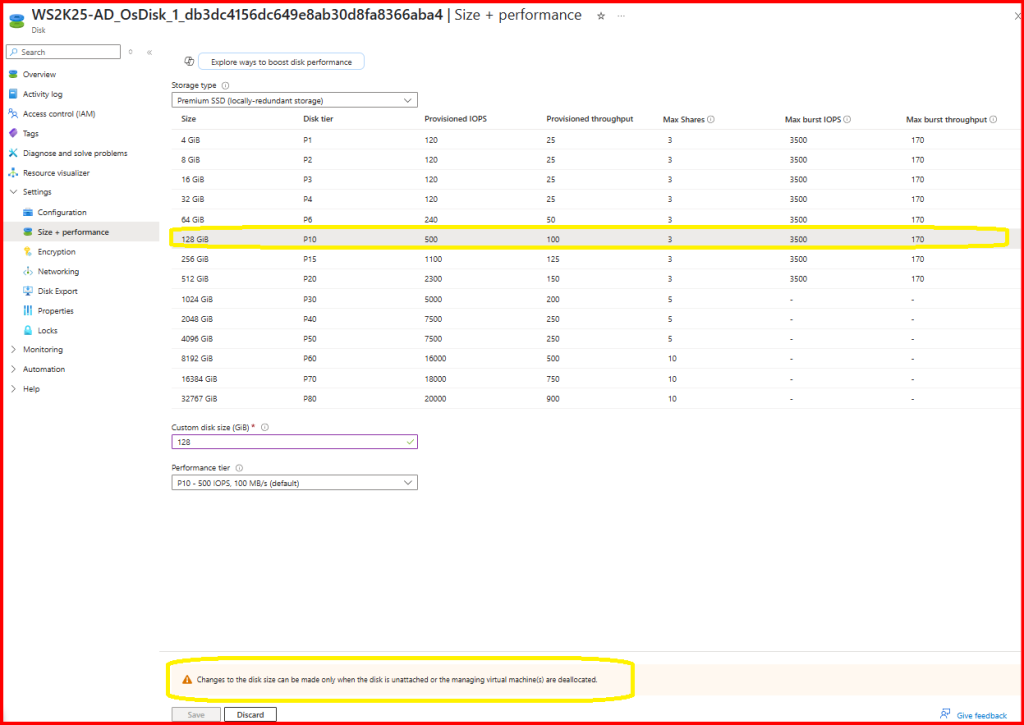
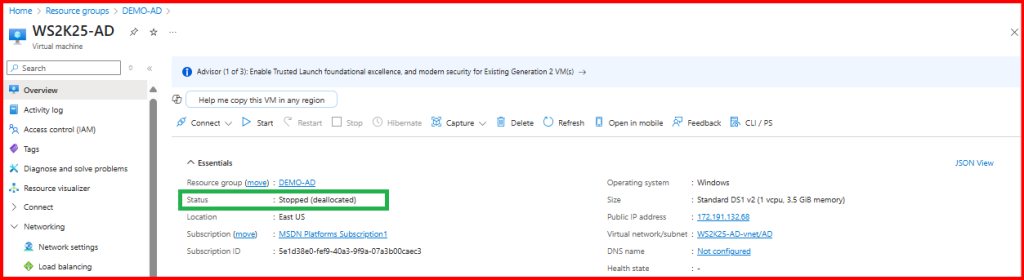
Changes to the disk size can be made only when the disk is unattached or the managing virtual machine(s) are deallocated.

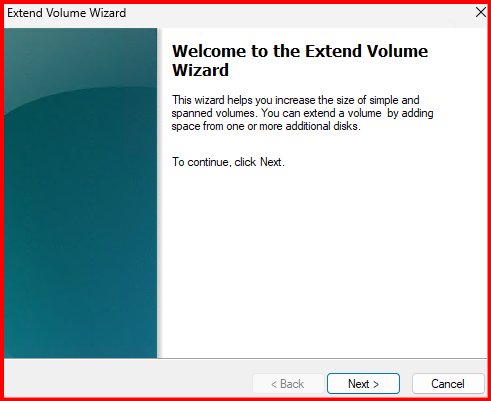
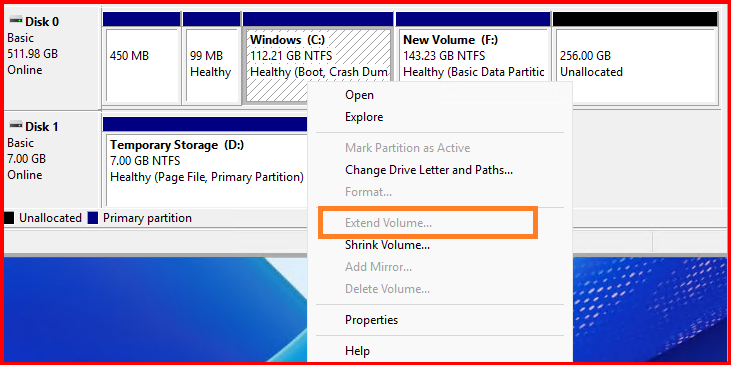
Step 2: Expand the Partition Inside the VM
🪟 For Windows VM
- RDP into the VM
- Open Disk Management (
diskmgmt.msc) - Locate the OS volume (e.g., C:\ )
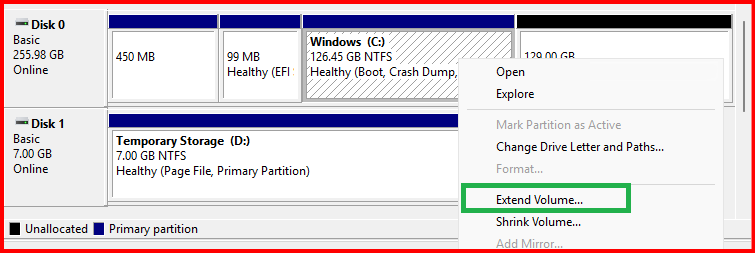
- Right-click the volume → Extend Volume
- Use the wizard to extend using available free space
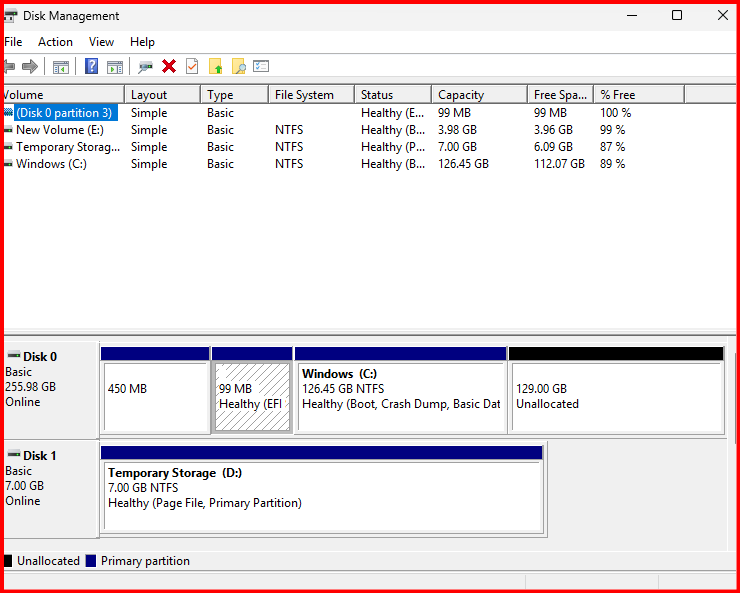
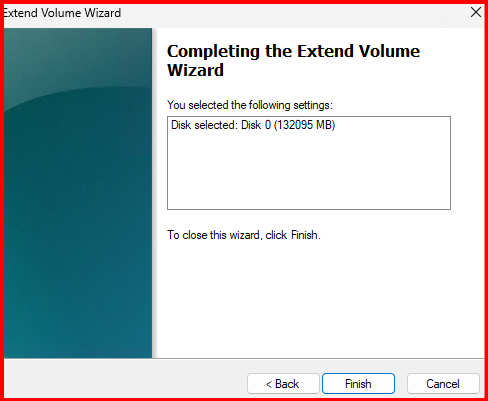
✅ Done! You’ll now see the full disk size available.
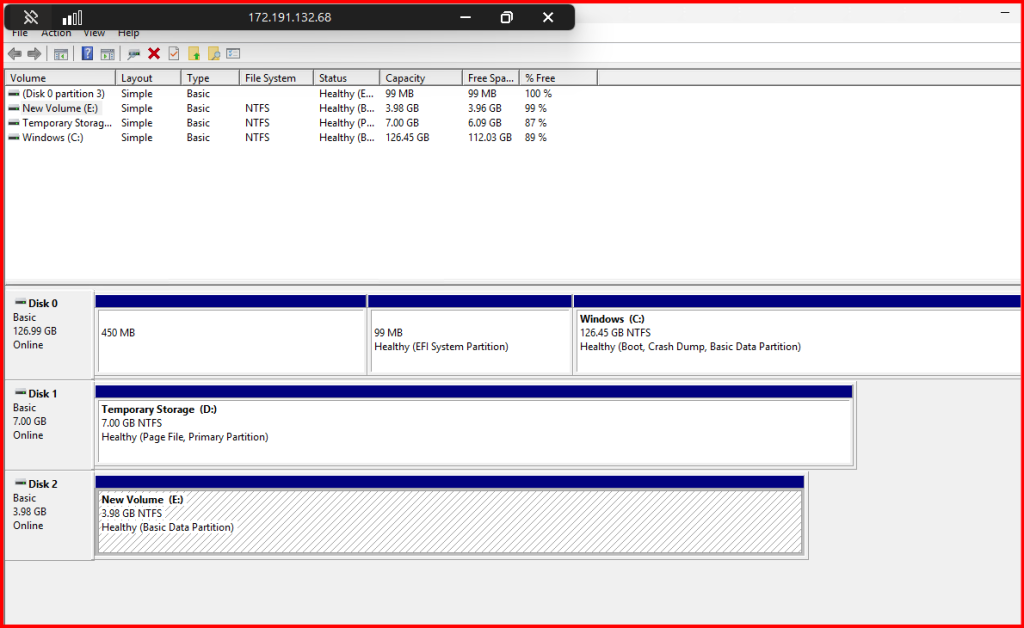
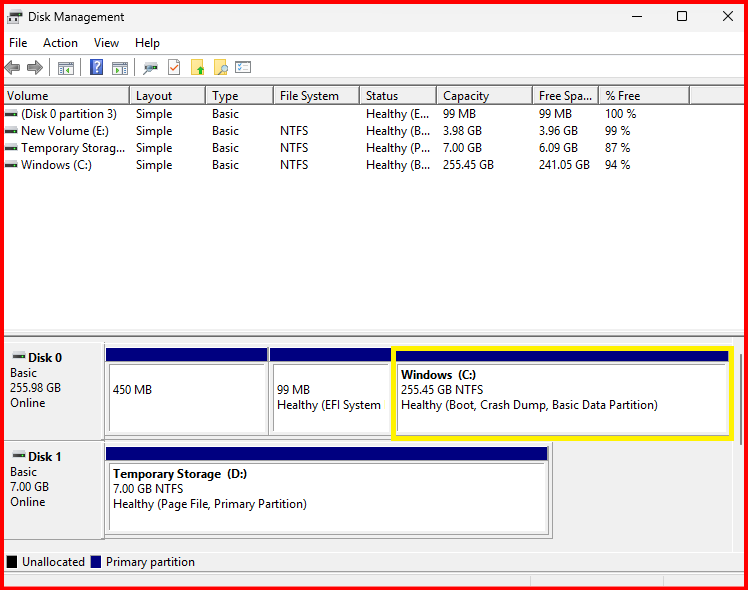
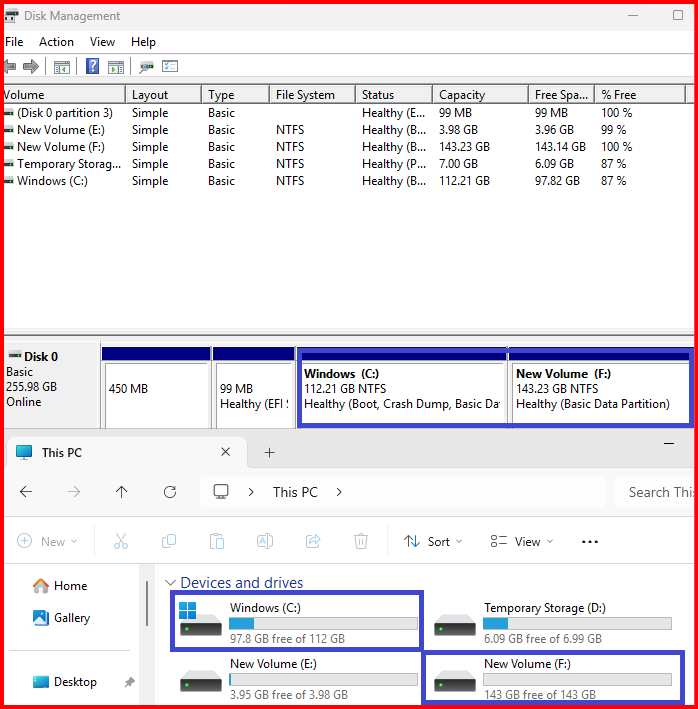
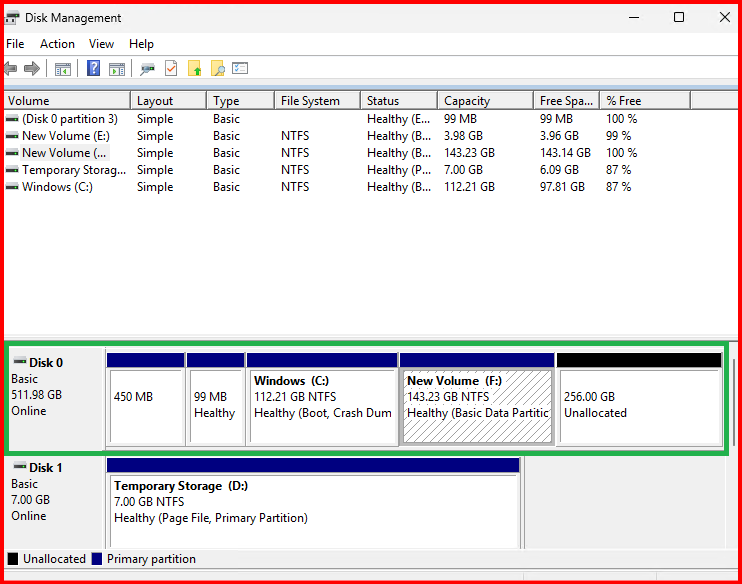
🧩 What Happens When You Partition the OS Disk?
By default, the OS disk comes as a single partition — typically the C: drive. If you use Disk Management to shrink C: and create another partition (e.g., D:), here’s what happens:
✅ What Works:
- The OS will boot normally
- You get an additional logical volume (e.g., F:) for storing files
- Backups and snapshots will include both partitions (because it’s the same disk)
- Performance behaves the same as before (still a single physical disk)
What If I need to resize the OS Disk Again?
In Azure Portal, Resize the OS disk as previous step:

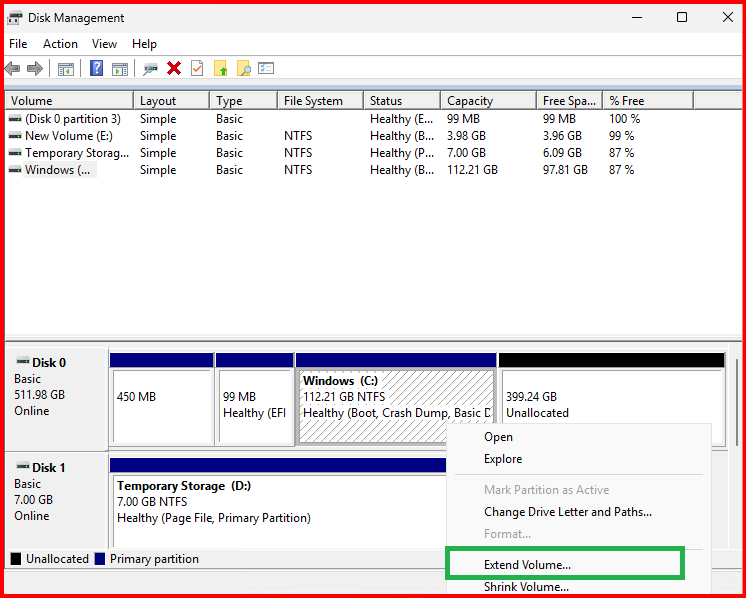
Inside VM, Expand the OS Disk and also check the Impact of partition disk:
In this case, I can extend disk in F: Drive but cannot extend in C: drive. My requirement is to extend disk space in C: drive.
🔍 Common Reasons You Can’t Extend C: Drive
🔸 Unallocated space is not adjacent to C: drive
- The Extend Volume option only works if the free/unallocated space is directly next to C: drive.
- If there’s a recovery partition or other partition between C: and the unallocated space, Windows won’t let you extend it.
✅ Best Practice Recommendation:
➤ Use Option 2 if you’re running a production VM or want to avoid 3rd-party tools in cloud environments.
Move the middle partition (e.g., Recovery or data) to a temporary disk, then delete it from the OS disk to free up contiguous space.
Step1: Move the data into another temporary attached disk and delete volume.
Step2: After volume deleted, all free spaces converted into Unallocated. Now, can extend the drive and retain data from temporary attached disk.
✅ Final Thoughts:
Managing storage in Azure VMs is all about keeping things clean and scalable. Use data disks for apps, logs, and databases—they’re flexible, can be resized without downtime, and are safer to manage independently from the OS. Keep the OS disk (usually C:) dedicated to the system only. Avoid partitioning it unless necessary, since all partitions on the OS disk share the same risk and are backed up together.
f you need to extend the C: drive but a recovery or other partition is in the way, the safest option is to move or delete the middle partition after taking a backup. Tools like GParted can help, but they’re riskier—especially in production. Always take a snapshot first.
For best performance and security, use Premium SSDs and enable encryption. Set up Azure Backup or snapshots regularly. In short: keep the OS disk lean, use data disks for everything else, and resize with care.