ADFS Installation & Configuration (2016)
Prerequisites, CA Template, DNS, and Full ADFS Server Setup
1. Objective & Lab Context
In this hands-on lab we will install and configure a new ADFS 2016 federation server and join it to an existing domain. The environment already contains:
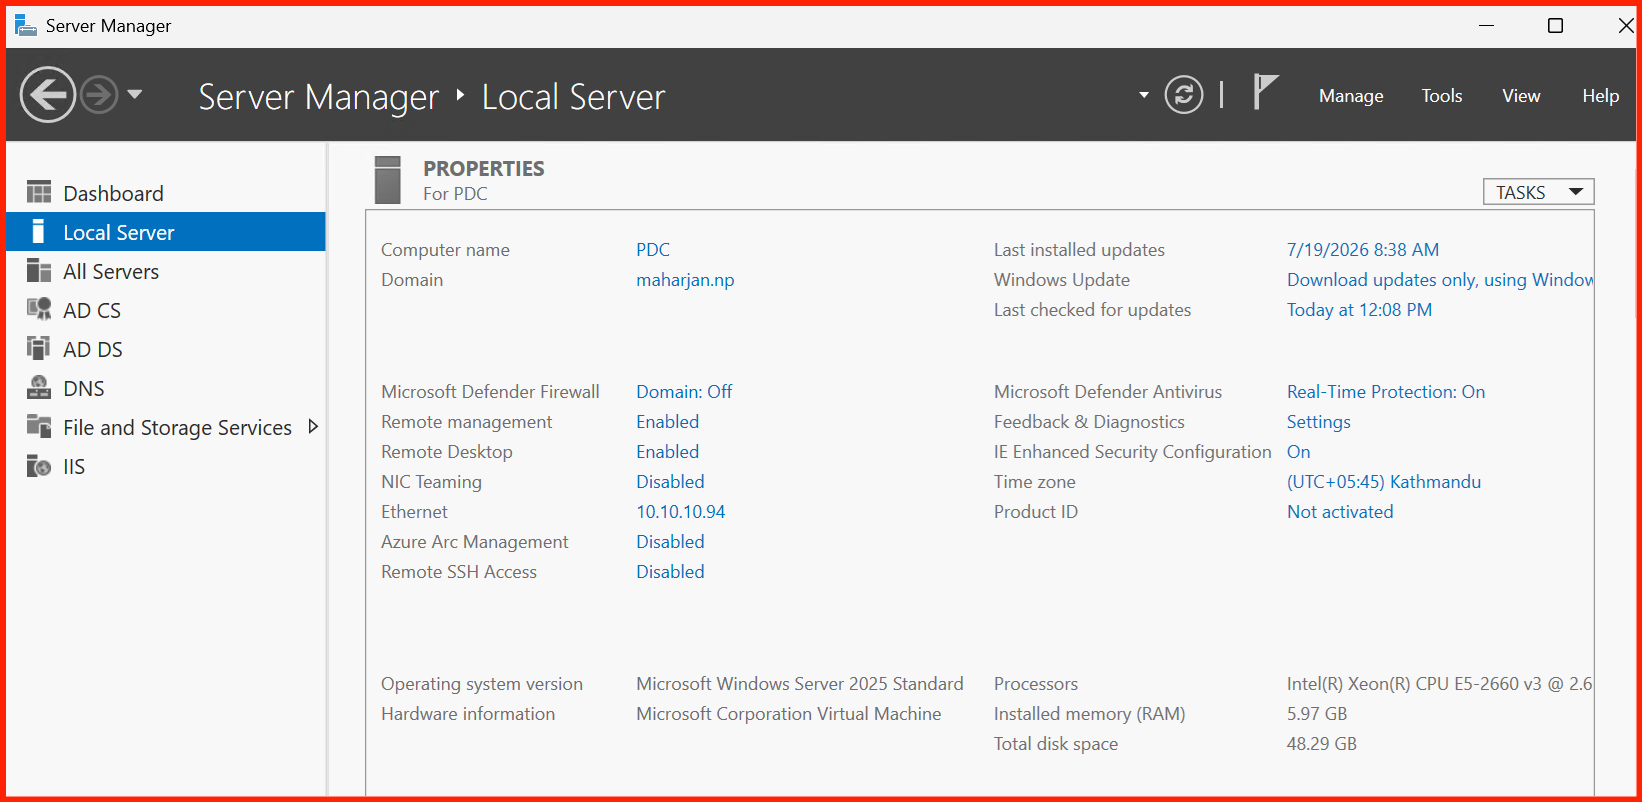
- Domain Controller + Enterprise CA – Windows Server 2025 (pdc.maharjan.np)
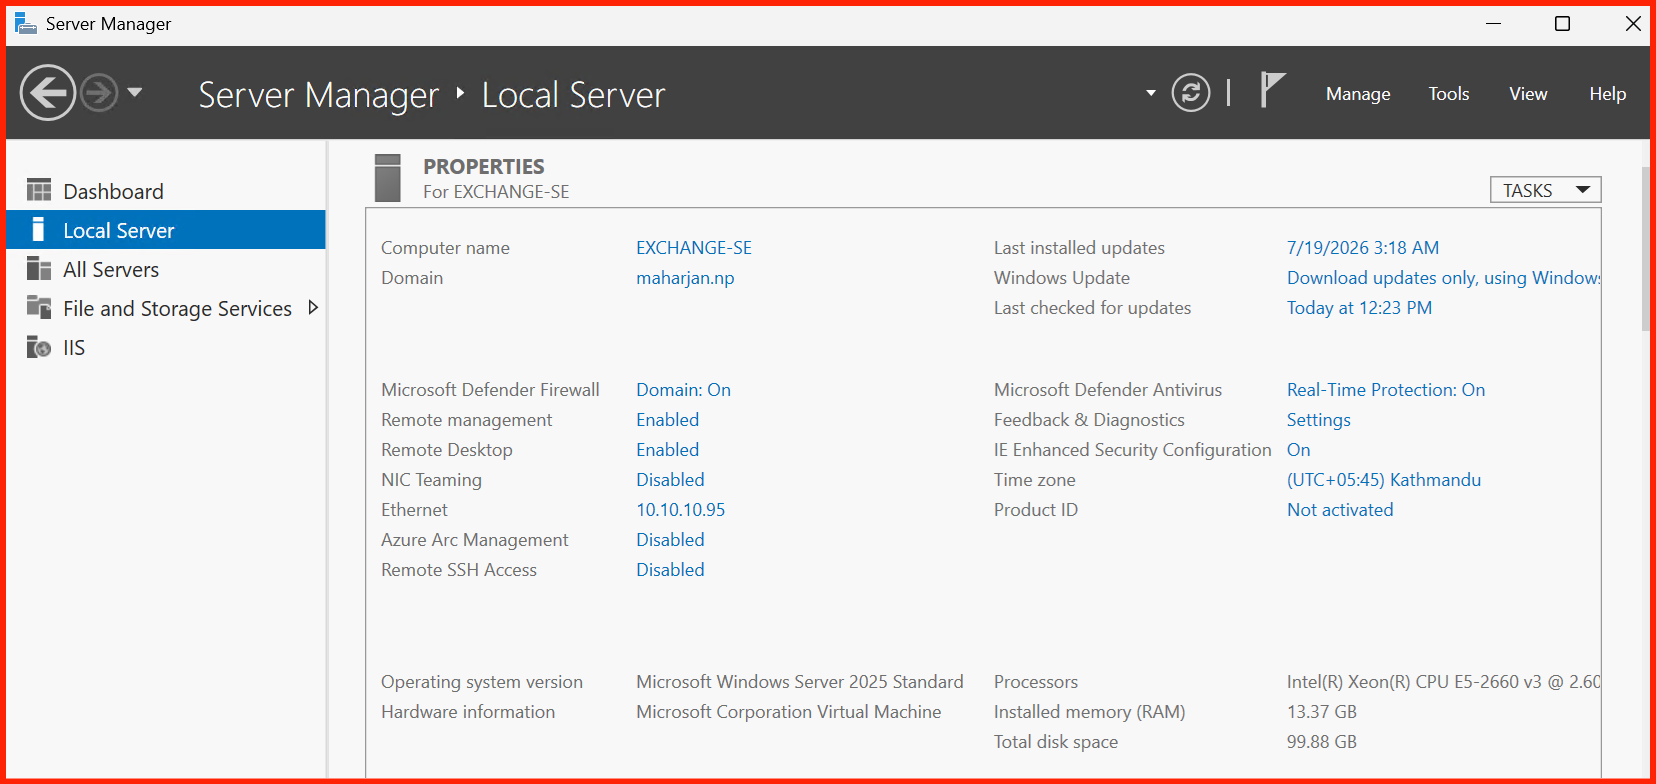
- Exchange Server SE – Windows Server 2025 (mail.mhr.com.np) – will be used later as a relying party
We’ll prepare the prerequisites, issue the required SSL certificate, and then deploy the ADFS role. By the end, you’ll have a fully functional ADFS endpoint ready for federation with Exchange and other applications.
2. Assumptions – Existing Infrastructure
We assume the following servers are already deployed and configured:
| Server | Role | Hostname / FQDN | IP |
|---|---|---|---|
| PDC | Domain Controller + Enterprise CA | pdc.maharjan.np | 10.10.10.94 |
| EXCH | Exchange Server SE | mail.mhr.com.np | 10.10.10.95 |
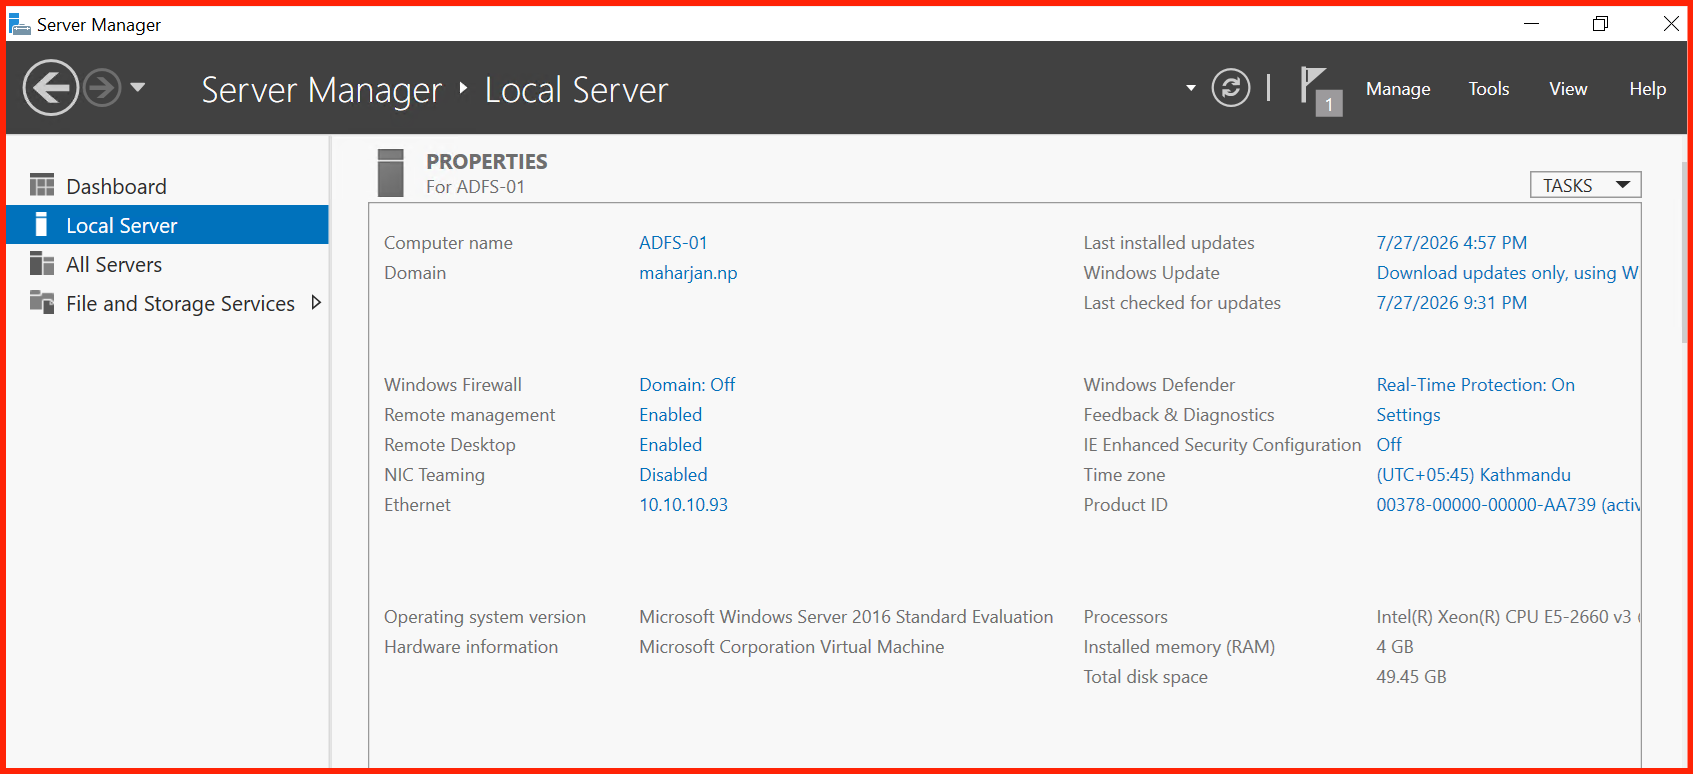
Below are overview screenshots of the three main server management consoles (Domain Controller, Certificate Authority, and Exchange Server) to confirm the environment is ready.
3. Full Prerequisites & Administrative Privileges
Before installing ADFS, ensure the following are in place.
3.1 Administrative Rights
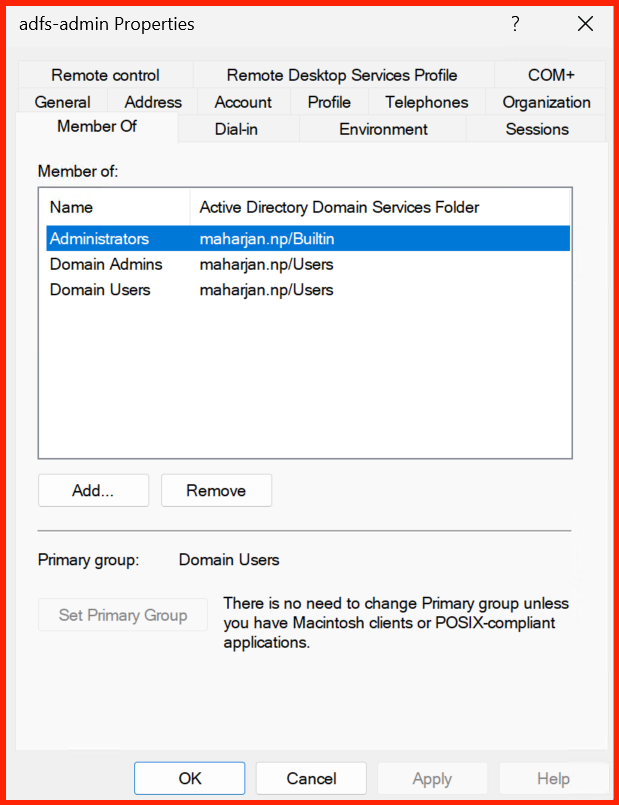
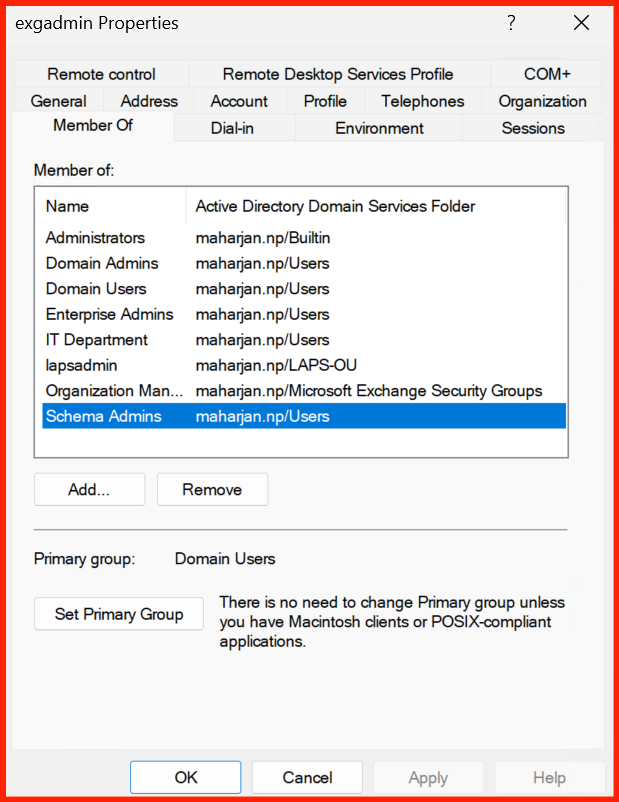
- You must be a member of Domain Admins or Enterprise Admins to deploy the ADFS role and create the farm.
- For Exchange integration later, you’ll need Organization Management role group membership.
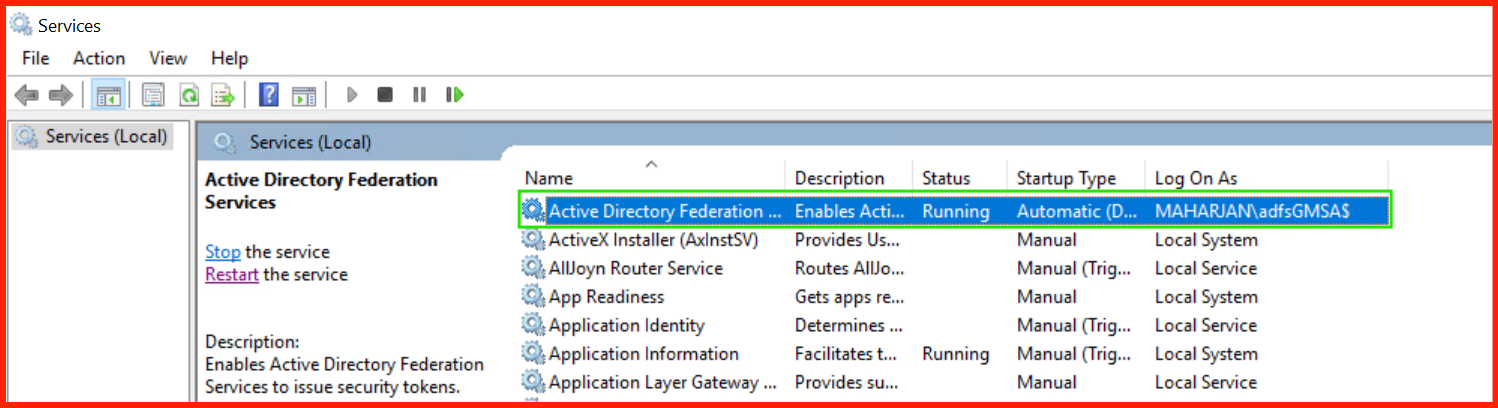
3.2 Group Managed Service Account (gMSA)
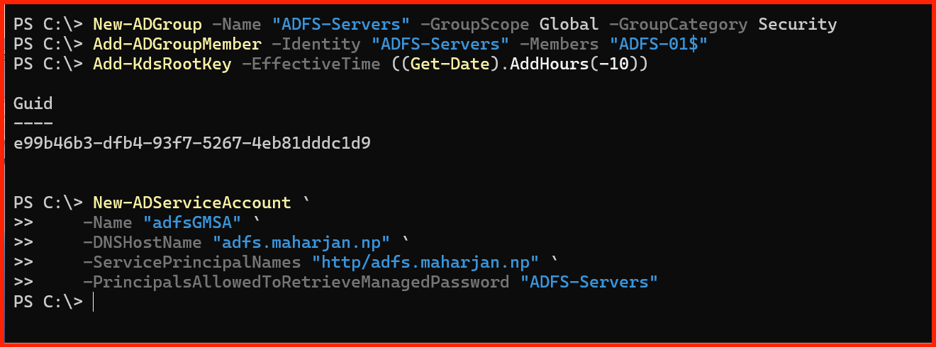
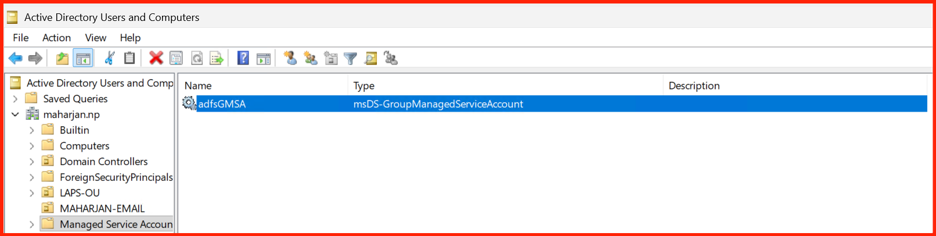
ADFS services should run under a gMSA for security and simplified password management. We created it on the DC:
3.3 Network & Firewall
- Port 443 (HTTPS) must be open between clients, ADFS, and Exchange.
- Port 80 (HTTP) is required for CRL distribution from the CA (pdc.maharjan.np).
- All servers must be on the same private network (or have proper routing).
3.4 Internal DNS Records
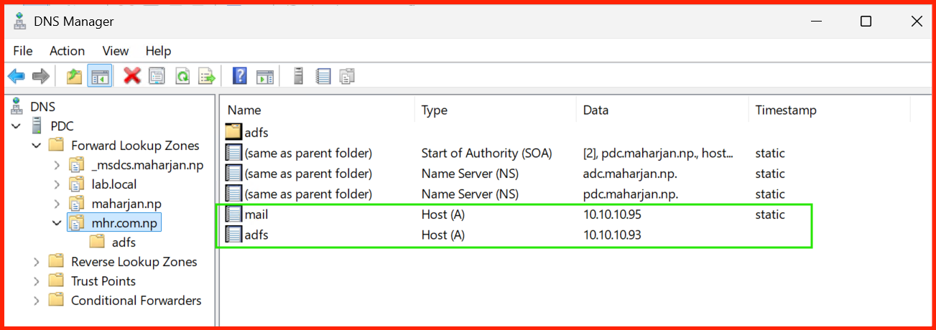
Create the following A-records on the internal DNS server (PDC):
adfs.mhr.com.np→ IP of ADFS server (10.10.10.93)certauth.adfs.mhr.com.np→ IP of ADFS server (for certificate enrollment)mail.mhr.com.np→ IP of Exchange server (already exists)
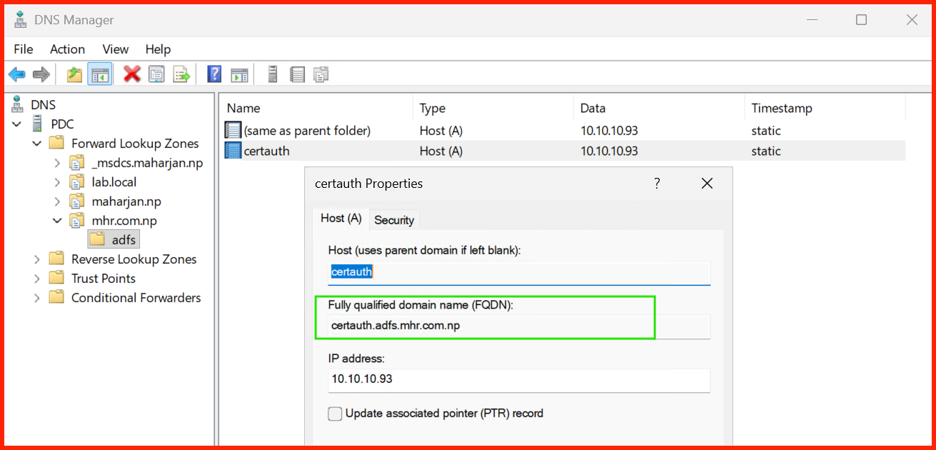
4. Step 3 – Create Web Server Certificate Template on CA
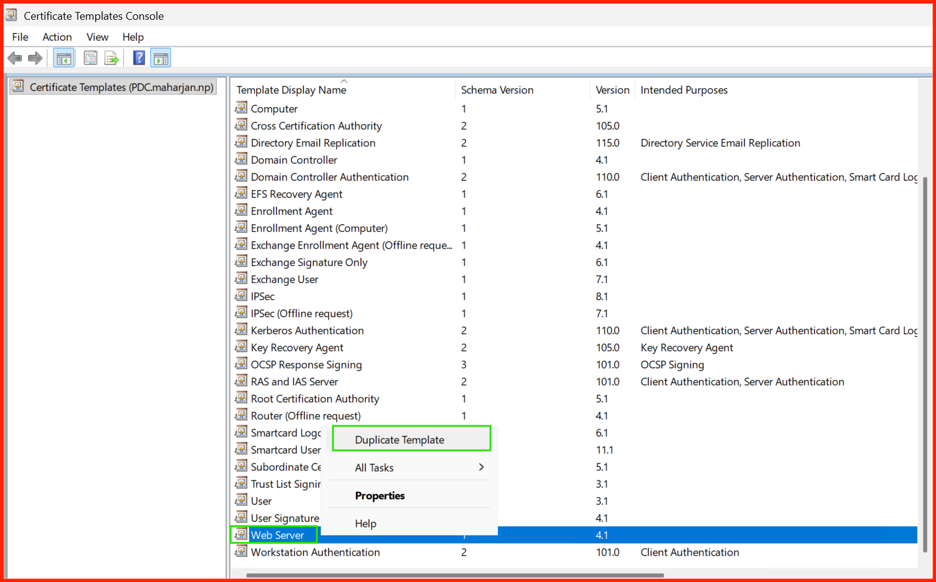
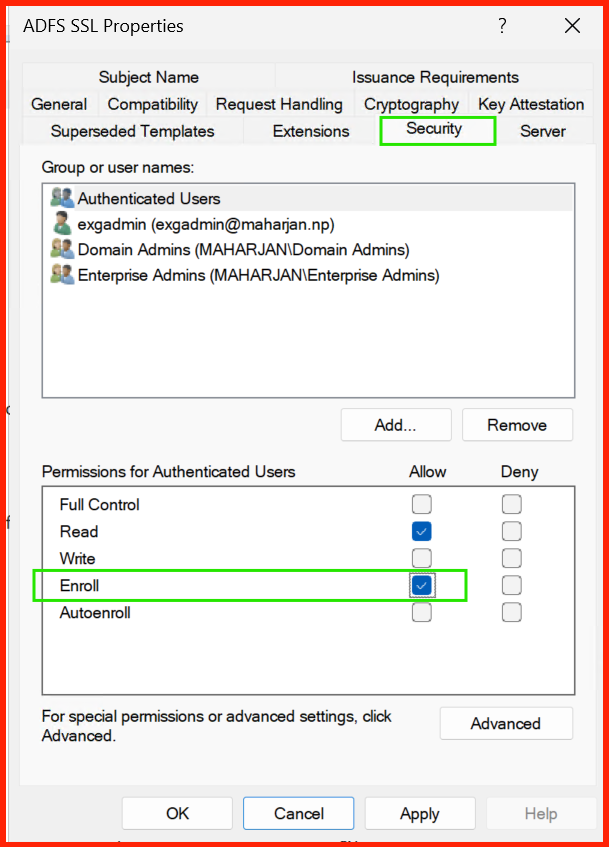
ADFS will need an SSL certificate with Subject Alternative Names. We’ll duplicate the built-in Web Server template to allow SANs and exportable private keys.
- Log in to the CA server (
pdc.maharjan.np) and open Certificate Templates console (certtmpl.msc). - Right‑click Web Server and select Duplicate Template.
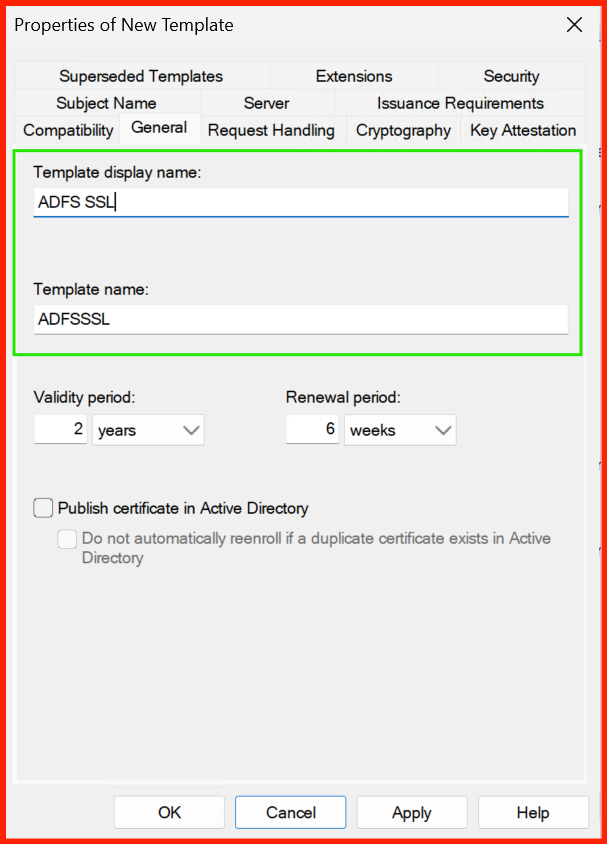
- On the General tab, give it a new name (e.g., ADFS Web Server) and set validity period as needed.
- On the Subject Name tab, ensure Supply in the request is selected so we can add SANs.
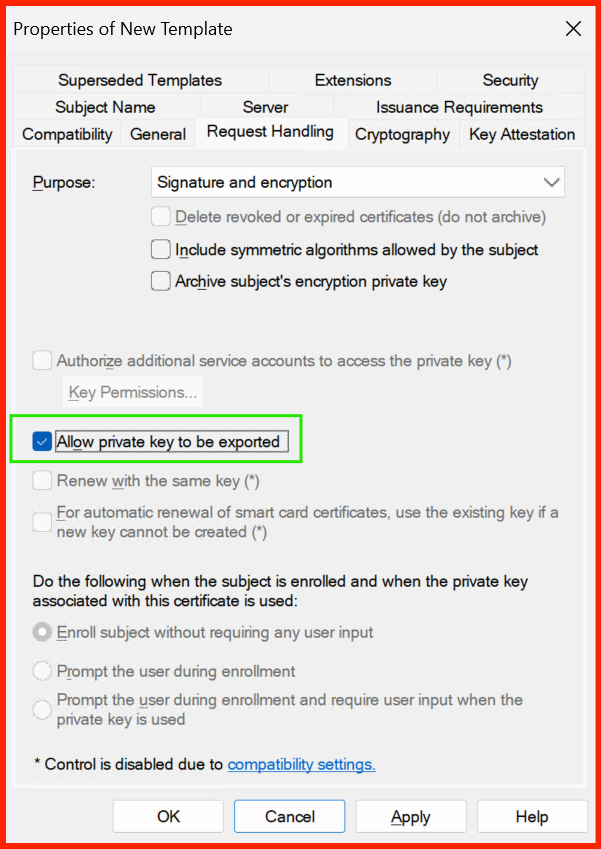
- On the Request Handling tab, check Allow export of private key.
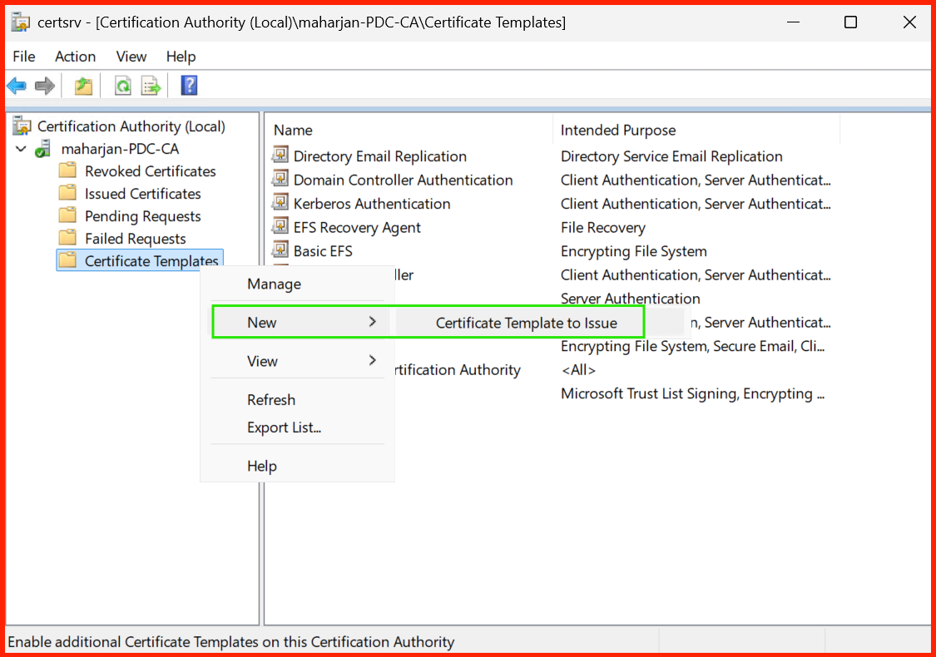
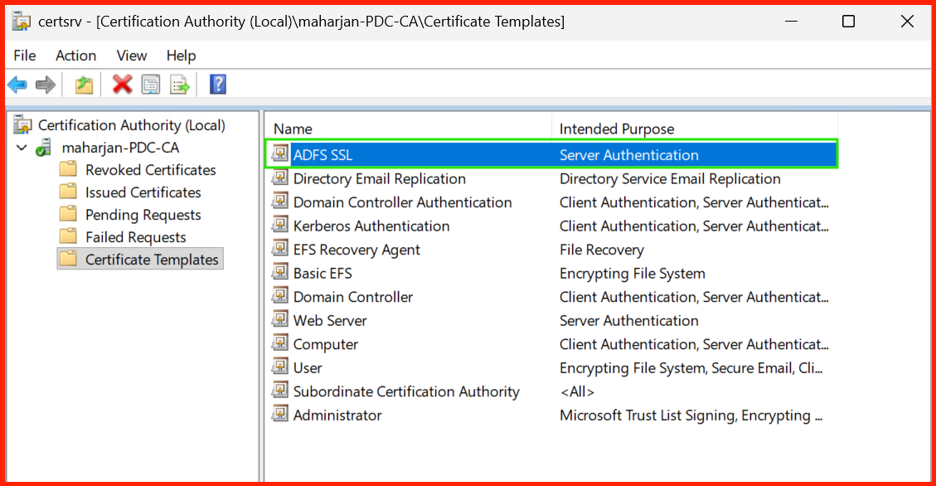
- Complete the wizard and Add the new template to the CA (right‑click Certificate Templates → New → Certificate Template to Issue).
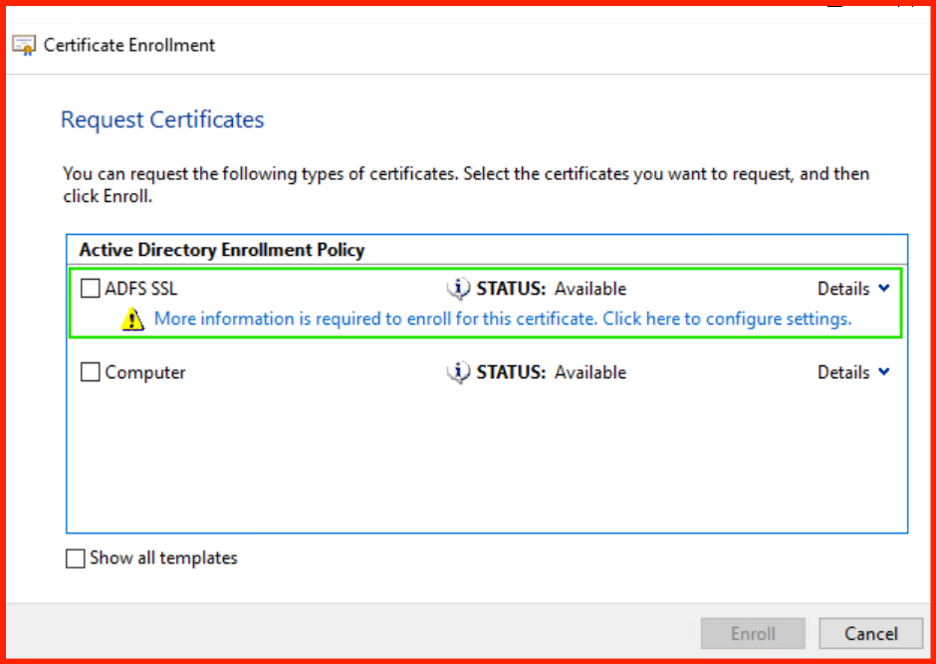
4.1 Request SSL Certificate for ADFS
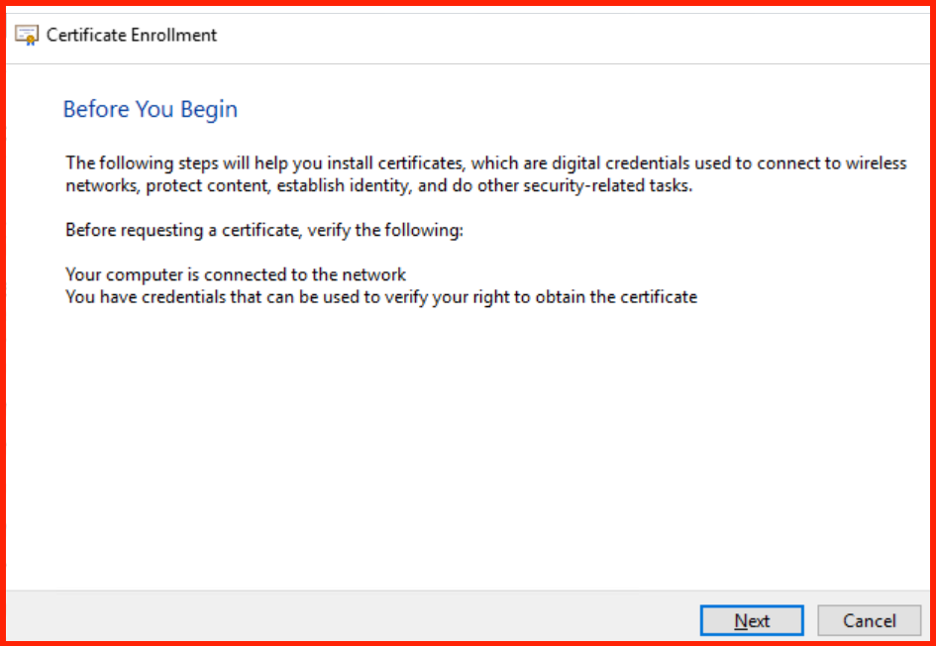
On the ADFS server (before installing the role), request a certificate using the new template:
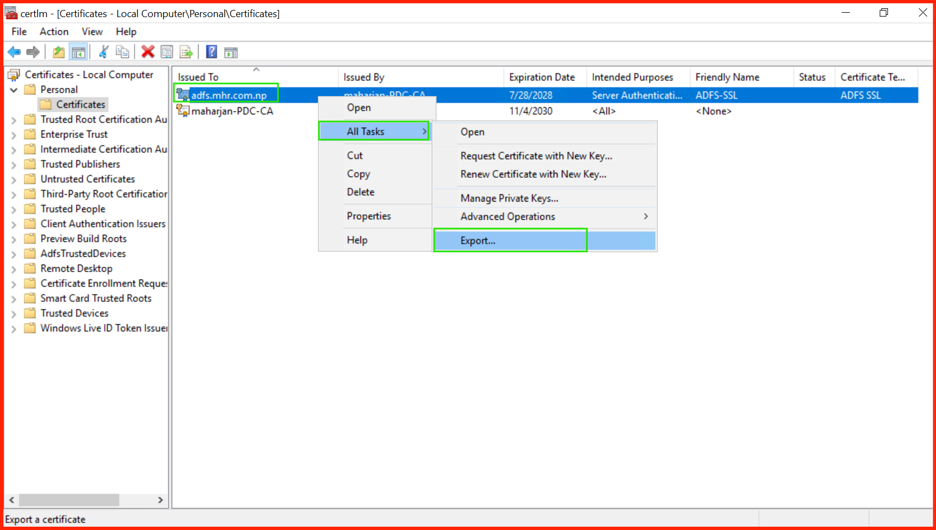
- Open
certlm.msc(Local Machine certificates). - Right‑click Personal → All Tasks → Request New Certificate.
- Select the enrollment policy that points to your CA.
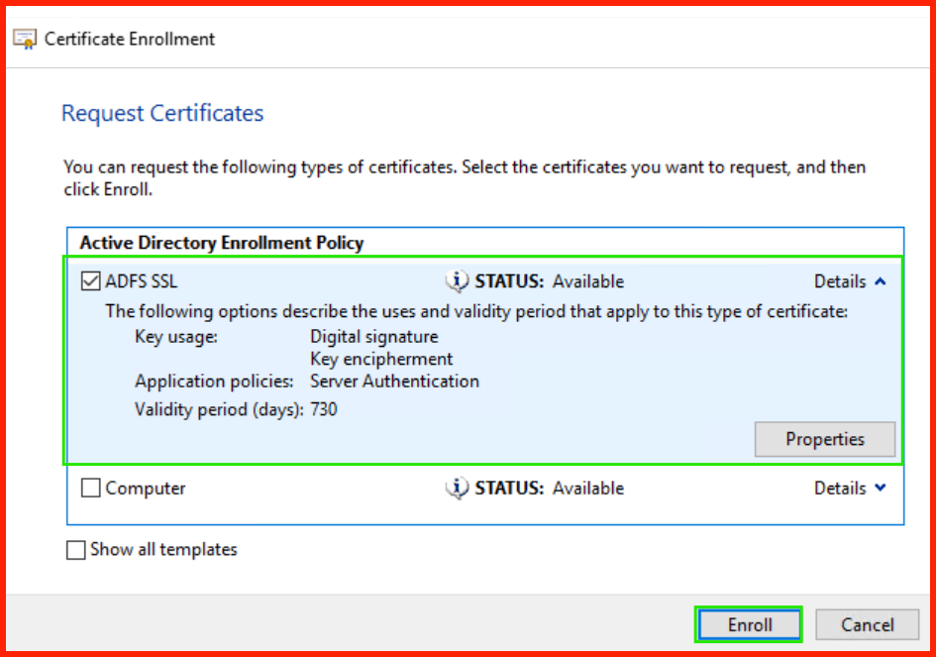
- Choose the ADFS Web Server template.
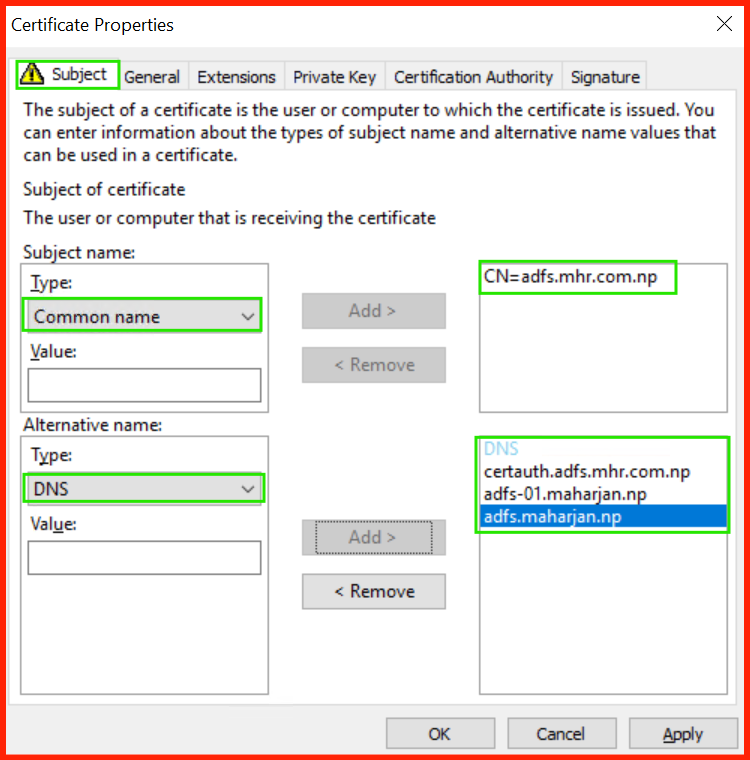
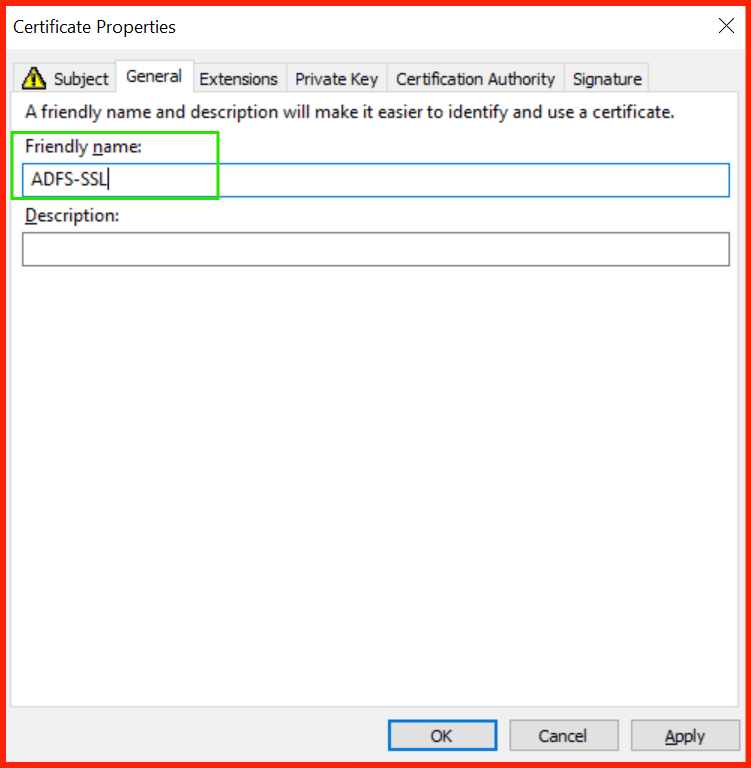
- Configure:
- Subject Name (CN):
adfs.mhr.com.np - Subject Alternative Names (DNS):
adfs-01.maharjan.np,certauth.adfs.mhr.com.np
- Subject Name (CN):
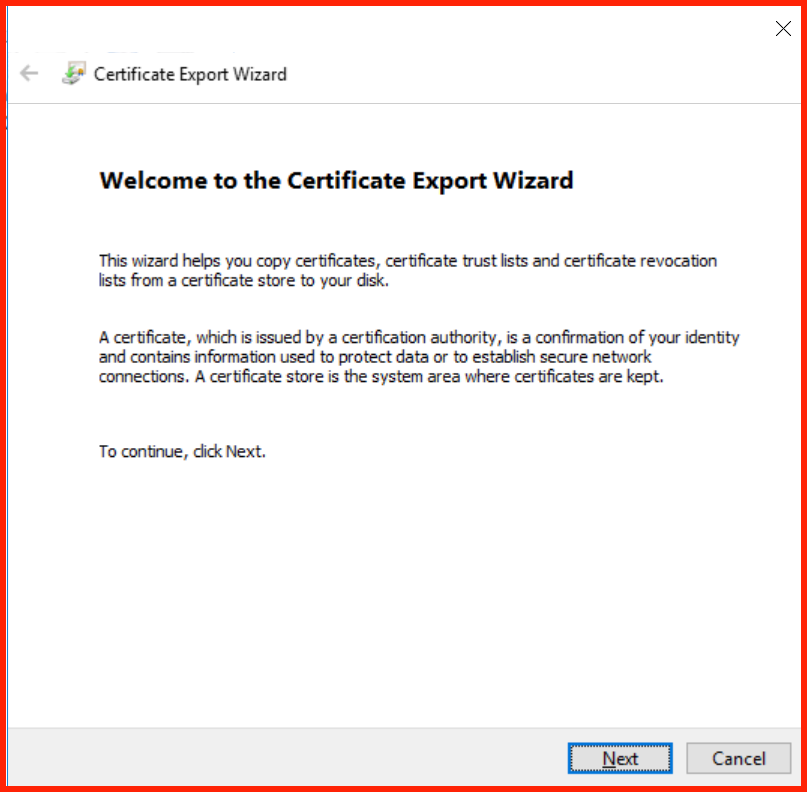
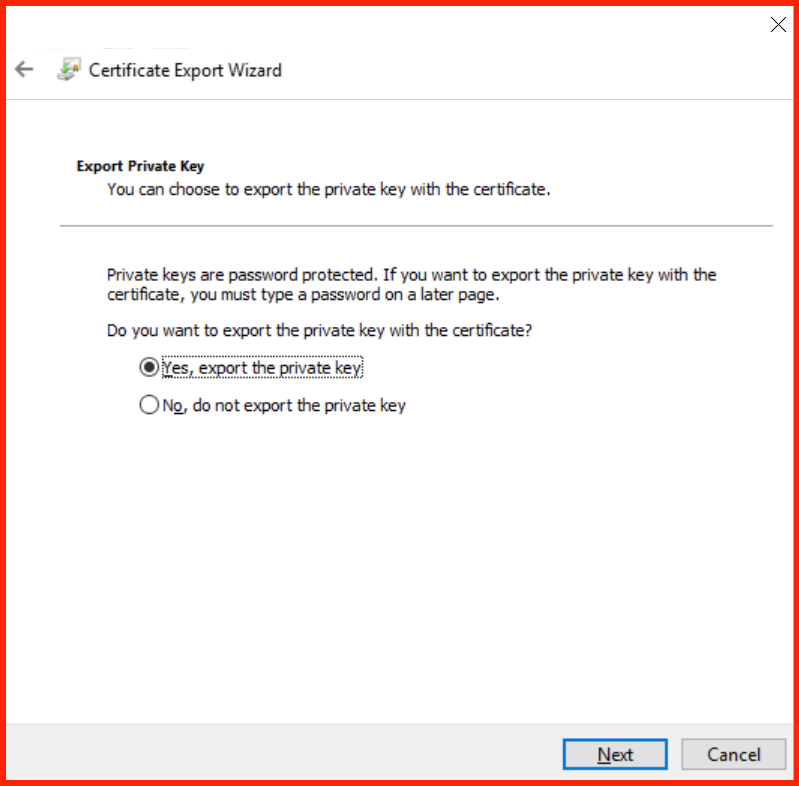
- Ensure Make private key exportable is checked.
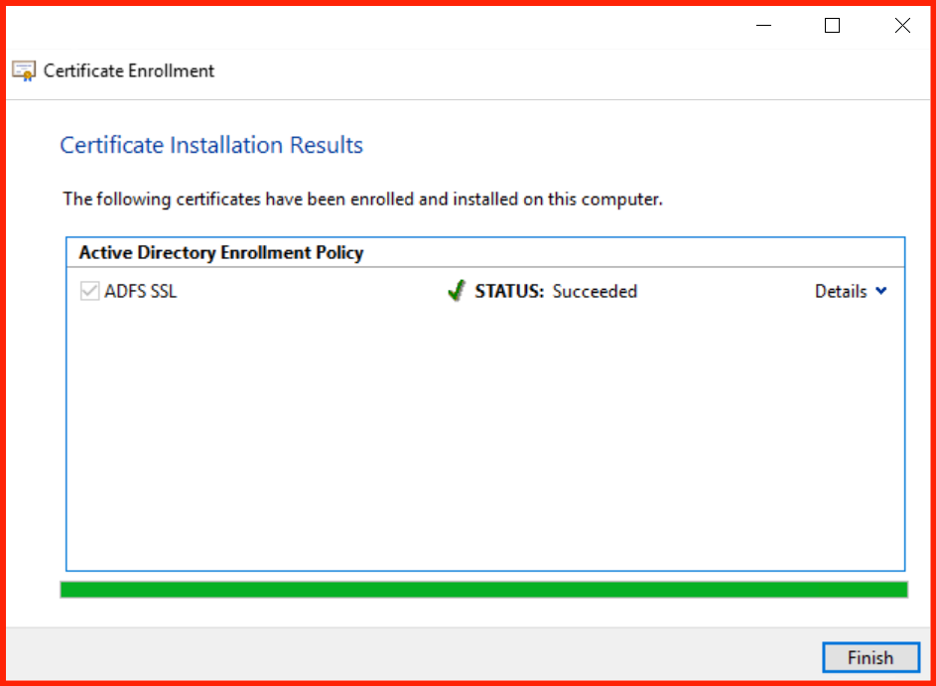
- Complete the enrollment.
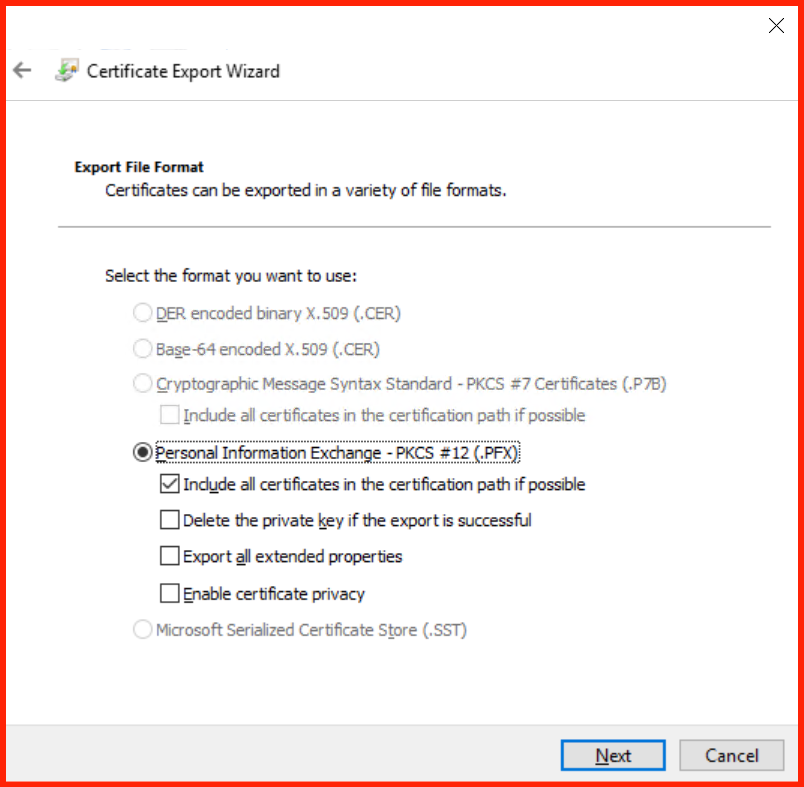
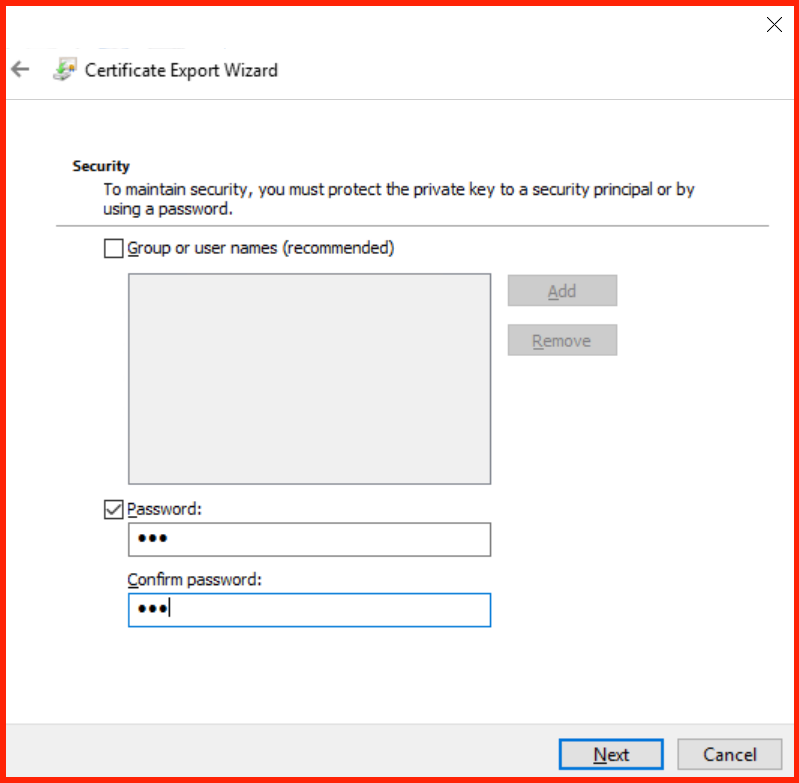
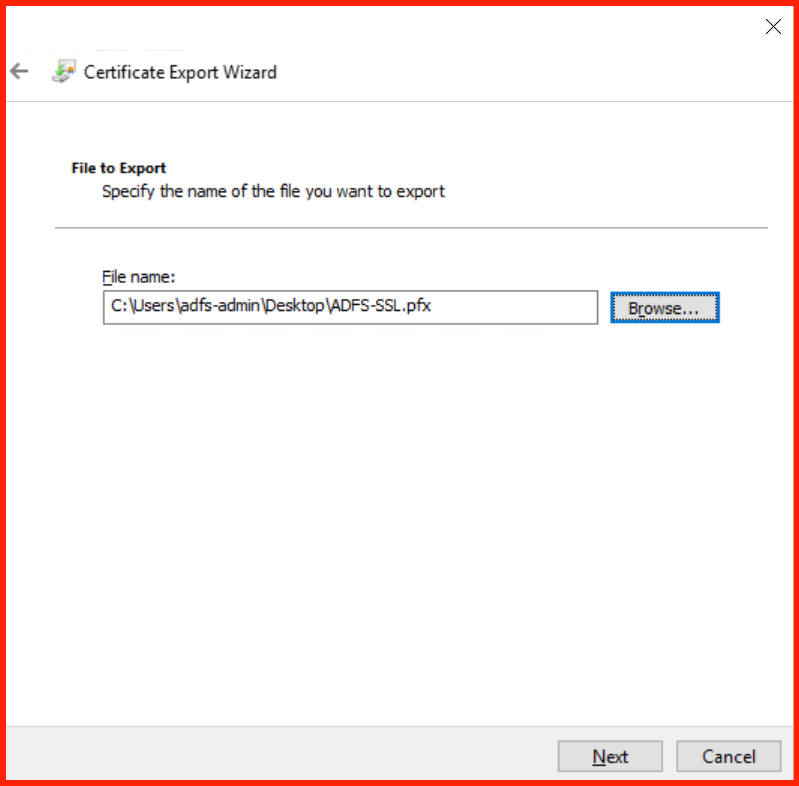
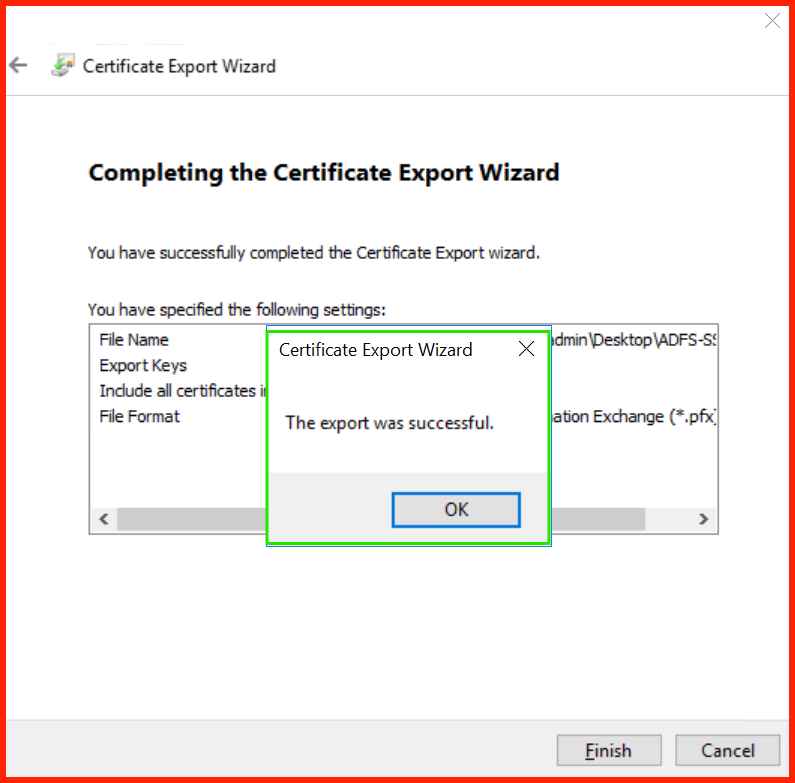
5. Step 4 – Install & Configure ADFS Role on Windows Server 2016
Now we will install the ADFS server role and configure the first federation server in a new farm.
5.1 Install the ADFS Role
On adfs-01.maharjan.np, open PowerShell as Administrator and run:
Install-WindowsFeature ADFS-Federation -IncludeManagementTools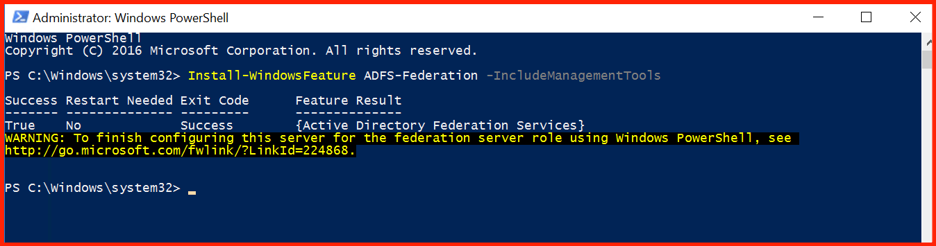
After installation, reboot the server.
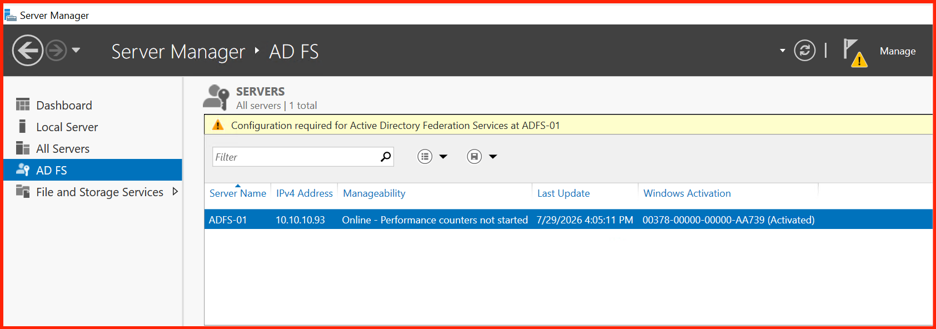
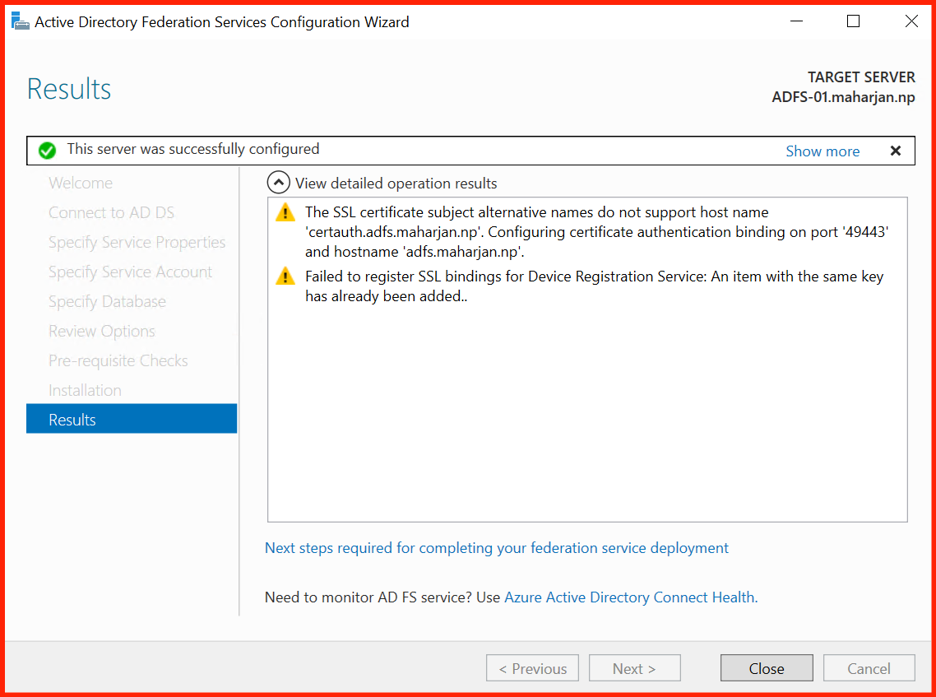
5.2 Configure the Federation Service
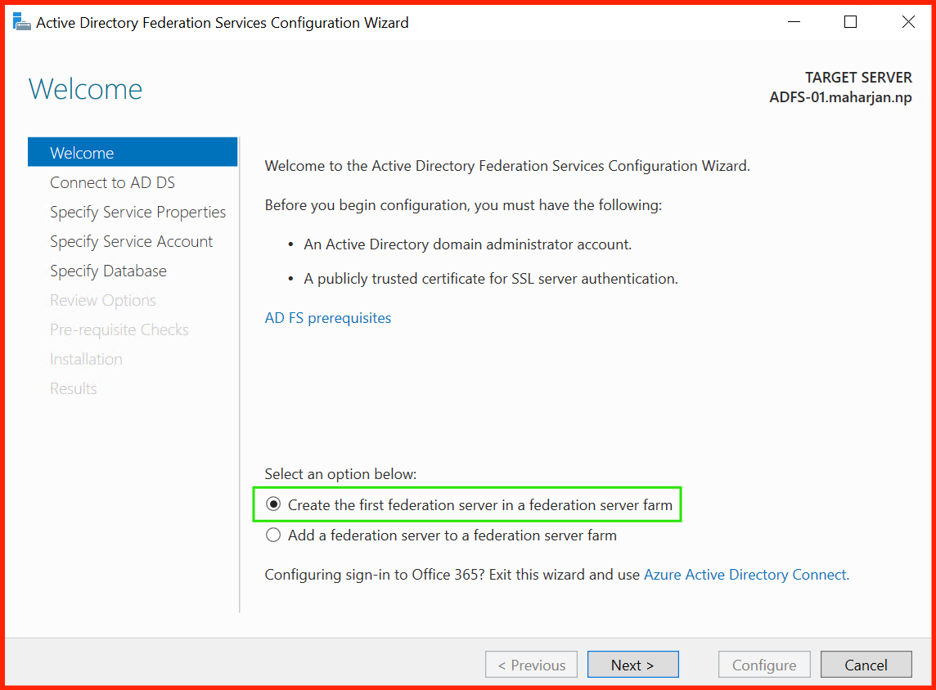
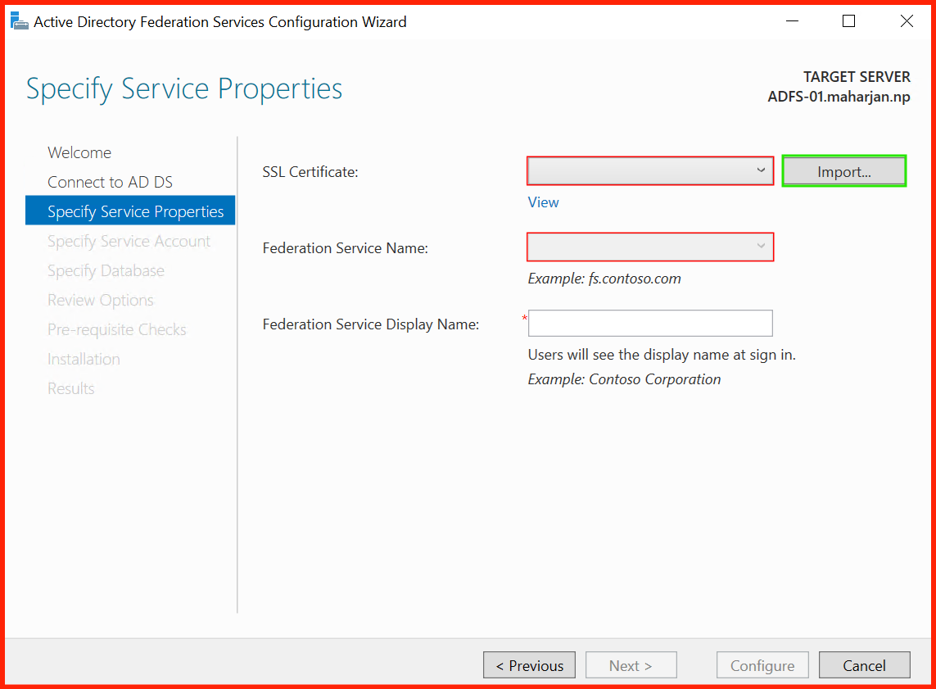
After reboot, open Server Manager, click the notification flag, and select Configure the federation service on this server.
- Choose Create the first federation server in a federation server farm.
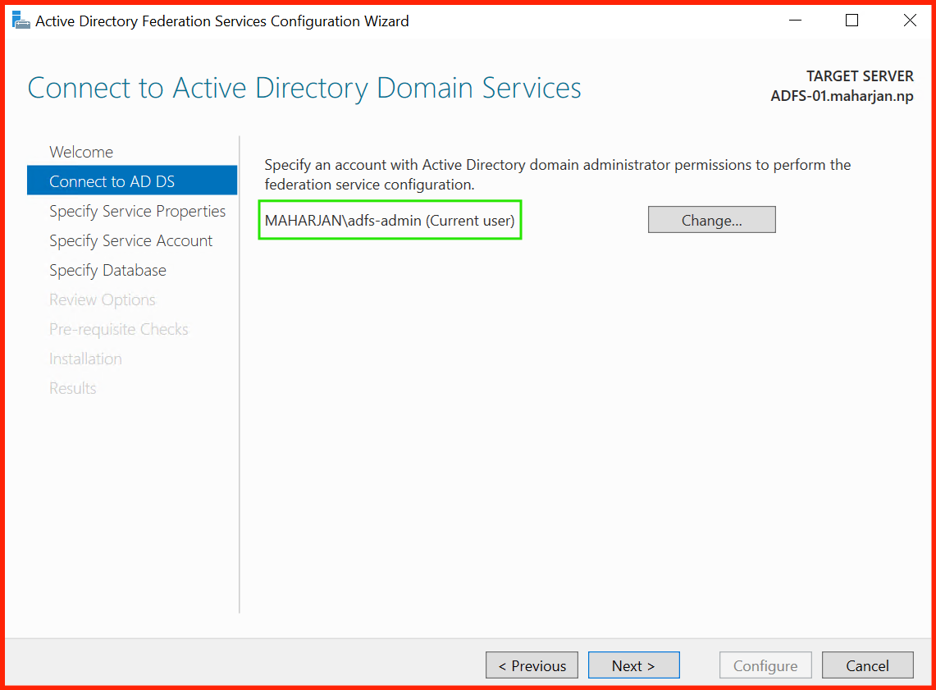
- Supply Domain Admin credentials.
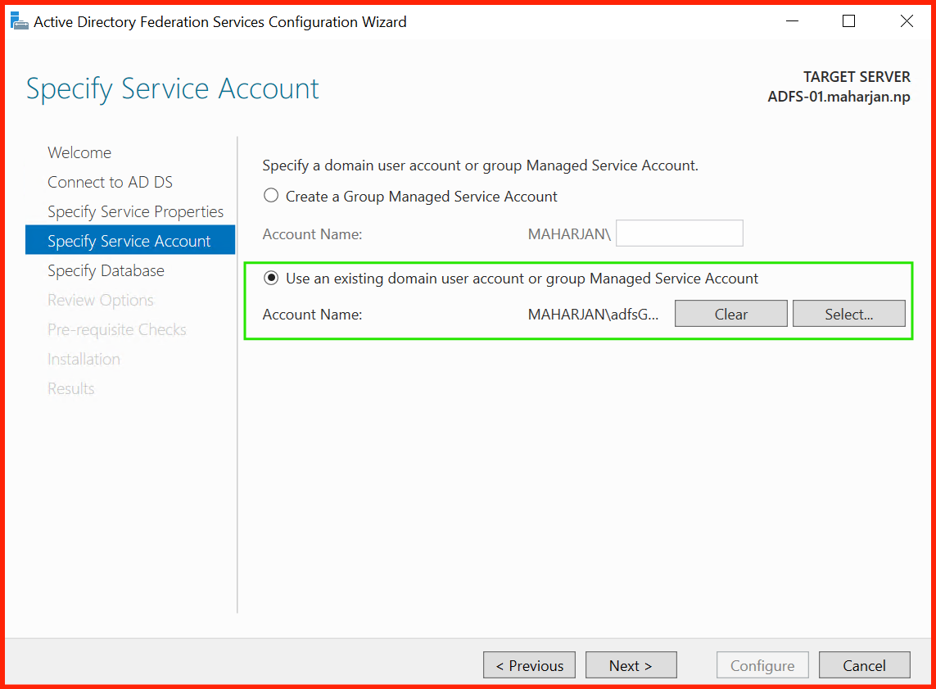
- On the Service Account page, specify
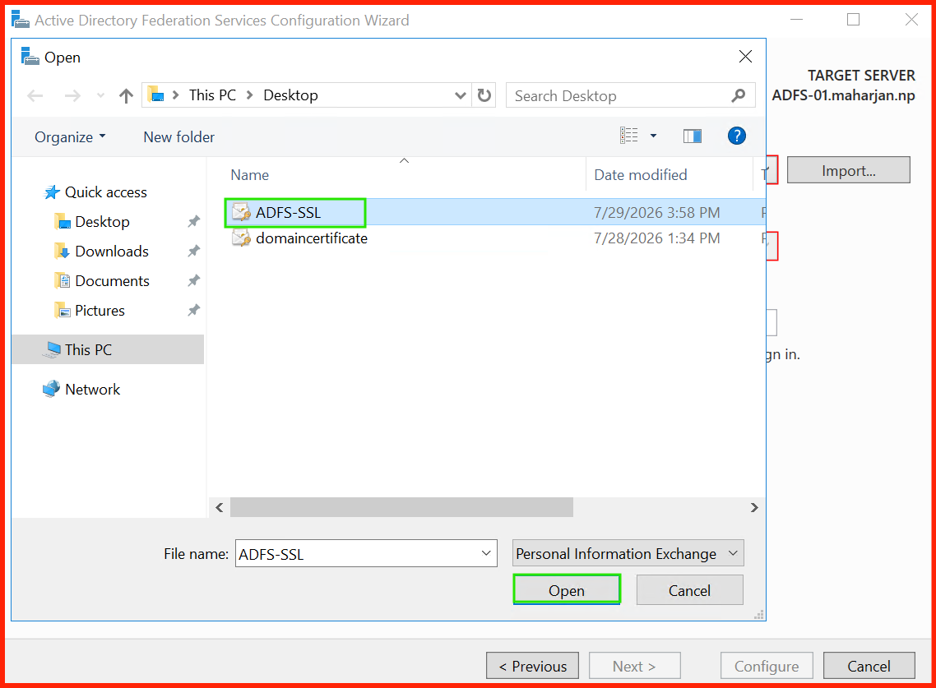
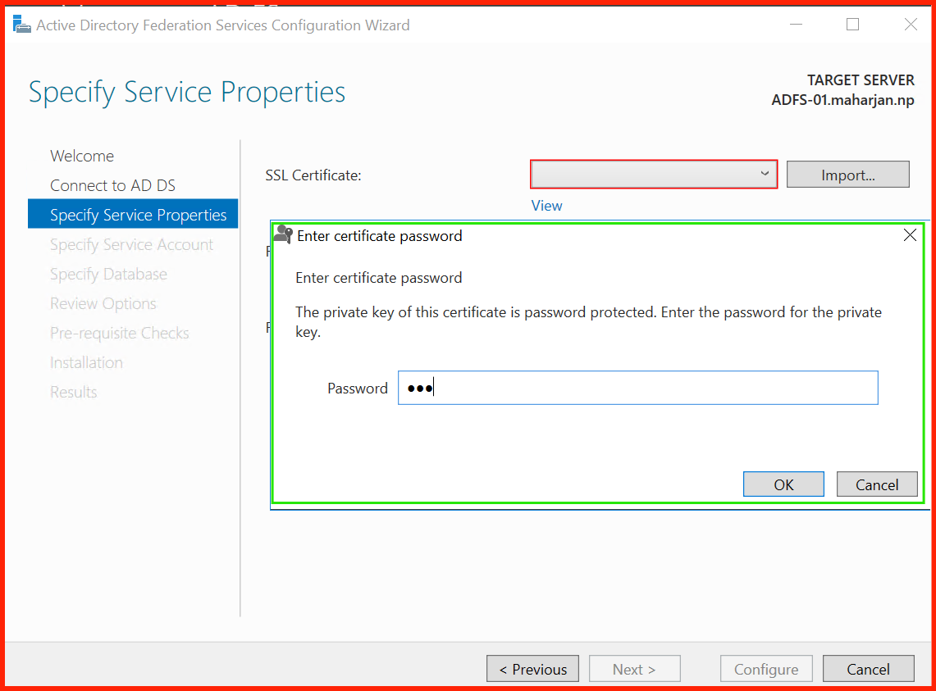
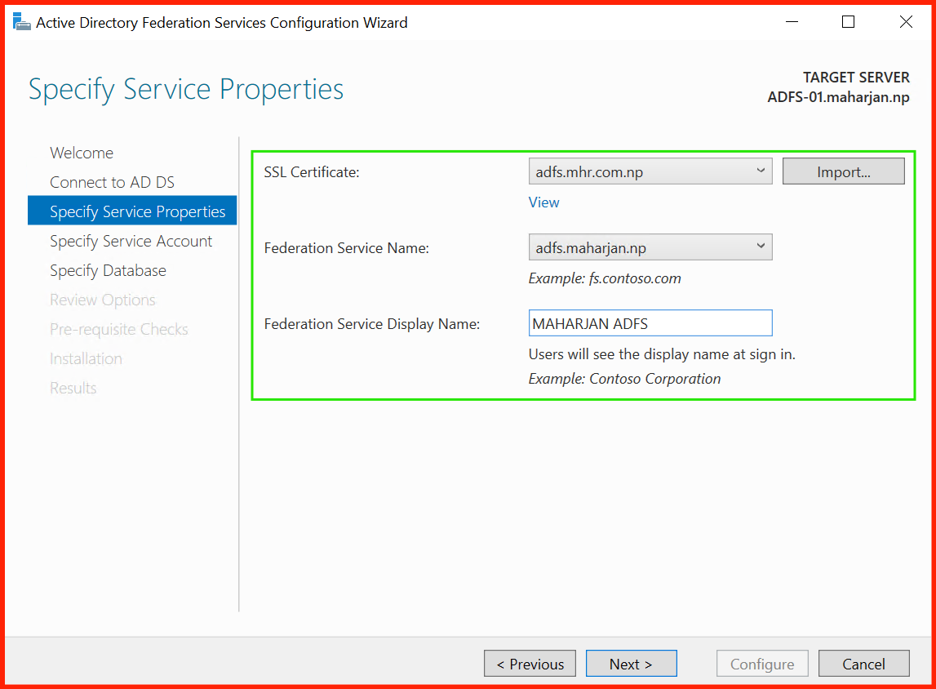
adfsGMSA(the gMSA we created). - Select the SSL certificate with subject
adfs.mhr.com.np. - Set Federation Service Display Name to
MAHARJAN ADFS. - For Federation Service Name, enter
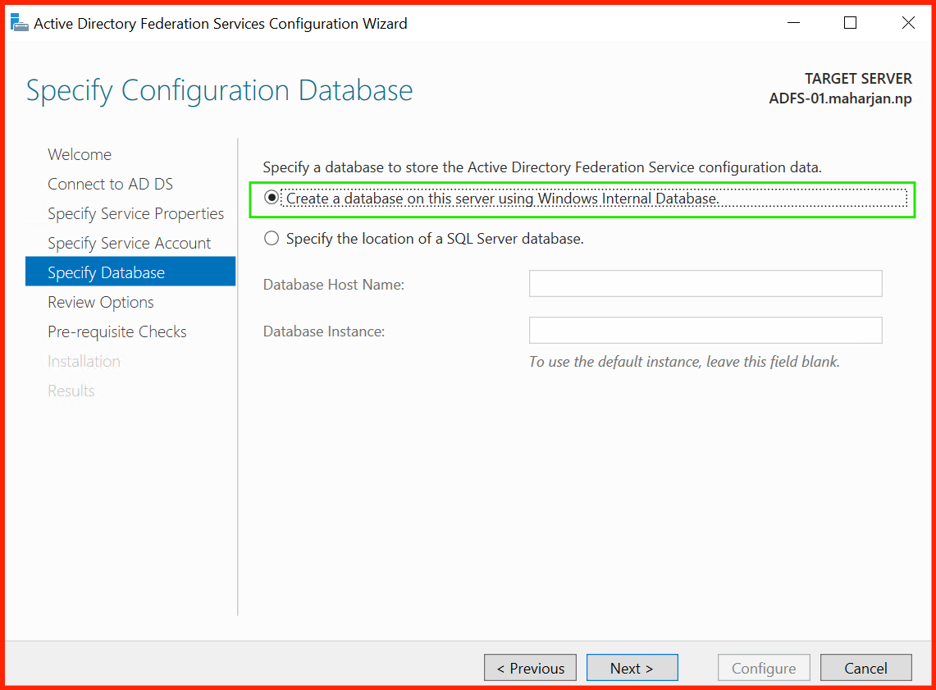
adfs.mhr.com.np. - Choose Windows Internal Database (WID) for the farm database (suitable for lab).
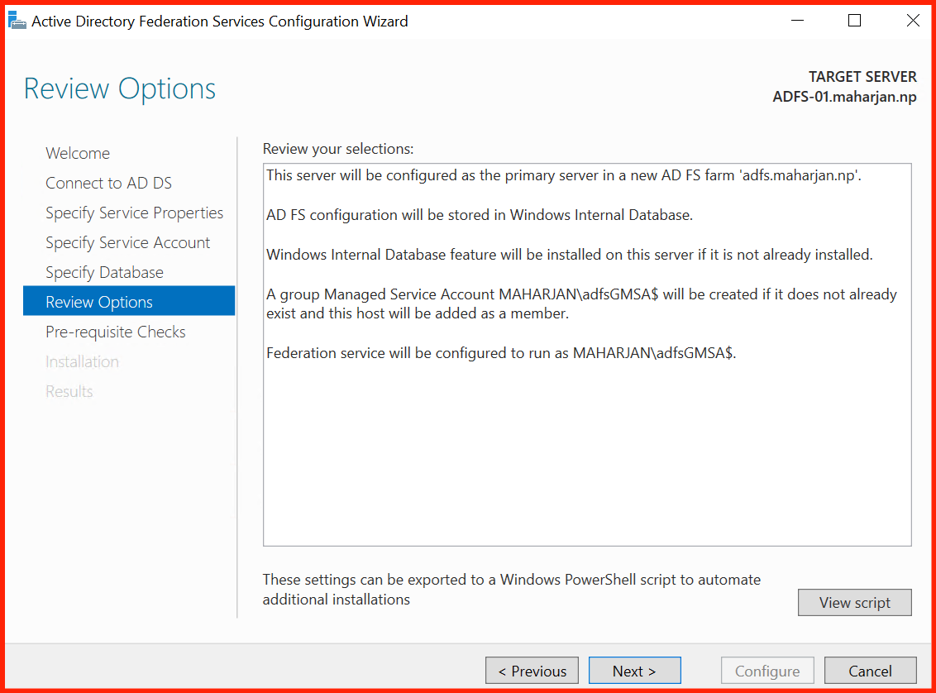
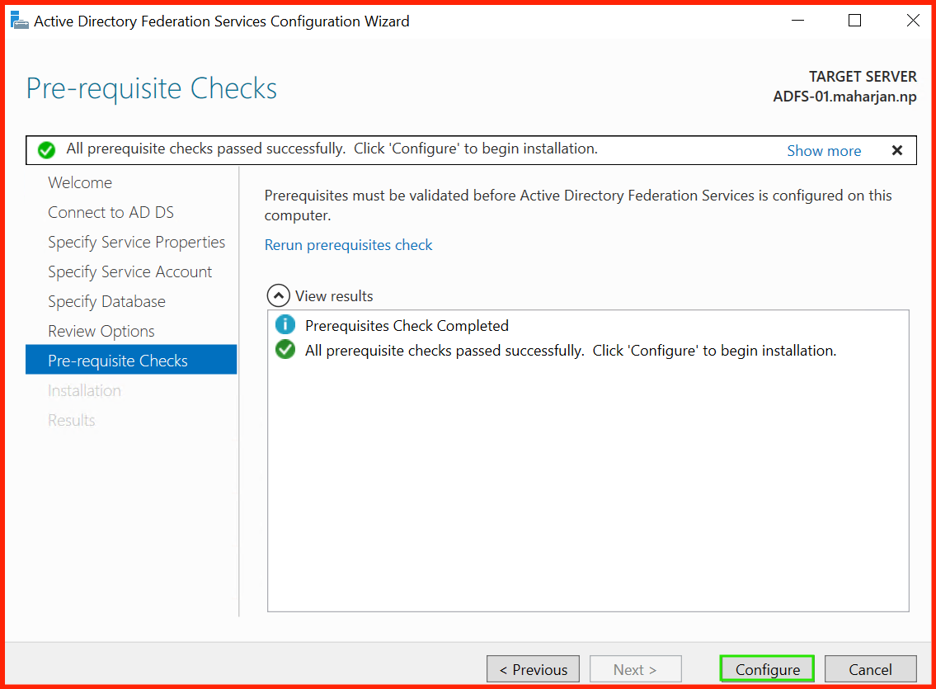
- Review settings and complete the wizard.
6. Verification – ADFS Endpoint
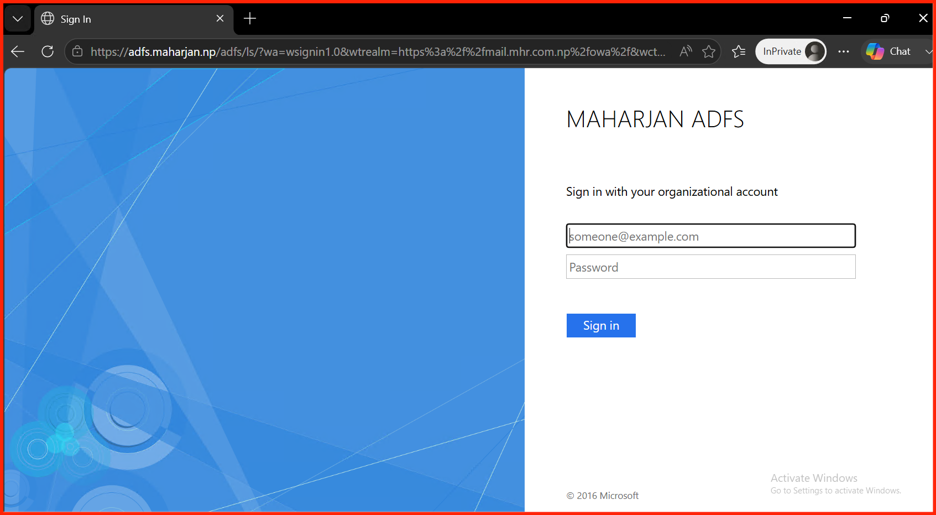
On the ADFS server (or a client with DNS resolution), open a browser and navigate to:
https://adfs.mhr.com.np/adfs/ls/idpinitiatedsignon.aspx(Note: If you use the internal hostname adfs.maharjan.np, replace accordingly.)
# Check current status
Get-AdfsProperties | Select-Object EnableIdpInitiatedSignonPage

# Enable the page
Set-AdfsProperties -EnableIdpInitiatedSignonPage $true
After enabling, you should see the ADFS sign‑in page. Log in with a domain account (e.g., maharjan\administrator) and confirm successful authentication.
Your ADFS farm is now operational!
7. Troubleshooting Common Issues
- Certificate not trusted: Ensure the CA root certificate is installed in the Trusted Root store on the ADFS server (domain members automatically trust it).
- gMSA not found: Use the full service account name with trailing
$(e.g.,maharjan\adfsGMSA$). - DNS resolution fails: Verify A-records for
adfs.mhr.com.npandcertauth.adfs.mhr.com.nppoint to the correct IP. - ADFS Sign-in Page Failure: Troubleshoot by checking the IdP‑initiated sign‑on status (
Get-AdfsProperties) and verifying SSL certificate bindings usingnetsh http show sslcertandGet-AdfsSslCertificate. - Port 443 blocked: Check Windows Firewall and network security groups.
- ADFS event logs: Check Applications and Services Logs → AD FS → Admin for detailed error messages.
🚀 Next Steps – Exchange OWA Federation
With the ADFS server now ready, we can proceed to integrate it with Exchange Server SE. In Part 4, we will:
- ✅ Create Relying Party Trust for OWA
- ✅ Configure claim rules for UPN and SID
- ✅ Enable ADFS authentication on Exchange
- ✅ Test the full SSO flow
Stay tuned for the next hands-on lab!
Start Part 4 Now