Exchange OWA as a Federated Relying Party
Single Sign‑On for Outlook Web App with ADFS – The Complete Lab
1. Objective & Real‑World Context
Now that our ADFS farm is alive, it’s time to plug in a real enterprise application – Exchange Server Outlook Web App (OWA). By the end of this lab, users will browse to https://mail.mhr.com.np/owa and be seamlessly redirected to ADFS for authentication. No more separate OWA login forms, no more password prompts – just a clean SSO experience driven by Active Directory.
This is exactly how thousands of organisations secure their on‑premises Exchange. We’ll configure Exchange to trust ADFS, set up the relying party trust, and craft the claim rules that make it all work.
2. Pre‑Lab Checklist
- ✅ Domain Controller & ADFS server fully configured (Part 3)
- ✅ Exchange Server SE (Windows Server 2025) joined to domain, Mailbox role installed
- ✅ OWA internally accessible via
https://mail.mhr.com.np/owa(forms‑based auth) - ✅ SSL certificate on Exchange covering
mail.mhr.com.np(internal CA is fine) - ✅ ADFS token‑signing certificate is exported and will be imported into Exchange (Step 1)
Setup.exe /IAcceptExchangeServerLicenseTerms_DiagnosticDataOFF /Mode:Install /Roles:Mailbox. It takes about 20 minutes.
3. Step 1 – Export ADFS Token‑Signing Certificate
Exchange needs to trust the token‑signing certificate that ADFS uses to sign SAML tokens. We’ll export its public key and import it on the Exchange server.
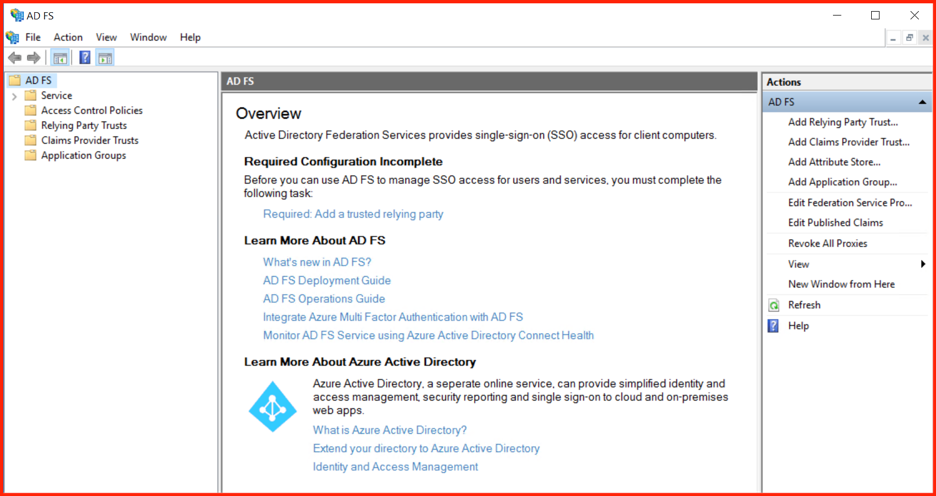
- On the ADFS server, open AD FS Management.
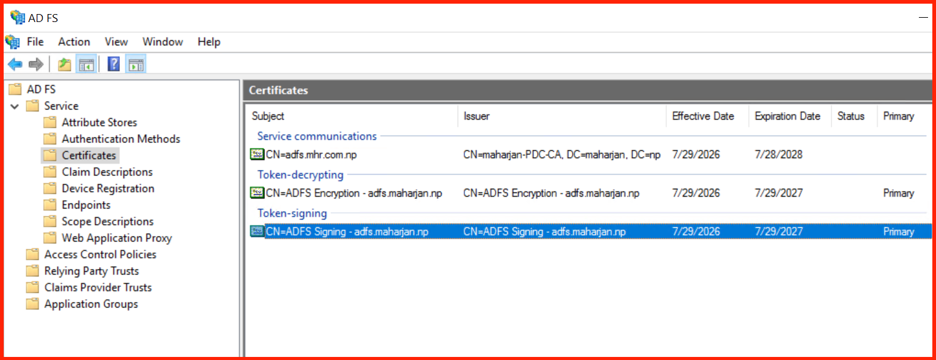
- Go to Service → Certificates. Double‑click the Token‑signing certificate.
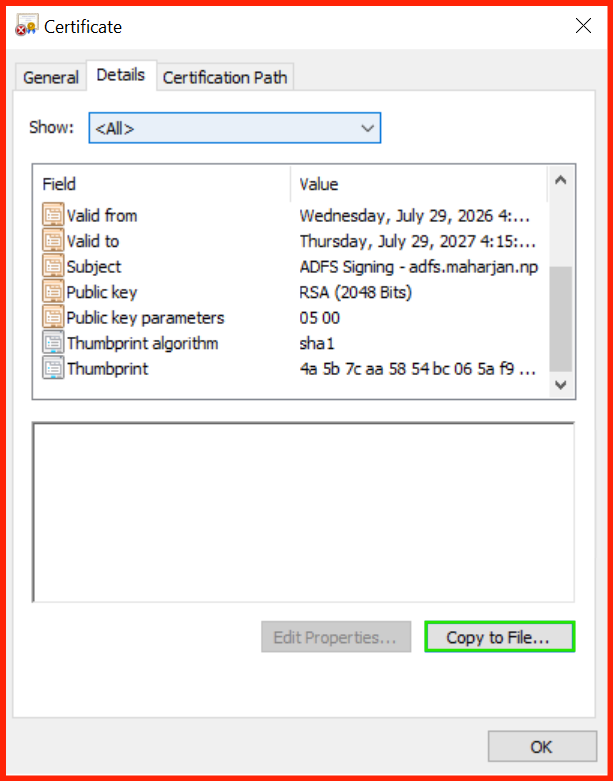
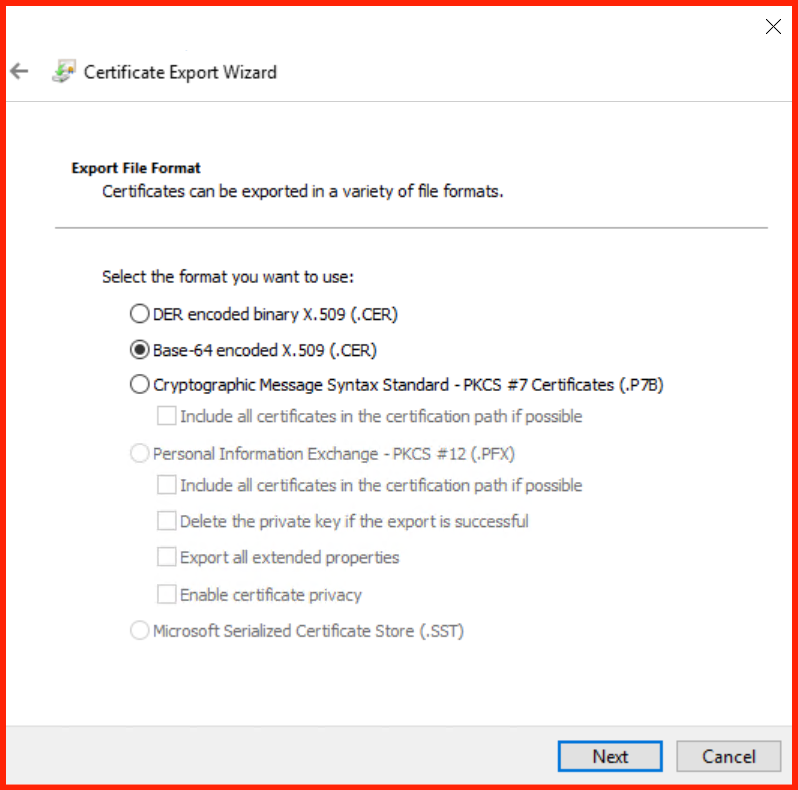
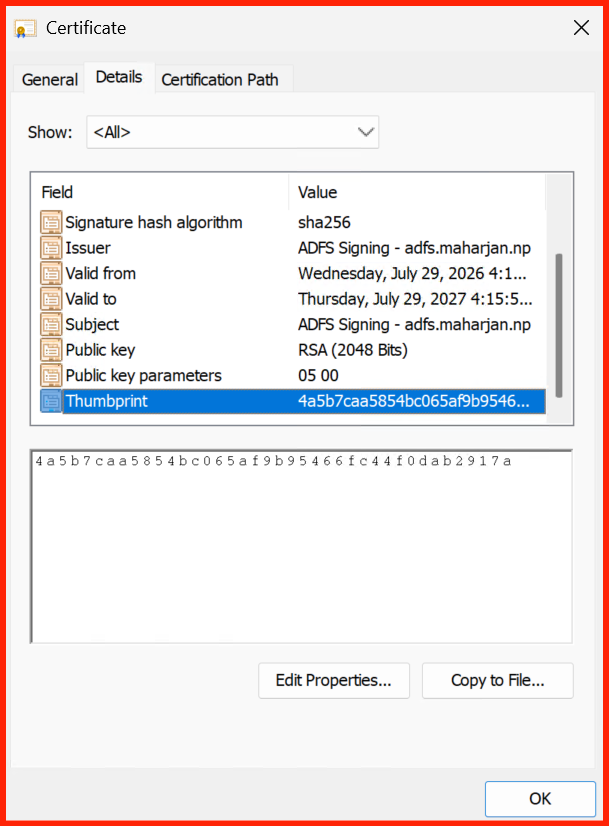
- Switch to the Details tab, click Copy to File, and export as a Base‑64 encoded X.509 (.CER) file. Save it as
ADFS_TokenSigning.cer.
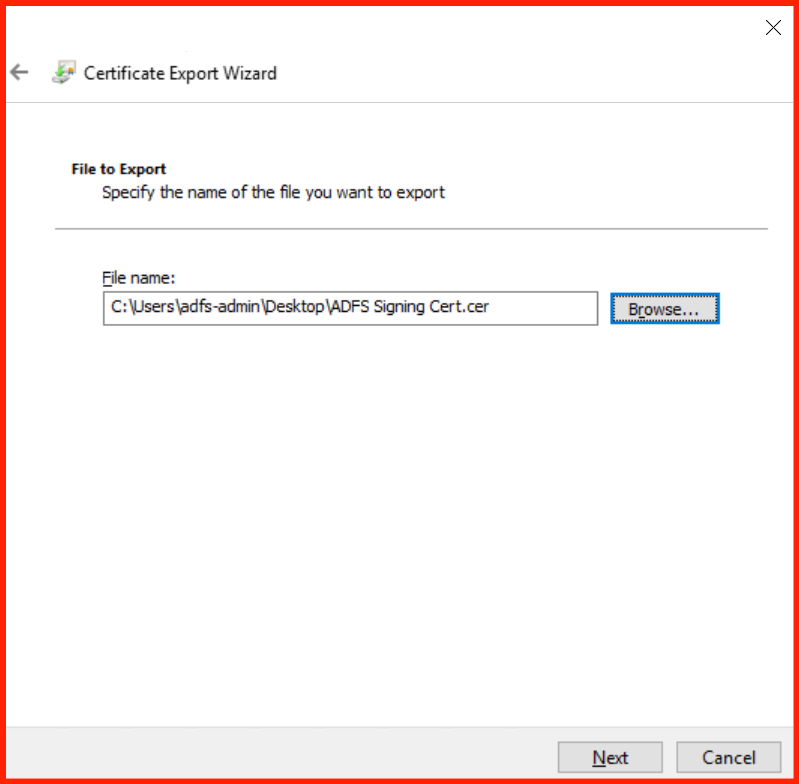
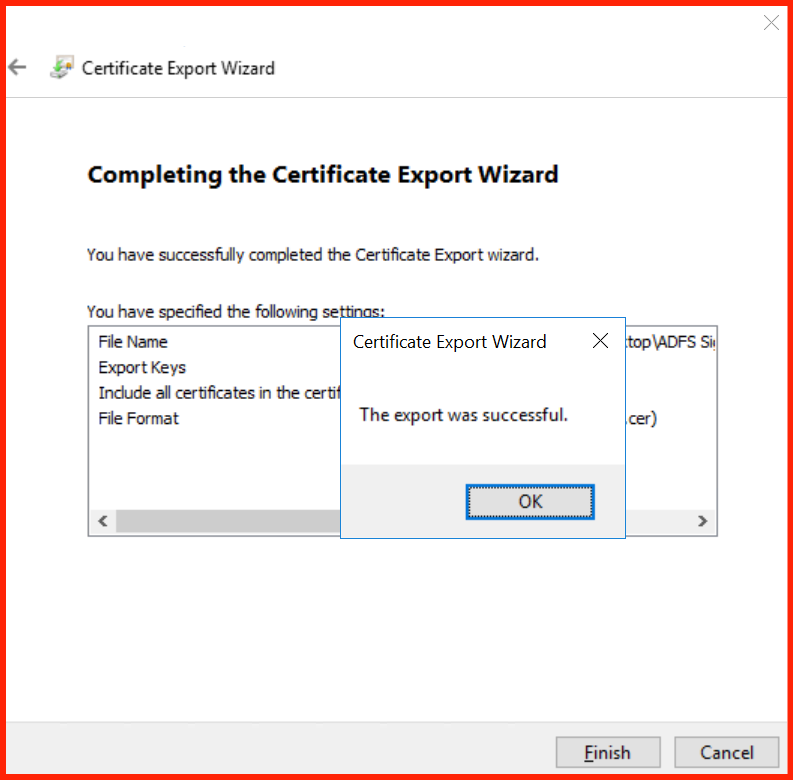
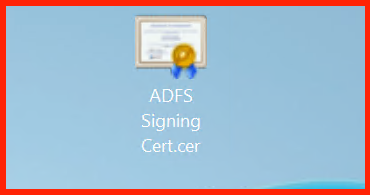
Copy this file to the Exchange server (via a shared folder or drag‑and‑drop).
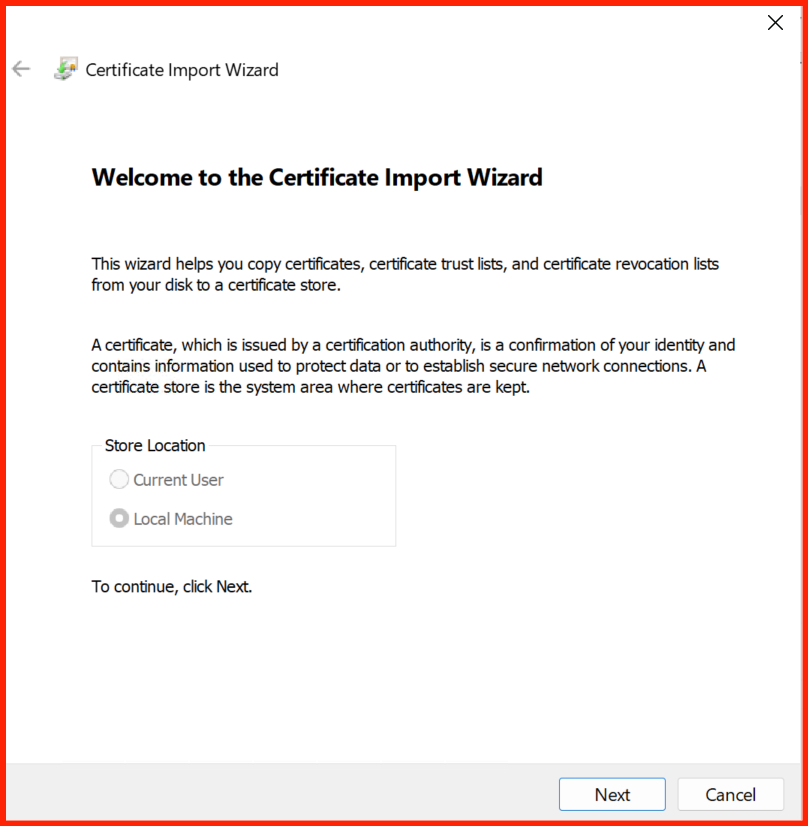
3.1 Import the Certificate on Exchange
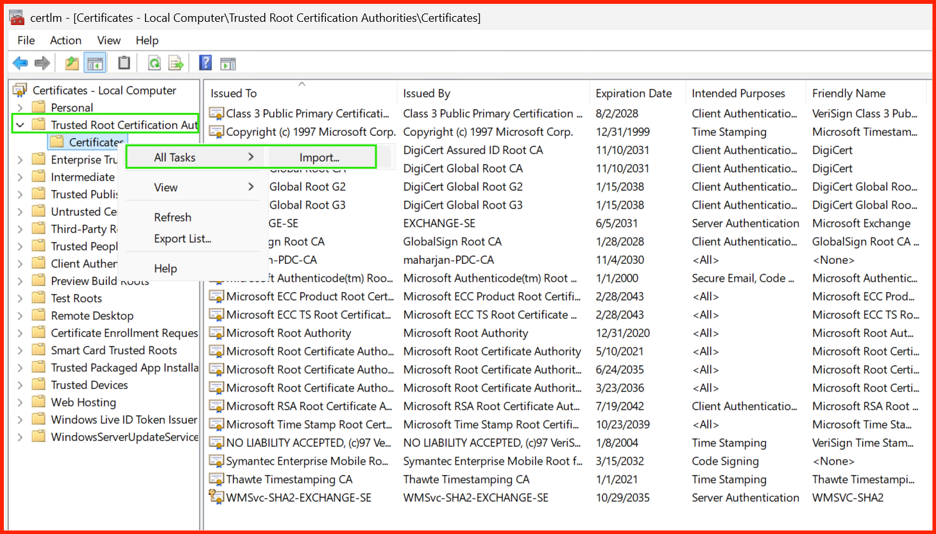
- On Exchange, run
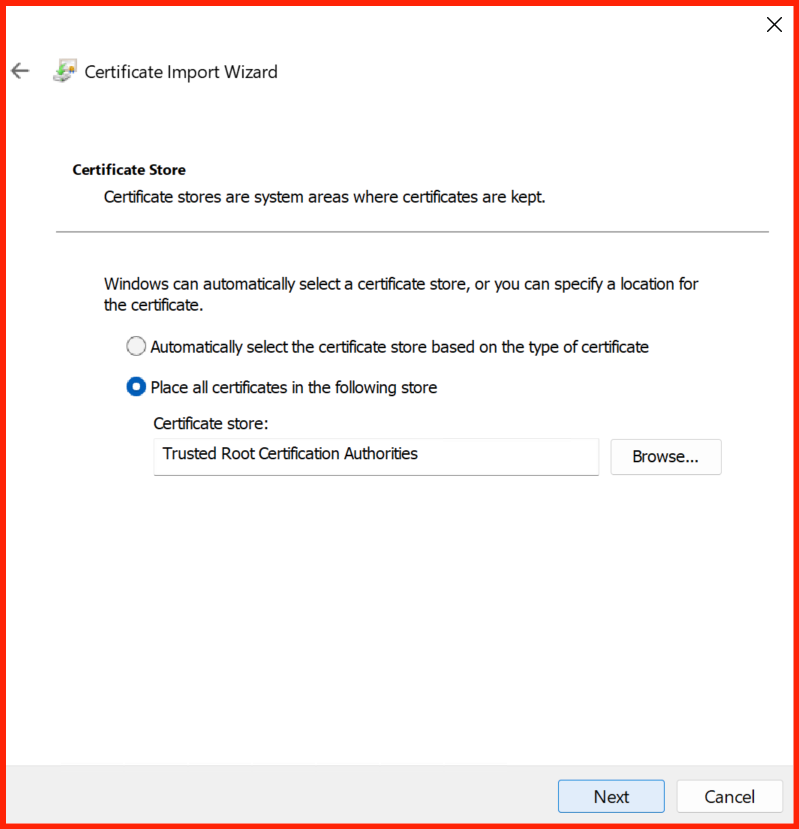
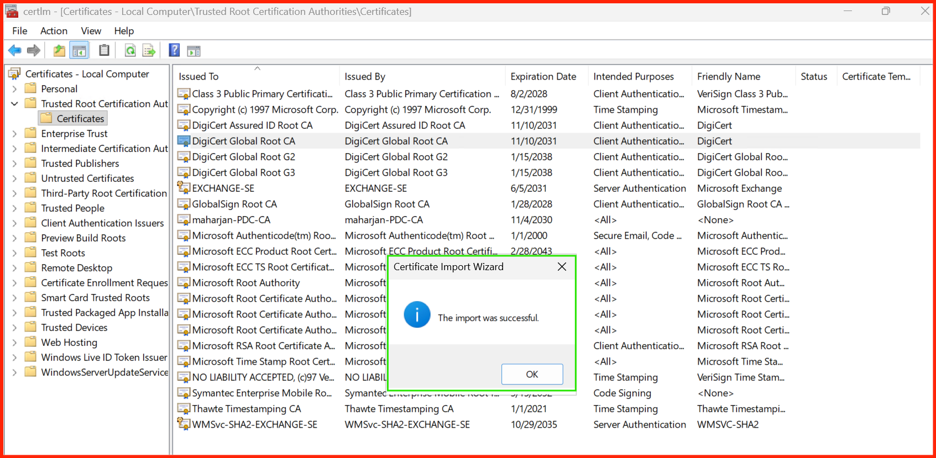
certlm.msc. - Expand Trusted Root Certification Authorities, right‑click Certificates → All Tasks → Import.
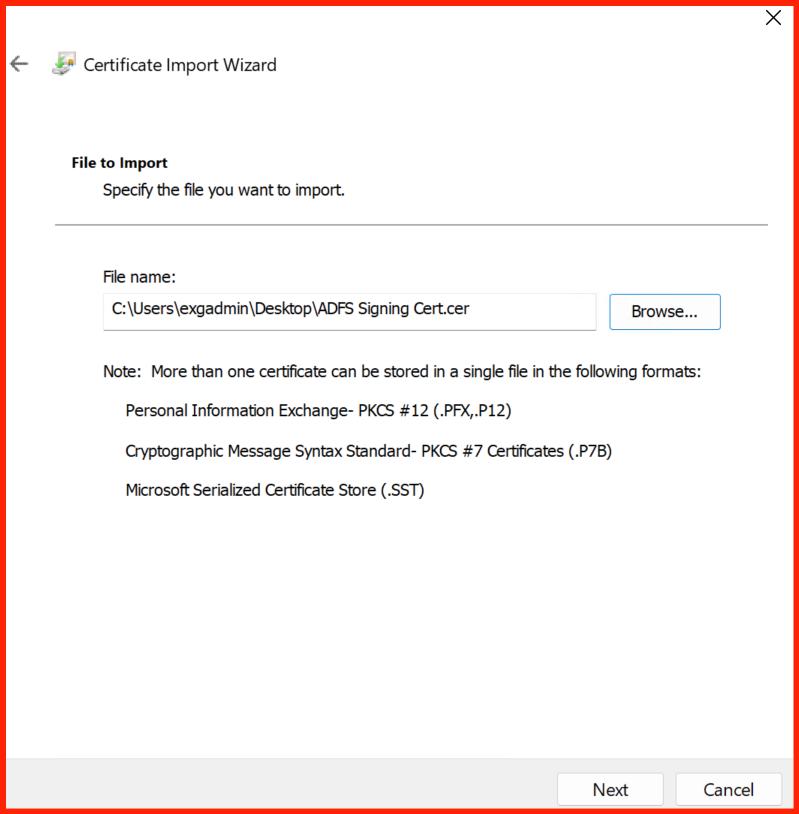
- Browse to
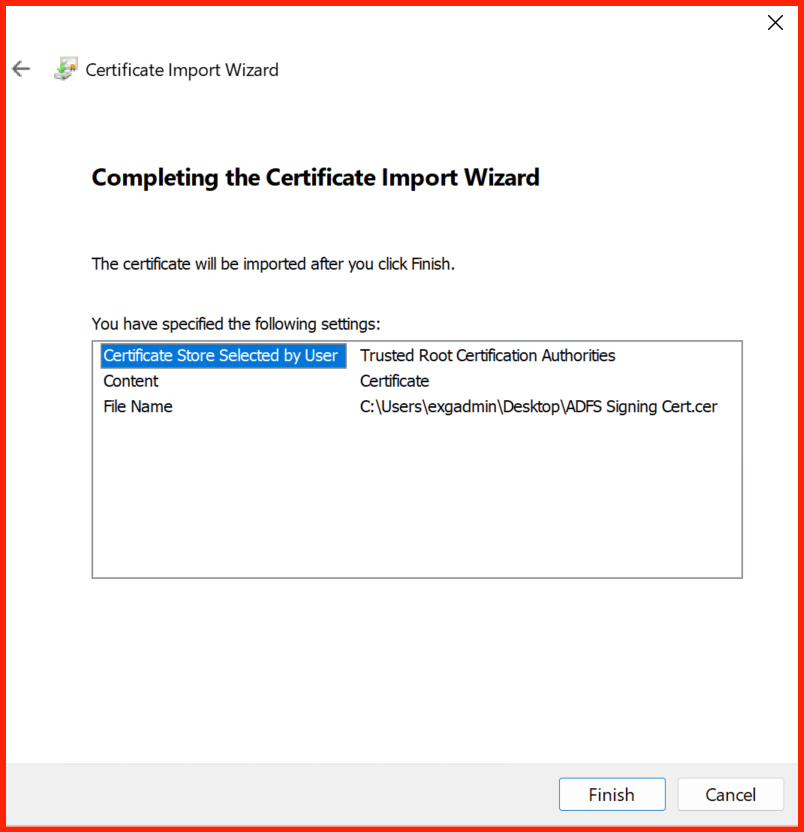
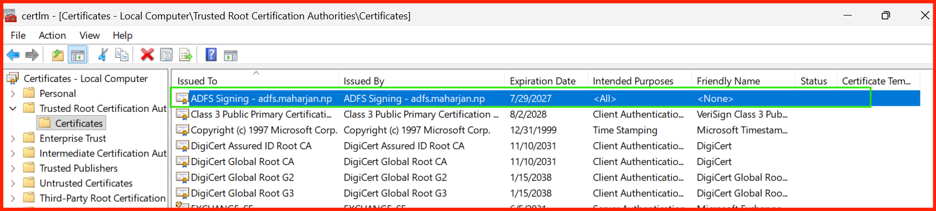
ADFS_TokenSigning.cer, finish the wizard. It will appear in the trusted root store.
4. Step 2 – Configure Exchange for ADFS Authentication
Open the Exchange Management Shell on the Exchange server (as administrator). We’ll first disable forms‑based authentication on OWA and ECP, then enable ADFS.
4.1 Disable Forms & Basic Auth, Enable ADFS
# Configure OWA Virtual Directory for ADFS
Set-OwaVirtualDirectory -Identity "EXCHANGE-SE\owa (Default Web Site)" `
                        -AdfsAuthentication $true `
                        -BasicAuthentication $false `
                        -DigestAuthentication $false `
                        -FormsAuthentication $false `
                        -WindowsAuthentication $false

# Configure ECP Virtual Directory for ADFS
Set-EcpVirtualDirectory -Identity "EXCHANGE-SE\ecp (Default Web Site)" `
                        -AdfsAuthentication $true `
                        -BasicAuthentication $false `
                        -DigestAuthentication $false `
                        -FormsAuthentication $false `
                        -WindowsAuthentication $false

# Restart IIS Services
iisreset /noforce
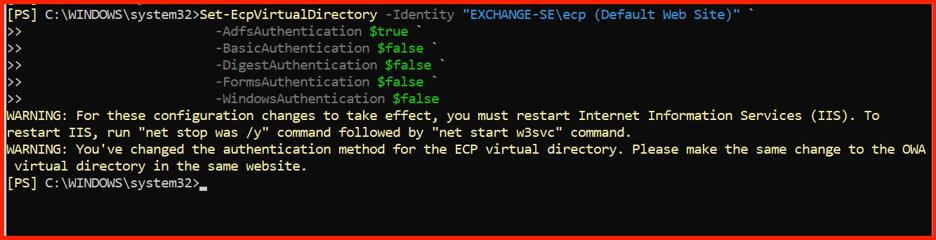

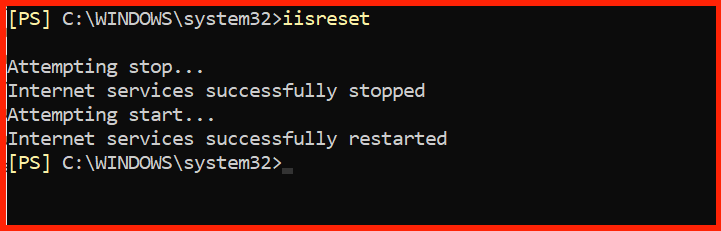
After running these commands, OWA’s default login page will disappear. Instead, users will be redirected to the ADFS endpoint we specify next.
4.2 Set Organization AD FS Parameters
Now tell Exchange where ADFS lives and what realm to use. The realm (audience URI) must match the relying party identifier we’ll create in ADFS. We’ll use https://mail.mhr.com.np/owa.
$adfsUrl = "https://adfs.mhr.com.np/adfs/ls/"
$realm = "https://mail.mhr.com.np/owa"

# Get the thumbprint of the Exchange OWA SSL certificate
$cert = Get-ExchangeCertificate | Where-Object {$_.Services -like "*IIS*"} | Select-Object -First 1

Set-OrganizationConfig -AdfsIssuer $adfsUrl `
                        -AdfsAudienceUris $realm `
                        -AdfsSignCertificateThumbprint $cert.Thumbprint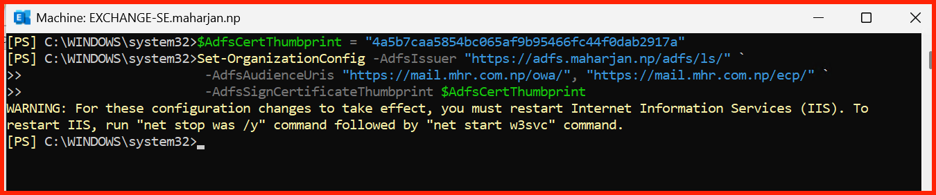
Restart IIS to ensure everything takes effect:
iisreset /noforce-Identity parameter accordingly (e.g., use Get-OwaVirtualDirectory to list existing directories).
5. Step 3 – Create the Relying Party Trusts in ADFS (PowerShell)
Now switch to the ADFS server and open an elevated PowerShell console. We’ll create two relying party trusts – one for OWA and one for ECP (Exchange Admin Center).
First, ensure the ADFS PowerShell module is loaded:
Import-Module ADFSThen run the following commands to add both trusts. These scripts use the identifiers and WS‑Fed endpoints that match our Exchange setup.
# Create trust for Outlook on the web (OWA)
Add-AdfsRelyingPartyTrust -Name "Outlook on the web" `
    -Notes "This is a trust for https://mail.mhr.com.np/owa/" `
    -Identifier "https://mail.mhr.com.np/owa/" `
    -WSFedEndpoint "https://mail.mhr.com.np/owa/" `
    -IssuanceAuthorizationRules '@RuleTemplate = "AllowAllAuthzRule" => issue(Type = "http://schemas.microsoft.com/authorization/claims/permit", Value = "true");' `
    -IssueOAuthRefreshTokensTo NoDevice

# Create trust for Exchange Admin Center (ECP)
Add-AdfsRelyingPartyTrust -Name "EAC" `
    -Notes "This is a trust for https://mail.mhr.com.np/ecp/" `
    -Identifier "https://mail.mhr.com.np/ecp/" `
    -WSFedEndpoint "https://mail.mhr.com.np/ecp/" `
    -IssuanceAuthorizationRules '@RuleTemplate = "AllowAllAuthzRule" => issue(Type = "http://schemas.microsoft.com/authorization/claims/permit", Value = "true");' `
    -IssueOAuthRefreshTokensTo NoDevice
Identifier must match the realm (audience URI) we set in Exchange’s Set-OrganizationConfig. The WSFedEndpoint is the passive URL that ADFS will redirect back to after authentication. The IssuanceAuthorizationRules simply permits all authenticated users (we’ll further refine with claims rules below).
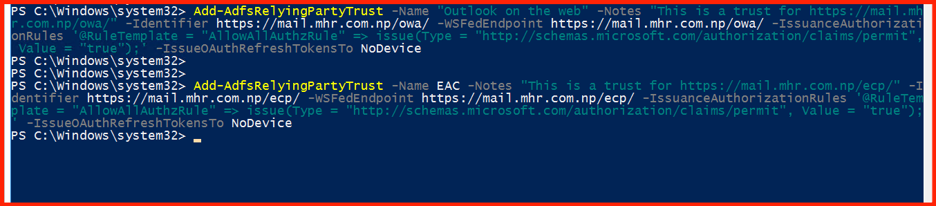
After creating the trusts, verify they exist:
Get-AdfsRelyingPartyTrust | Select-Object Name, Identifier, WSFedEndpoint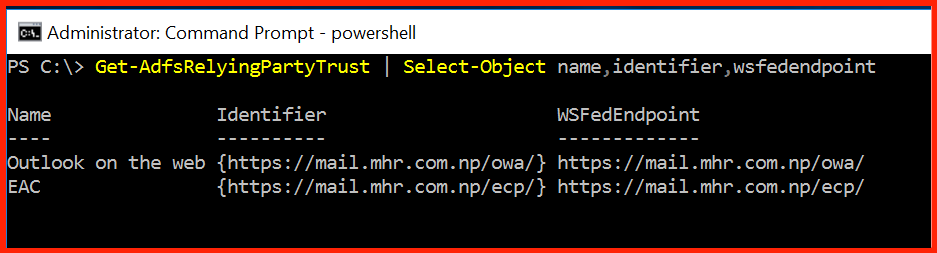
6. Step 4 – Configure Claim Rules (PowerShell)
Exchange expects certain claims in the SAML token to map the federated user to a mailbox. The most critical is the User Principal Name (UPN) and the Security Identifier (SID). We will apply the same claim rules to both the OWA and ECP trusts.
Run the following PowerShell commands on the ADFS server to set the issuance transform rules:
# Claim rules for "Outlook on the web"
Set-AdfsRelyingPartyTrust -TargetName "Outlook on the web" -IssuanceTransformRules `
'@RuleName = "ActiveDirectoryUserSID"
c:[Type == "http://schemas.microsoft.com/ws/2008/06/identity/claims/windowsaccountname", Issuer == "AD AUTHORITY"]
 => issue(store = "Active Directory", types = ("http://schemas.microsoft.com/ws/2008/06/identity/claims/primarysid"), query = ";objectSID;{0}", param = c.Value);

@RuleName = "ActiveDirectoryUPN"
c:[Type == "http://schemas.microsoft.com/ws/2008/06/identity/claims/windowsaccountname", Issuer == "AD AUTHORITY"]
 => issue(store = "Active Directory", types = ("http://schemas.xmlsoap.org/ws/2005/05/identity/claims/upn"), query = ";userPrincipalName;{0}", param = c.Value);'

# Claim rules for "EAC"
Set-AdfsRelyingPartyTrust -TargetName "EAC" -IssuanceTransformRules `
'@RuleName = "ActiveDirectoryUserSID"
c:[Type == "http://schemas.microsoft.com/ws/2008/06/identity/claims/windowsaccountname", Issuer == "AD AUTHORITY"]
 => issue(store = "Active Directory", types = ("http://schemas.microsoft.com/ws/2008/06/identity/claims/primarysid"), query = ";objectSID;{0}", param = c.Value);

@RuleName = "ActiveDirectoryUPN"
c:[Type == "http://schemas.microsoft.com/ws/2008/06/identity/claims/windowsaccountname", Issuer == "AD AUTHORITY"]
 => issue(store = "Active Directory", types = ("http://schemas.xmlsoap.org/ws/2005/05/identity/claims/upn"), query = ";userPrincipalName;{0}", param = c.Value);'
- ActiveDirectoryUserSID – Queries Active Directory for the user’s objectSID and issues it as a primary SID claim. Exchange uses this to identify the user.
- ActiveDirectoryUPN – Retrieves the user’s UPN from AD and issues it as a UPN claim, which Exchange can also use for lookup.

You can verify the applied rules with:
Get-AdfsRelyingPartyTrust -Name "Outlook on the web" | Select-Object IssuanceTransformRules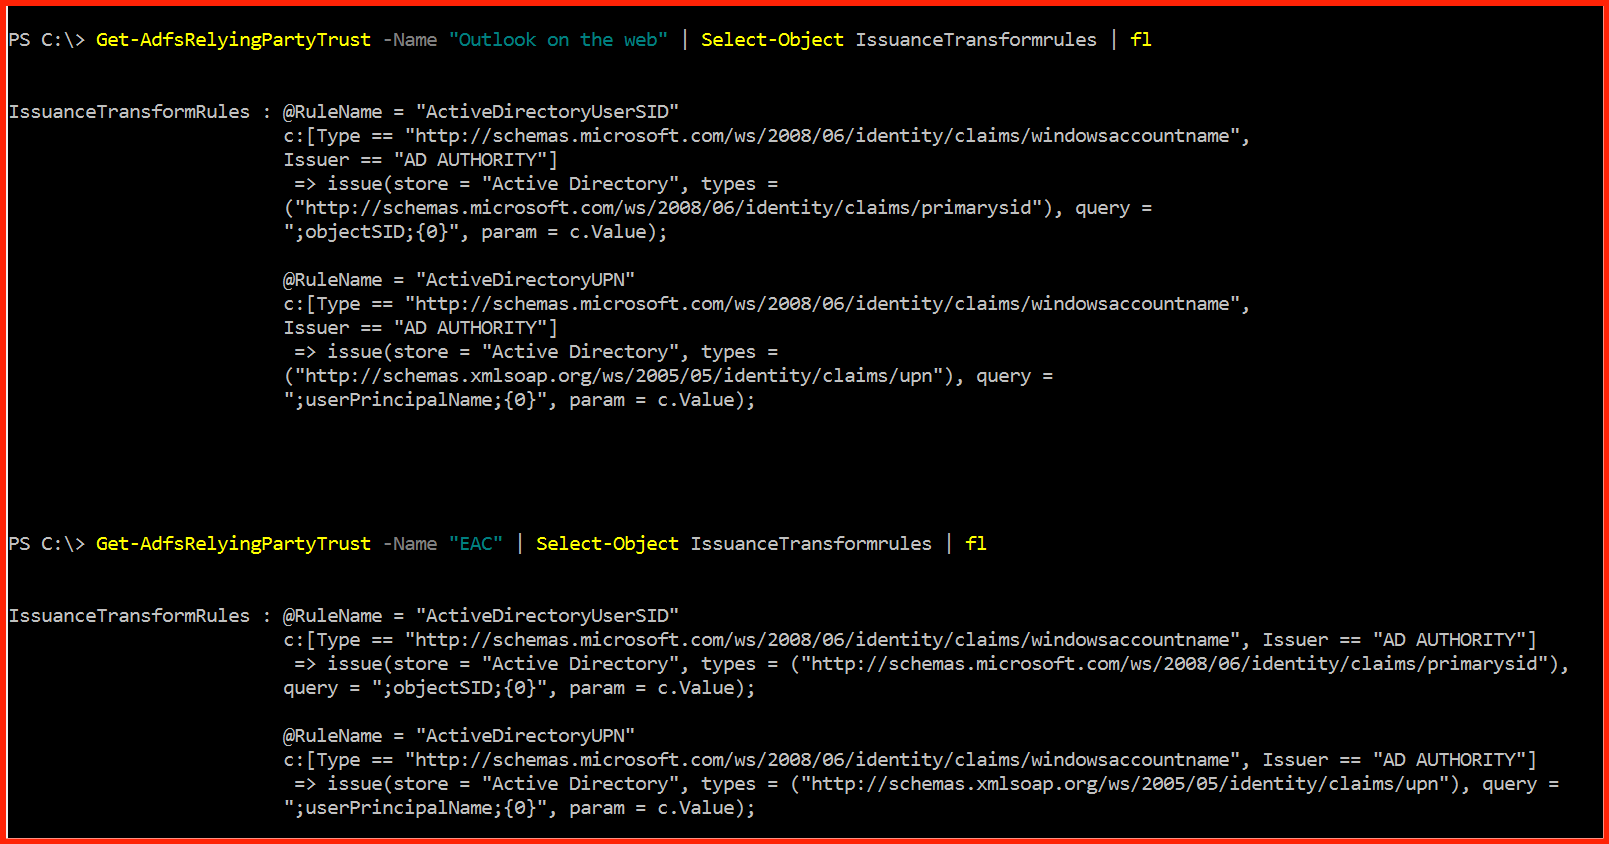
Now ADFS is ready to issue the right claims to Exchange.
7. Step 5 – Test and Verify
Now the real magic.
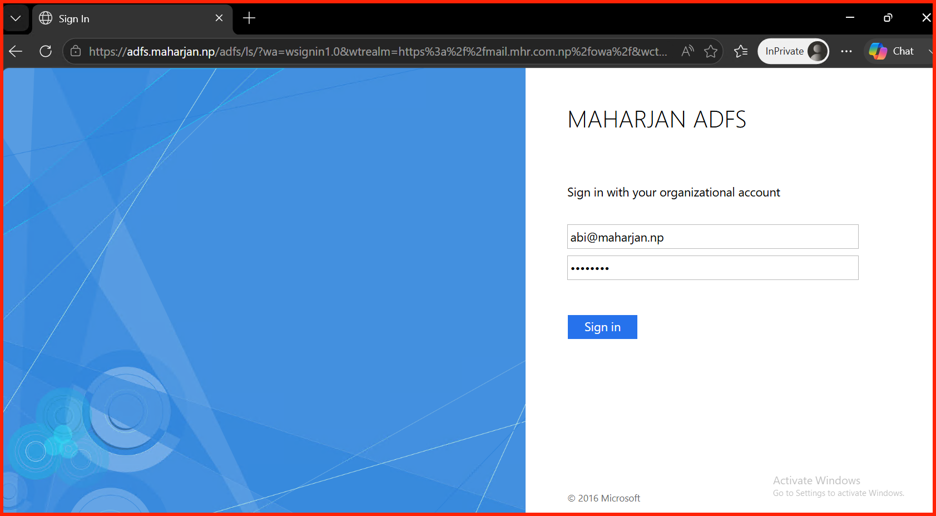
- From a domain‑joined machine (or a browser on any lab VM), browse to
https://mail.mhr.com.np/owa. - You should be immediately redirected to
https://adfs.mhr.com.np/adfs/ls/...(ADFS sign‑in page). - Sign in with a domain user account (e.g.,
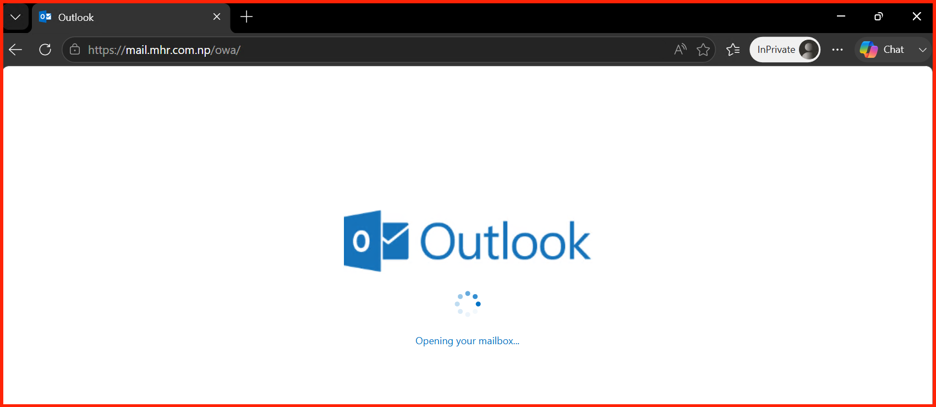
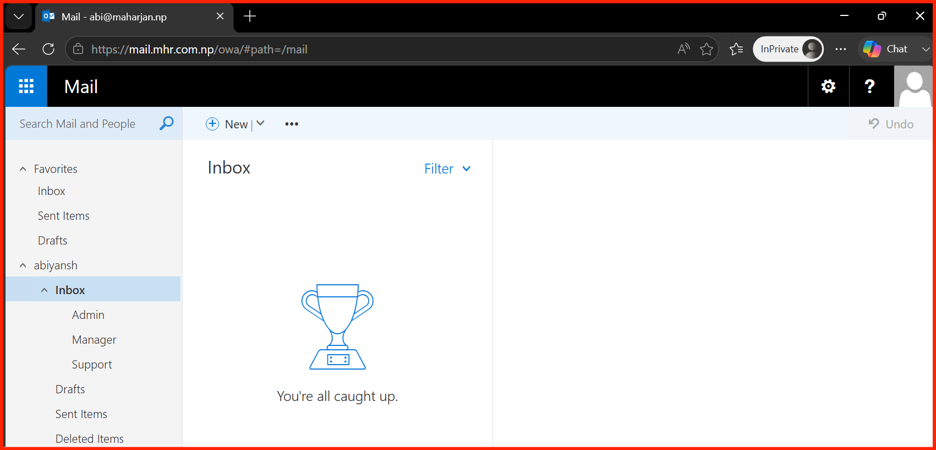
maharjan\administratoror a test user with a mailbox). - After successful authentication, you’ll be redirected back to OWA, which should load your inbox.
Also try the IdP‑initiated flow:
- Go to
https://adfs.mhr.com.np/adfs/ls/idpinitiatedsignon.aspx(ensure it’s enabled – see Part 3). - Sign in, select Exchange OWA from the relying party list, and you’ll land in OWA already authenticated.
8. Deep Dive: What Just Happened?
When you first hit OWA, Exchange (the relying party) detects no active session. It constructs a WS‑Federation sign‑in request, signs it with the OWA SSL certificate’s private key, and redirects your browser to ADFS with that request.
ADFS authenticates you against Active Directory (Kerberos if inside the domain, or forms login). Then it queries AD for your attributes, runs the claim rules we defined, and issues a SAML token containing your UPN (as NameID) and other claims. The token is signed with the ADFS token‑signing certificate.
Your browser posts that token back to Exchange OWA. Exchange validates the signature (using the token‑signing certificate we imported), extracts the NameID/UPN, and maps it to a mailbox. Session cookies are created, and you’re in.
9. Troubleshooting Common Pitfalls
- Redirect loop or blank page after login? – Ensure the relying party passive URL ends with
/owa/and matches exactly. Check that theAdfsAudienceUrisin Exchange matches the relying party identifier. - “Couldn’t find a mailbox” error? – The user’s UPN or SID might not map to their mailbox. Verify the claim rules are correctly retrieving
objectSIDanduserPrincipalName. Check the ADFS event log for claim issuance. - Token‑signing certificate trust? – Make sure the token‑signing cert is in Exchange’s Trusted Root store. Check the ADFS event log for signature validation errors.
- Forms authentication still showing? – Did you run both
Set-OwaVirtualDirectoryandSet-EcpVirtualDirectory? Restart IIS after changes. - ADFS event log? – Always check AD FS → Admin for detailed errors. If you see “MSIS7065: No authentication context”, double‑check the passive URL.
- PowerShell errors: Ensure you are running as administrator and the ADFS module is loaded. If the trust already exists, you may need to remove it first with
Remove-AdfsRelyingPartyTrust -Name "Outlook on the web"before re‑adding.
10. Emergency Rollback Procedure
If you need to revert Exchange SE back to the standard Forms‑Based Authentication (e.g., for troubleshooting or to undo the federation), execute the following in the Exchange Management Shell (EMS) on the Exchange server.
# Revert OWA & ECP Virtual Directories to Forms Authentication
Set-OwaVirtualDirectory -Identity "mail\owa (Default Web Site)" -AdfsAuthentication $false -FormsAuthentication $true
Set-EcpVirtualDirectory -Identity "mail\ecp (Default Web Site)" -AdfsAuthentication $false -FormsAuthentication $true

# Restart IIS Services
iisreset /noforce
Note: The identity "mail\owa (Default Web Site)" assumes your Exchange server name is mail. If your server has a different name, adjust accordingly (e.g., "EXCHANGE-SE\owa (Default Web Site)"). You can list existing virtual directories with:
Get-OwaVirtualDirectory | Select-Object Name, IdentityAfter running the rollback, users accessing https://mail.mhr.com.np/owa will see the classic Exchange login page again.
🚀 Next Steps – External Access with Web Application Proxy
Fantastic work! You now have Exchange OWA federated with ADFS. Users get a true SSO experience, and IT retains control. But right now, this only works inside the corporate network.
👉 Part 5 – External Access with Web Application Proxy
We’ll publish OWA securely to the internet using the ADFS Web Application Proxy (WAP), simulate a DMZ, and even enforce Multi‑Factor Authentication for external access.