After successfully installing Exchange Server 2019 in my environment, the next important step was activating it with a valid product key. Without activation, the server runs in a trial mode for 180 days. In this post, I’ll walk you through how I activated Exchange Server 2019 using PowerShell.
Step 1: Understanding Exchange Editions
Before activation, it’s important to know which edition of Exchange Server I was using. Exchange Server 2019 comes in two editions:
- Standard Edition – Allows up to 5 mounted mailbox databases.
- Enterprise Edition – Allows up to 100 mounted mailbox databases.
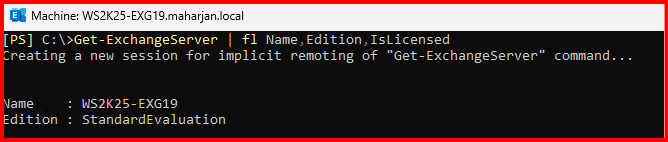
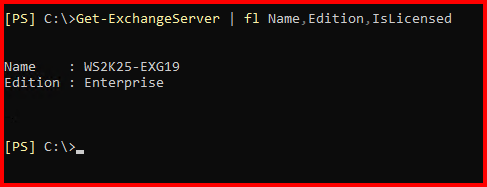
To check the current license status of my Exchange server, I used the following PowerShell command:
Get-ExchangeServer | fl Name,Edition,IsLicensedIf IsLicensed shows False, then activation is pending.
Step 2: Finding My Product Key
I made sure I had the correct 25-character product key for my edition. You can get this from your Volume Licensing Service Center (VLSC) or reseller. It looks like this: XXXXX-XXXXX-XXXXX-XXXXX-XXXXX
Step 3: Activating Exchange Server 2019 Using PowerShell
To activate the server, I launched the Exchange Management Shell and ran the following command:
Set-ExchangeServer -Identity "EXCH01" -ProductKey XXXXX-XXXXX-XXXXX-XXXXX-XXXXX
Replace
EXCH01with your server name and update the product key accordingly.
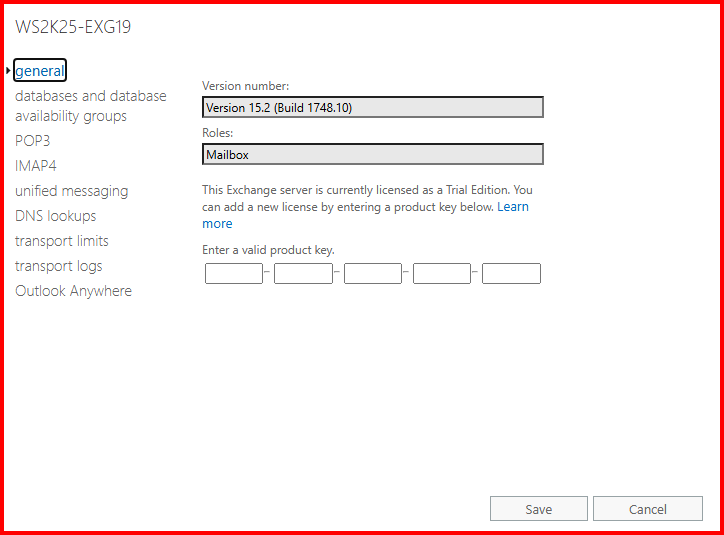
Alternatively, can activate via ECP Portal,

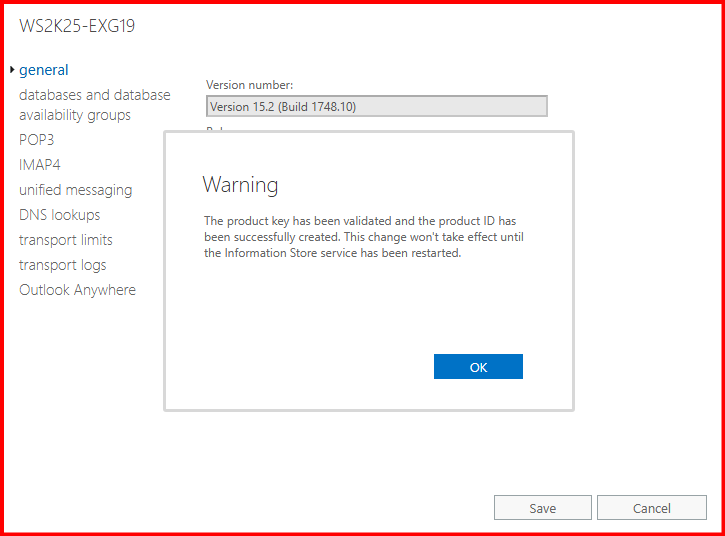
After entering the key, I restarted the Microsoft Exchange Information Store service to apply the license:
Restart-Service MSExchangeIS
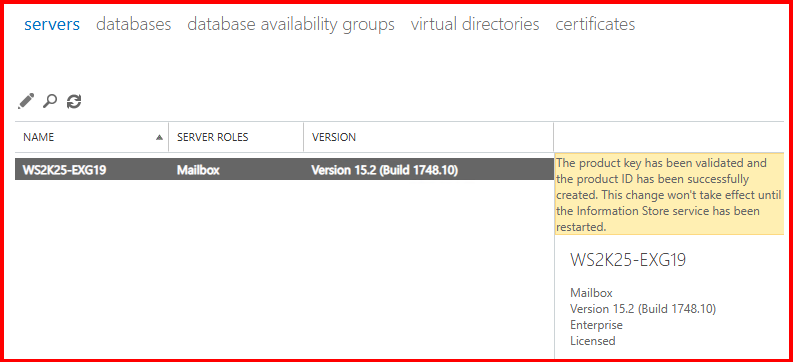
Step 4: Verifying Activation
To verify if the activation was successful, I re-ran: Get-ExchangeServer | fl Name,Edition,IsLicensed
Now, IsLicensed showed True, and the edition matched my product key (Standard or Enterprise).
Important Notes
- The activation is per server, not per organization.
- Once the product key is applied, you cannot downgrade the edition. You can, however, upgrade from Standard to Enterprise by reapplying the Enterprise key.
- Always ensure you’re applying the product key to the correct server, especially in environments with multiple Exchange servers.
Troubleshooting Tips
If you get any error while applying the product key, check the following:
- Run the Exchange Management Shell as Administrator.
- Make sure the product key is valid and not for a different version (e.g., 2016 or 2013).
- Ensure Exchange services are running before applying the key.
Conclusion
Activating Exchange Server 2019 is a straightforward but essential step to move out of evaluation mode. Using a simple PowerShell command, I was able to license my Exchange server and ensure it’s production-ready. I always recommend checking activation status post-installation to avoid surprises down the road.