Introduction
In our previous guide (Part 1), we laid the foundation – extending the schema, configuring the basic password settings (complexity, age, readers), setting AD permissions, and deploying the client.
This is Part 2, where we go beyond the basics. We’ll tackle the advanced GPO settings that add encryption, DSRM management, password history, custom account names, and post‑authentication actions.
I’ll guide you through each remaining policy with:
- Where to apply it (Domain Controllers, Workstations, or all endpoints).
- What happens when you enable it – the actual impact.
- Step‑by‑step configuration instructions.
- Best practice tips and security considerations.
maharjan.np (DC=maharjan,DC=np).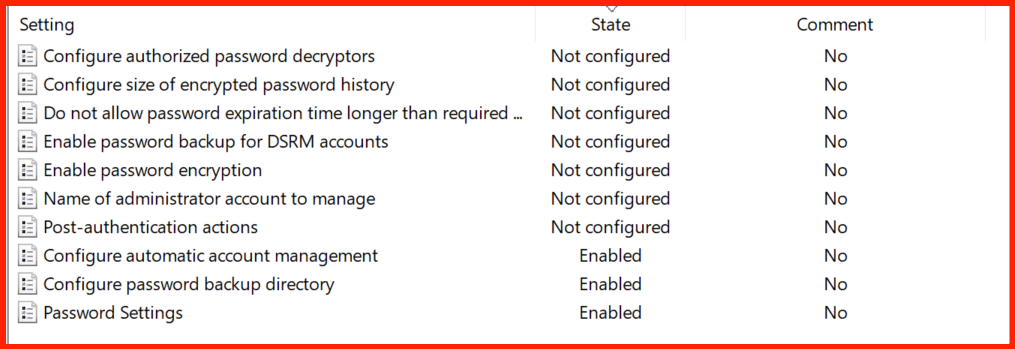
GPO Location & Recap
All LAPS policies are located under:
Edit these in the Group Policy Management Console (GPMC) on your domain controller. Ensure your GPO is linked to the OUs containing your target computers (e.g., Workstations, Servers, Domain Controllers).
Policies Already Covered in Part 1 (Recap)
✅ 1. Configure automatic account management
Status: Already Enabled in Part 1.
What it does: LAPS automatically rotates the password for the local administrator account (or a custom account) at the defined interval.
Impact: Ensures passwords are never stale. Prevents “password drift” if someone manually changes the admin password.
✅ 2. Configure password backup directory
Status: Already configured in Part 1 (e.g., OU=Workstations,DC=maharjan,DC=np).
What it does: Specifies the AD path where LAPS stores encrypted password attributes.
Impact: Passwords are backed up to the correct OU. If misconfigured, passwords won’t be stored.
Now let’s dive into the remaining advanced policies.
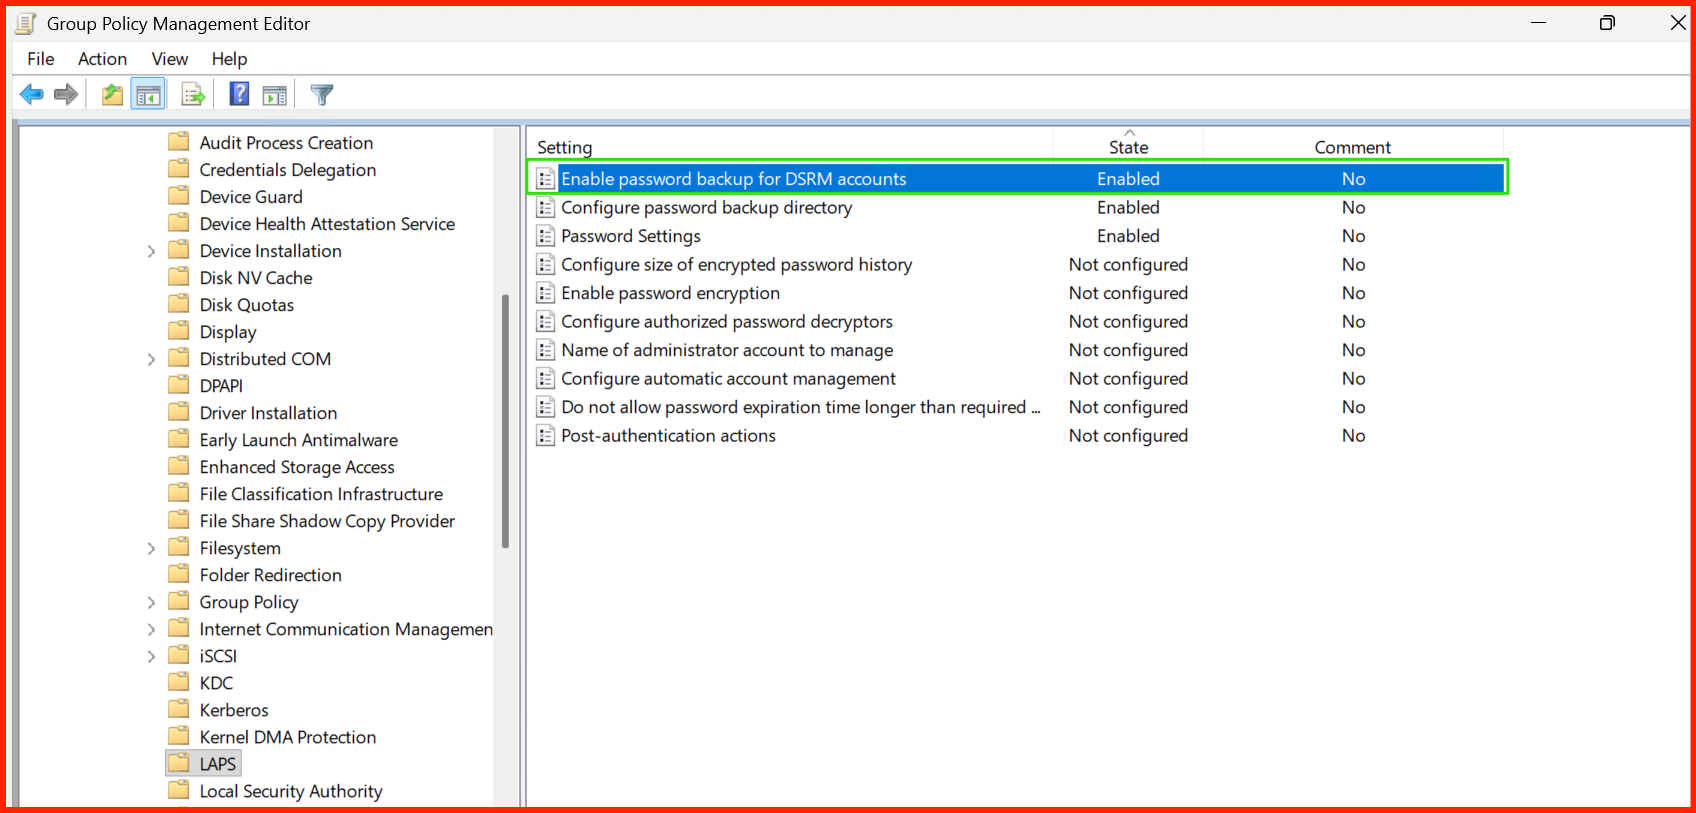
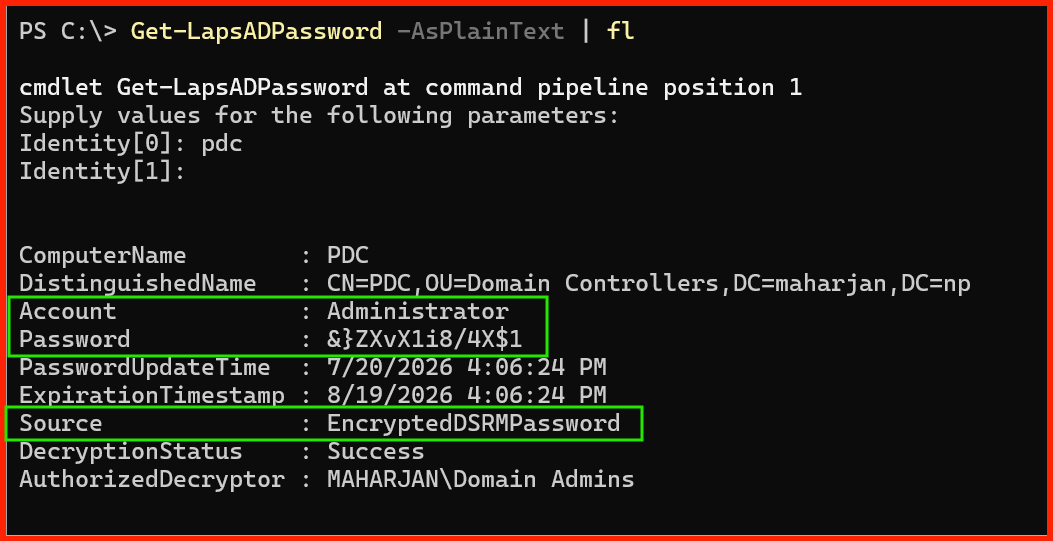
1. Enable password backup for DSRM accounts
Setting: Enable password backup for DSRM accounts
📌 Description
Directory Services Restore Mode (DSRM) is a special boot mode for Domain Controllers used for disaster recovery. This policy allows LAPS to manage the DSRM password on your DCs, ensuring it is unique, complex, and rotated regularly.
📍 Where to apply
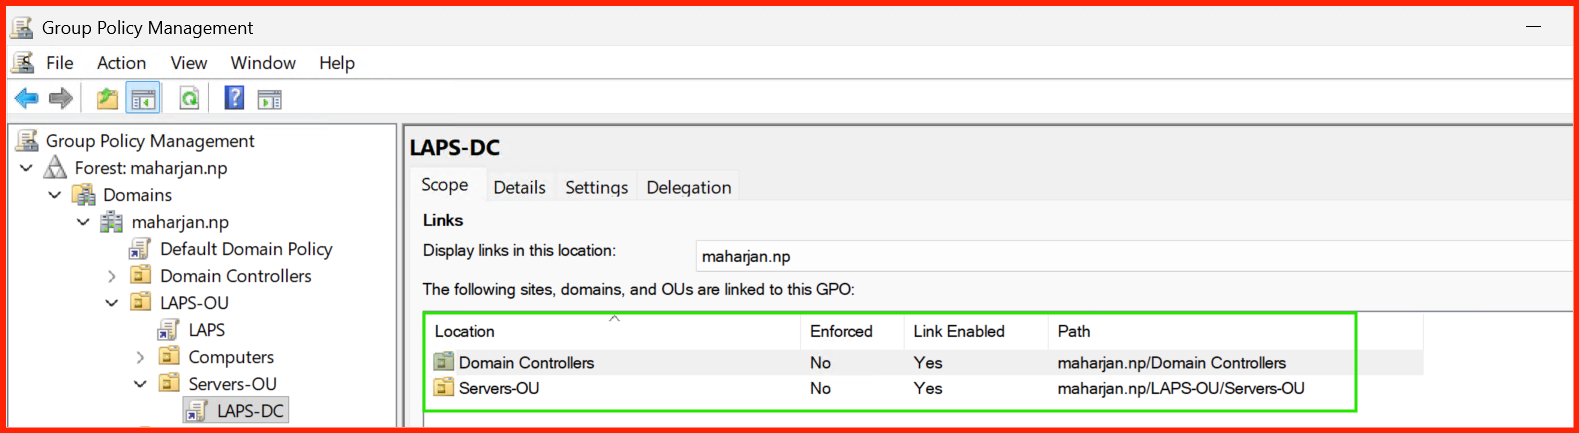
- Domain Controllers OU – this policy only affects DCs.
- If applied to workstations/servers, it is simply ignored.
⚡ Impact / What happens
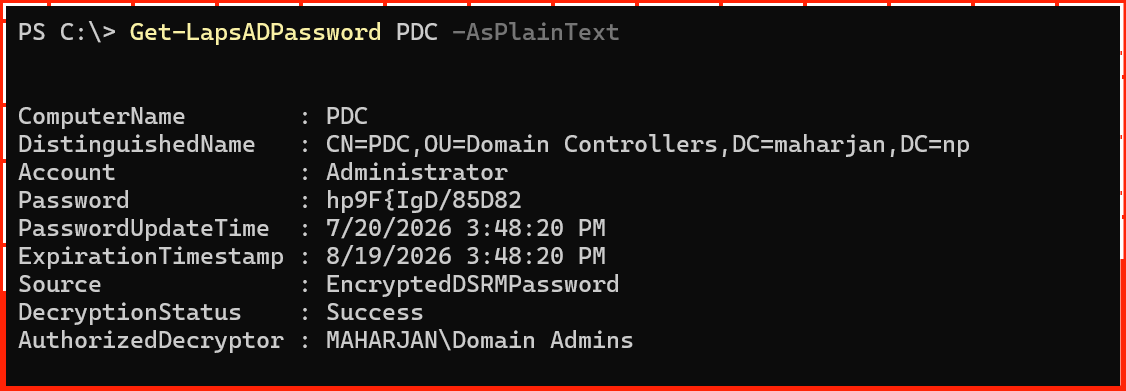
- LAPS generates a strong, unique DSRM password for each DC.
- The password is stored in AD under the computer object.
- When you need to boot into DSRM, you can retrieve the password using
Get-LapsADPassword. - Password rotation follows the same schedule as other LAPS‑managed accounts.
📝 Step-by-step configuration
- Open Group Policy Management Console (GPMC).
- Edit the GPO linked to your Domain Controllers OU.
- Navigate to:
Computer Configuration → Policies → Administrative Templates → System → LAPS - Double‑click Enable password backup for DSRM accounts.
- Select Enabled → Click OK.
- Run
gpupdate /forceon your DCs.
2. Configure size of encrypted password history
Setting: Configure size of encrypted password history
📌 Description
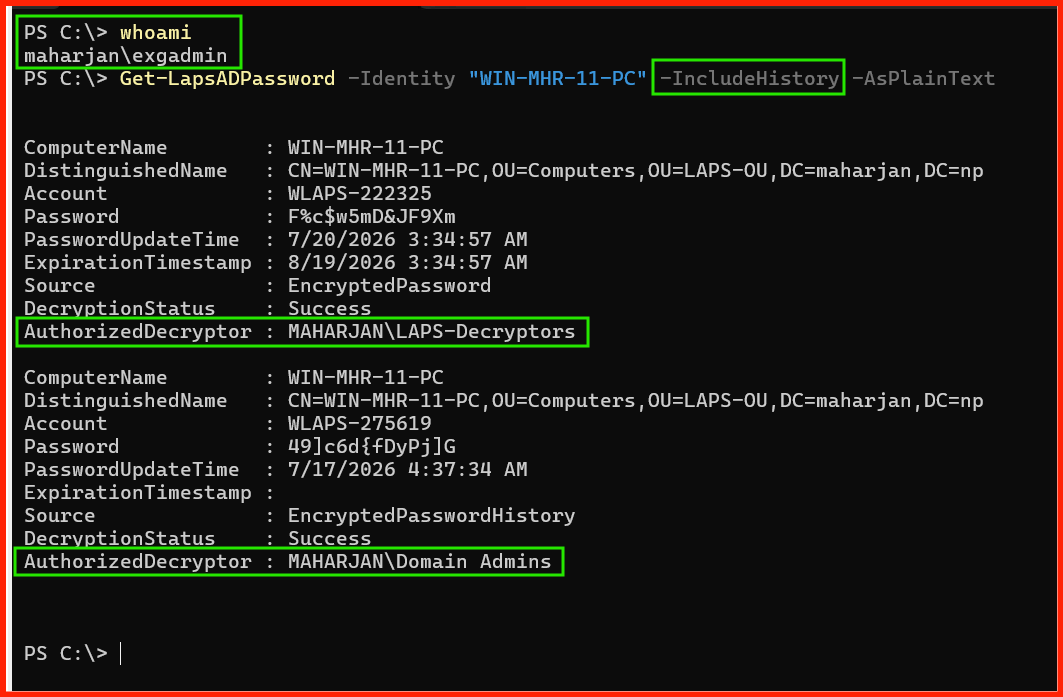
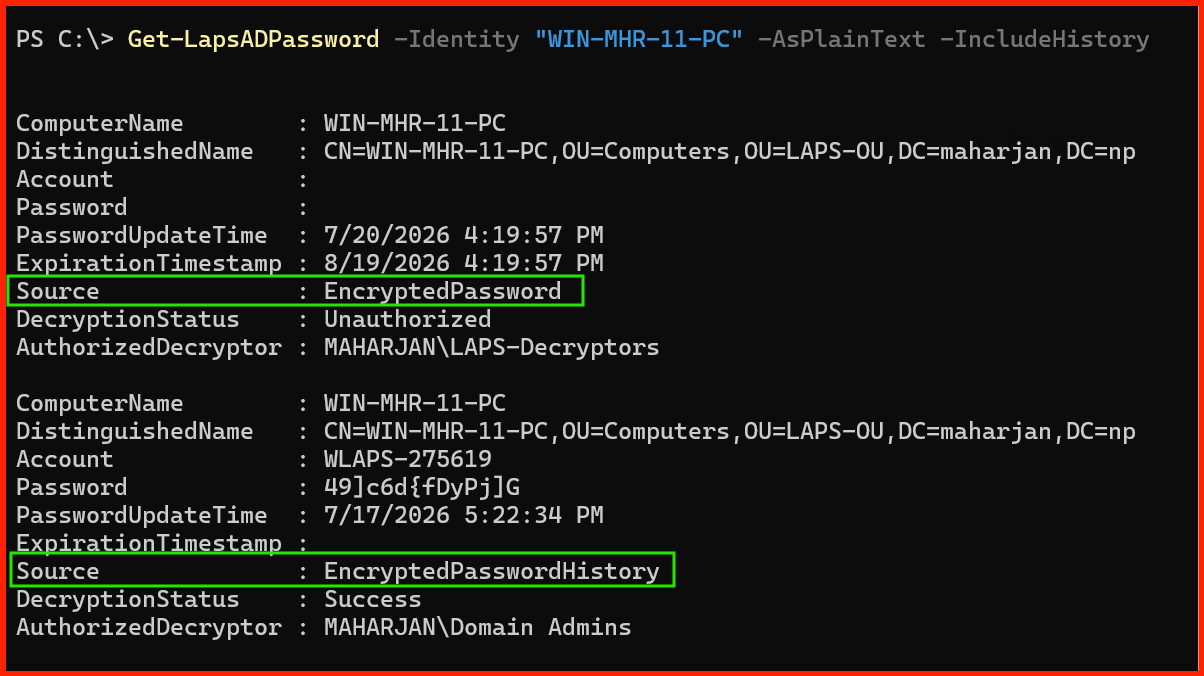
Defines how many previous passwords are stored in AD for each
computer. If set to 5, LAPS retains the last 5 encrypted passwords.
📍 Where to apply
- All endpoints – Workstations, Servers, and Domain Controllers.
- Apply at the domain level or to specific OUs.
⚡ Impact / What happens
- If a critical service breaks after a password rotation, you can retrieve an older password from the history to restore access.
- Increases AD attribute storage slightly (negligible for small histories).
- Only authorised decryptors can view the history.
5 or 10.
Avoid very large numbers (e.g., 100) to prevent AD bloat.📝 Step-by-step configuration
- Open GPMC and edit your LAPS GPO.
- Navigate to
Computer Configuration → Policies → Administrative Templates → System → LAPS. - Double‑click Configure size of encrypted password history.
- Select Enabled.
- In the Options box, enter a number (e.g.,
5). - Click OK.
- Run
gpupdate /forceon target machines.
Get-LapsADPassword -Identity "PC-001" -History -AsPlainText
to view the stored history.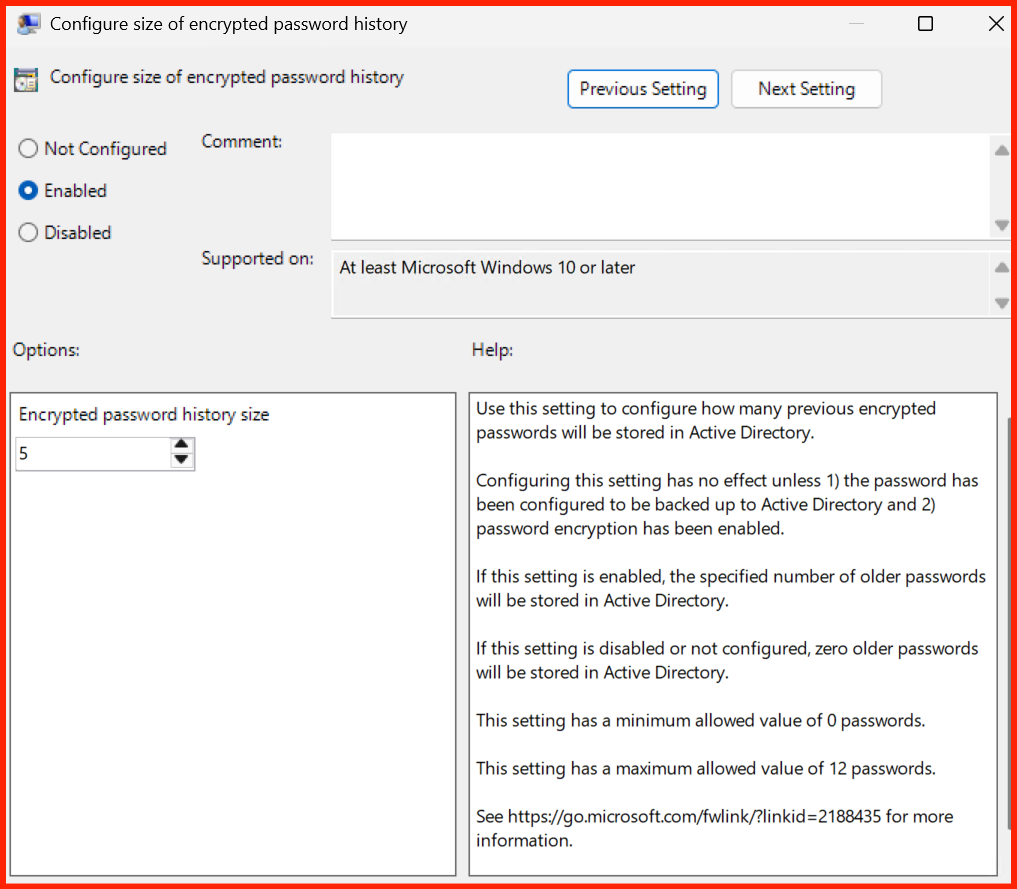
3. Enable password encryption & Configure authorized decryptors
Settings: Enable password encryption &
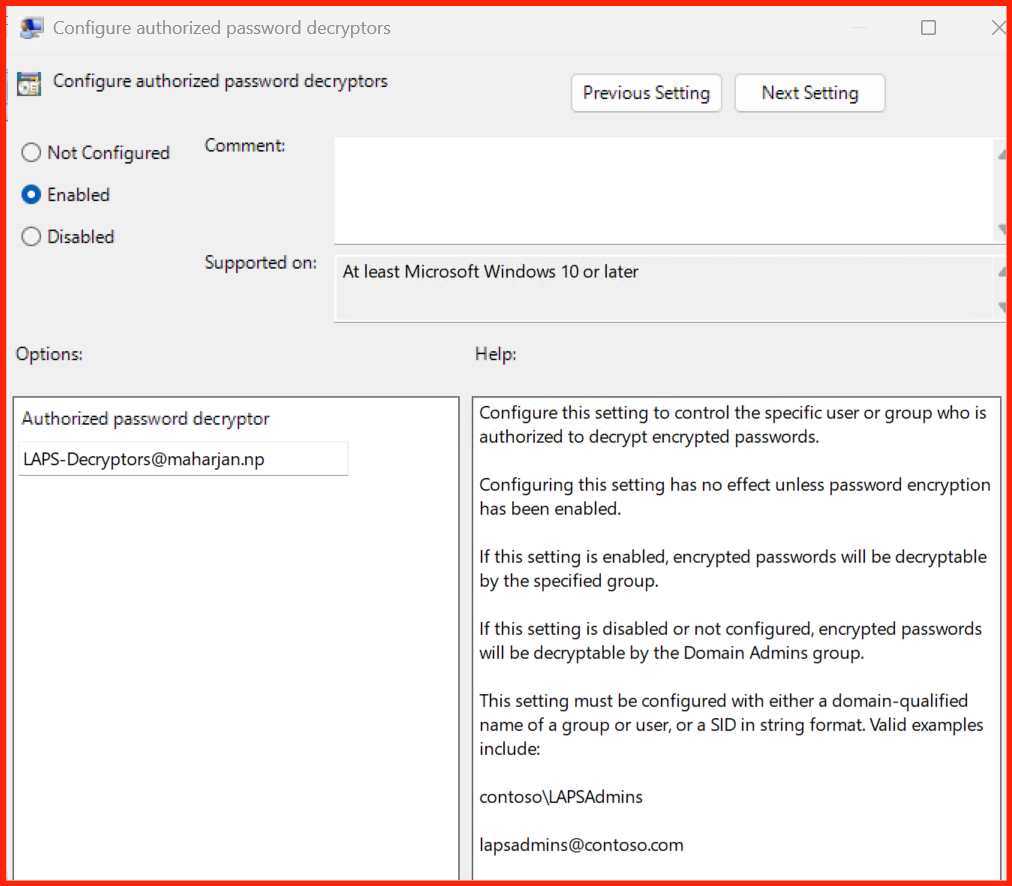
Configure authorized password decryptors
📌 Description
These two work together:
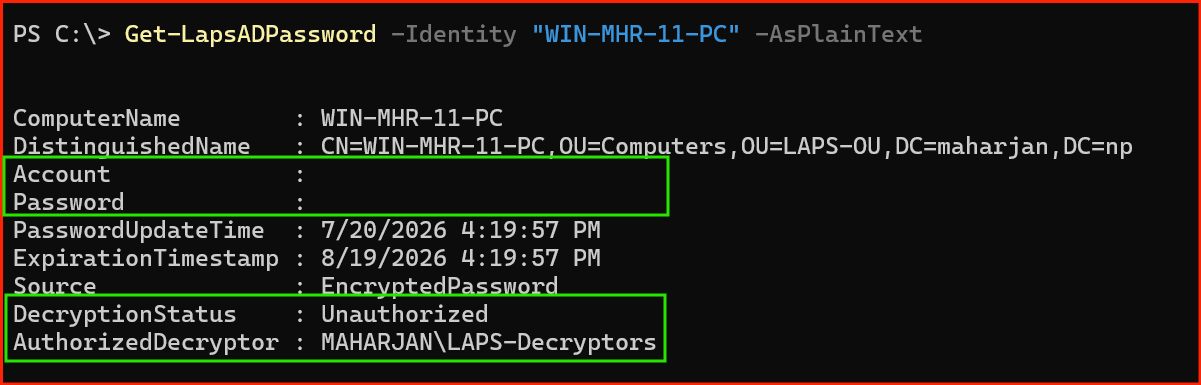
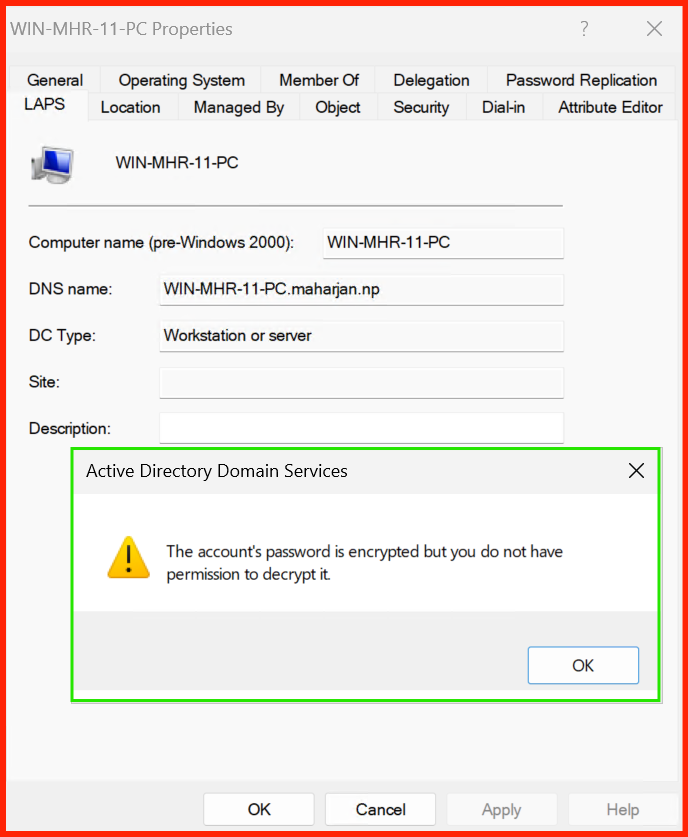
- Enable password encryption: Encrypts the password in AD using group‑based encryption – even if an attacker reads the AD attribute, they cannot decrypt it without the right permissions.
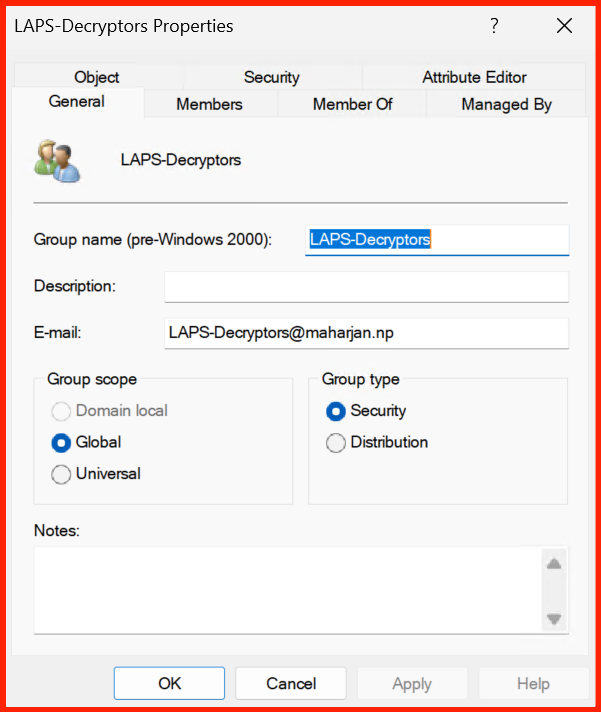
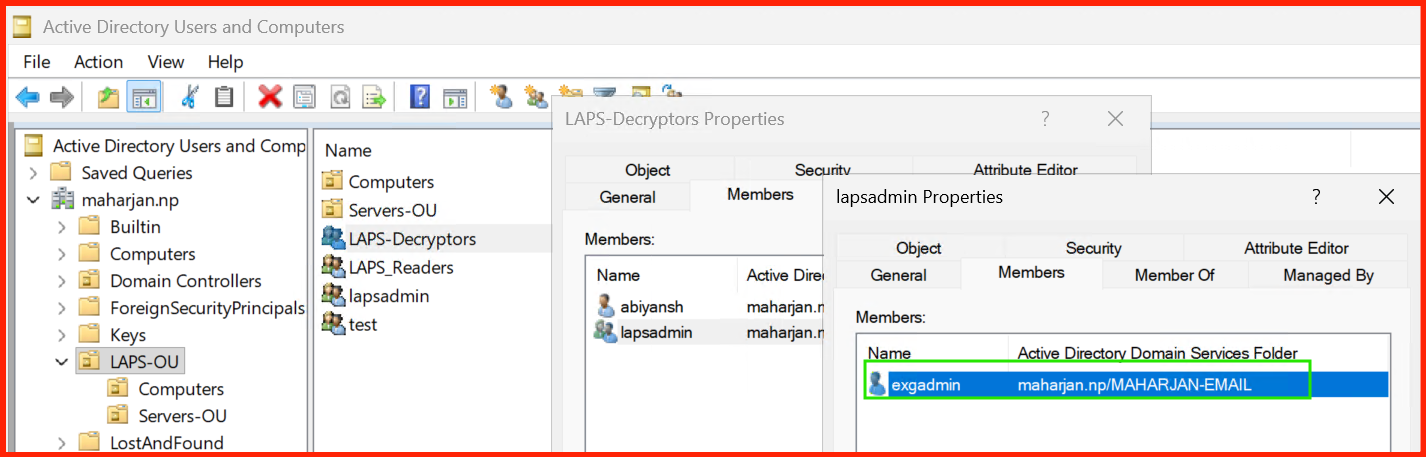
- Configure authorized password decryptors: Specifies which
security groups are allowed to decrypt the password. By default, only
Domain Adminscan decrypt. You can add a dedicated group (e.g.,LAPS_Decryptors) to separate “read” from “decrypt” permissions.
📍 Where to apply
- All endpoints – Workstations, Servers, and DCs.
- Requires that the decryptor groups exist in AD before applying.
⚡ Impact / What happens
- Passwords are stored encrypted – defence‑in‑depth.
- Only members of the specified decryptor groups can view plaintext passwords.
- Even if a user has
Readpermission on the computer object, they cannot decrypt the password unless they are a decryptor. - If no decryptors are configured, only
Domain Adminscan decrypt.
📝 Step-by-step configuration
- Open GPMC and edit your LAPS GPO.
- Navigate to
Computer Configuration → Policies → Administrative Templates → System → LAPS. -
First, enable encryption:
Double‑click Enable password encryption → Select Enabled → OK. -
Then, configure decryptors:
Double‑click Configure authorized password decryptors → Select Enabled. - In the Options box, add your security groups (e.g.,
DOMAIN\LAPS_Decryptors; DOMAIN\Domain Admins). - Click OK.
- Run
gpupdate /forceon target machines.
Get-ItemProperty -Path "HKLM:\SOFTWARE\Microsoft\Windows\CurrentVersion\Policies\LAPS" | Select-Object ADPasswordEncryptionEnabled, ADPasswordEncryptionPrincipal
to confirm settings.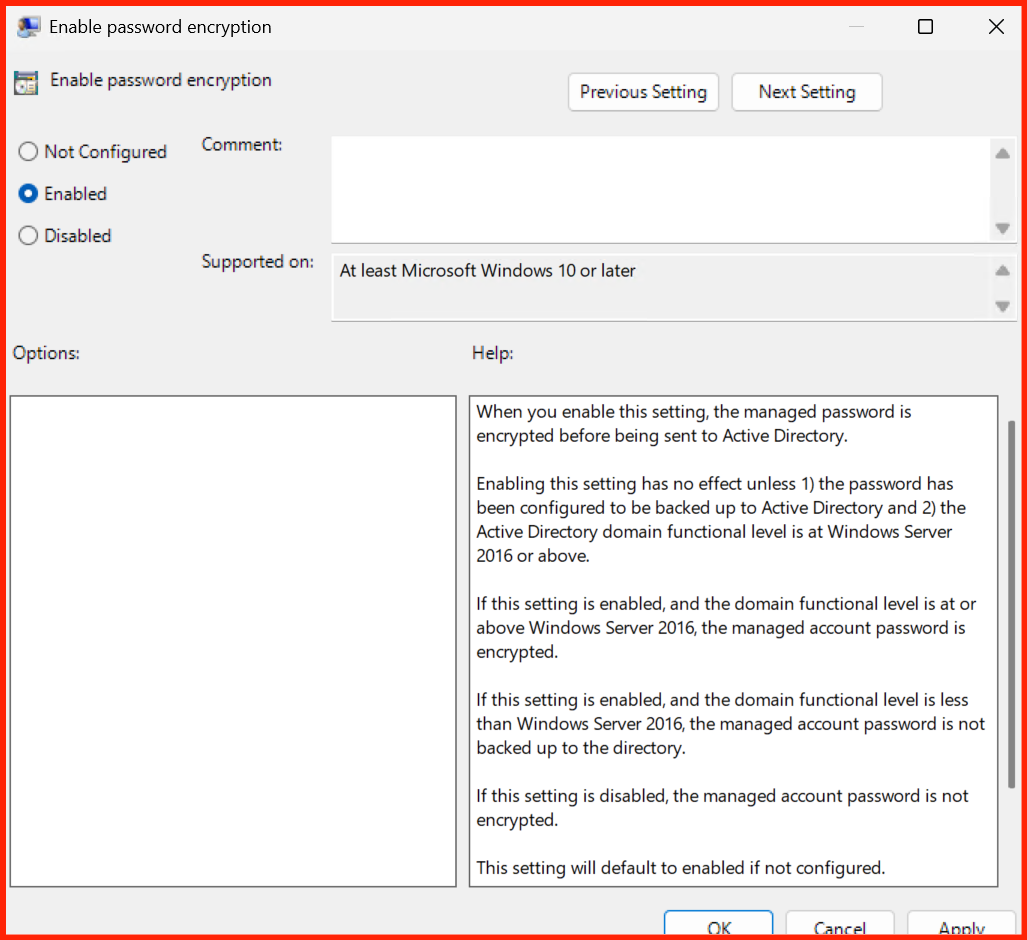

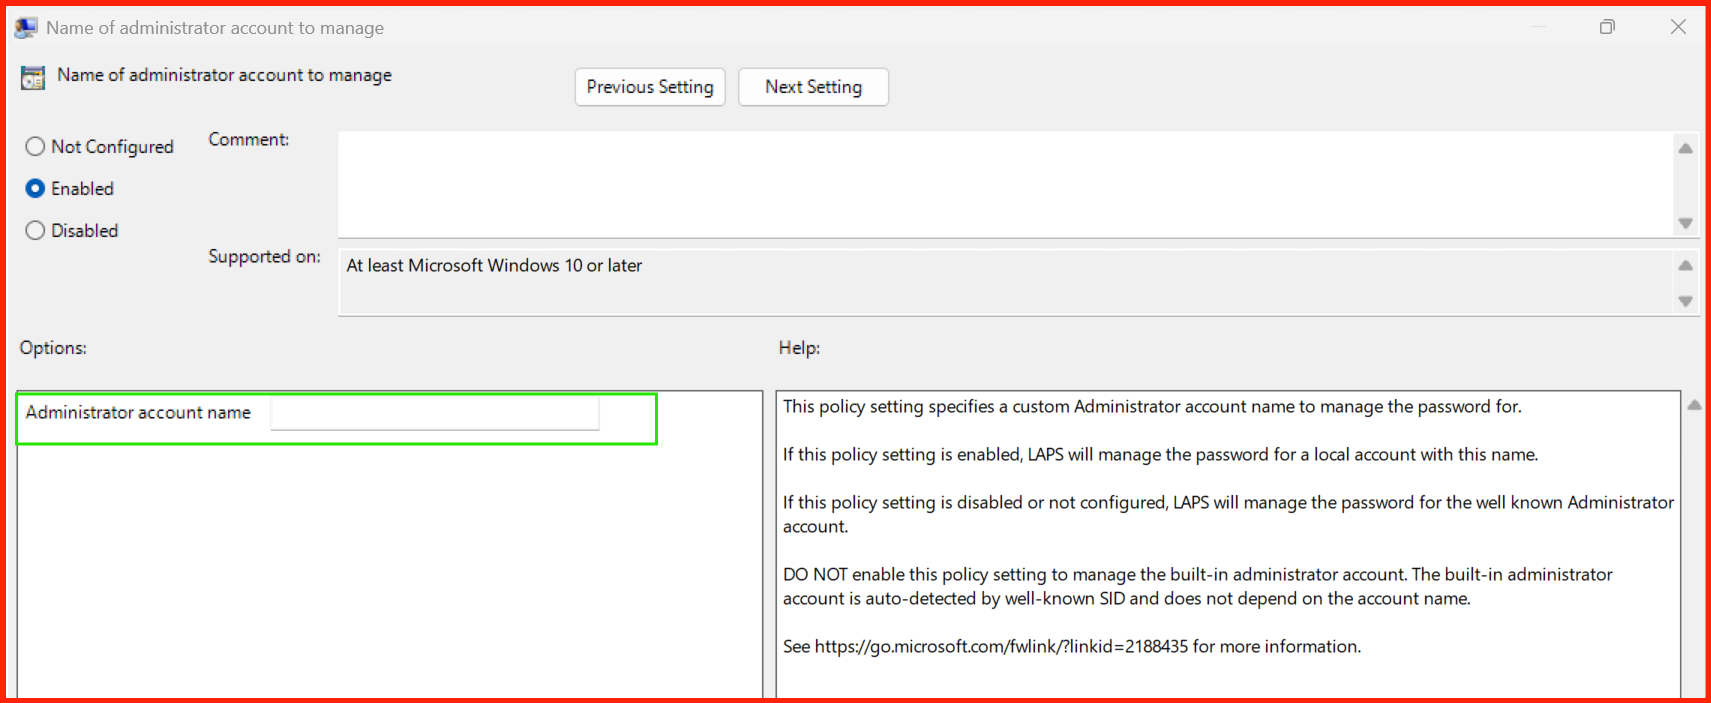
4. Name of administrator account to manage
Setting: Name of administrator account to manage
📌 Description
By default, LAPS manages the built‑in Administrator account.
This policy lets you specify a custom local administrator account
name (e.g., LocalAdmin, Internal_IT_Admin).
📍 Where to apply
- All endpoints – Workstations, Servers, and DCs (though DCs use domain admin accounts, so this is primarily for workstations/servers).
⚡ Impact / What happens
- LAPS will manage the specified account instead of the built‑in Administrator.
- If the account does not exist, LAPS will not create it automatically (unless you pair it with a startup script).
- You must ensure the account exists on all target machines before applying this policy, or the password rotation will fail.
Wks_Admin) using Group Policy Preferences, then point
LAPS to that name.📝 Step-by-step configuration
- Open GPMC and edit your LAPS GPO.
- Navigate to
Computer Configuration → Policies → Administrative Templates → System → LAPS. - Double‑click Name of administrator account to manage.
- Select Enabled.
- In the Options box, type the exact username (e.g.,
LocalAdmin). - Click OK.
- Run
gpupdate /forceon target machines.
5. Do not allow password expiration time longer than required
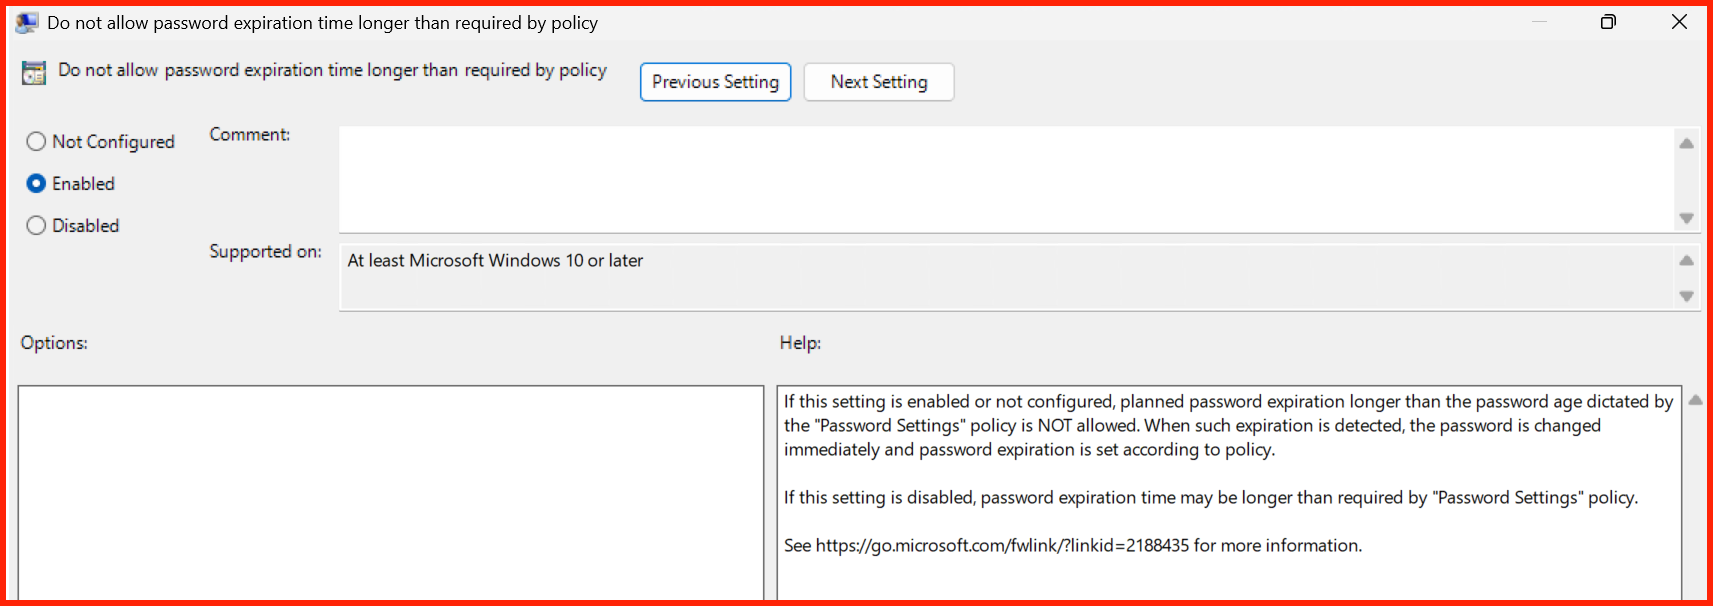
Setting: Do not allow password expiration time longer than required by policy
📌 Description
This policy caps the maximum password age that can be set on a computer. If enabled, LAPS will not allow a password to have an expiration date beyond what is specified in the Password Settings policy (e.g., 30 days).
📍 Where to apply
- All endpoints – Workstations, Servers, and DCs.
⚡ Impact / What happens
- Prevents accidental or intentional extension of the rotation interval.
- Enforces strict password rotation – no exceptions.
- If an admin manually tries to extend the password age, LAPS will override it at the next policy refresh.
📝 Step-by-step configuration
- Open GPMC and edit your LAPS GPO.
- Navigate to
Computer Configuration → Policies → Administrative Templates → System → LAPS. - Double‑click Do not allow password expiration time longer than required by policy.
- Select Enabled → Click OK.
- Run
gpupdate /forceon target machines.
6. Post‑authentication actions
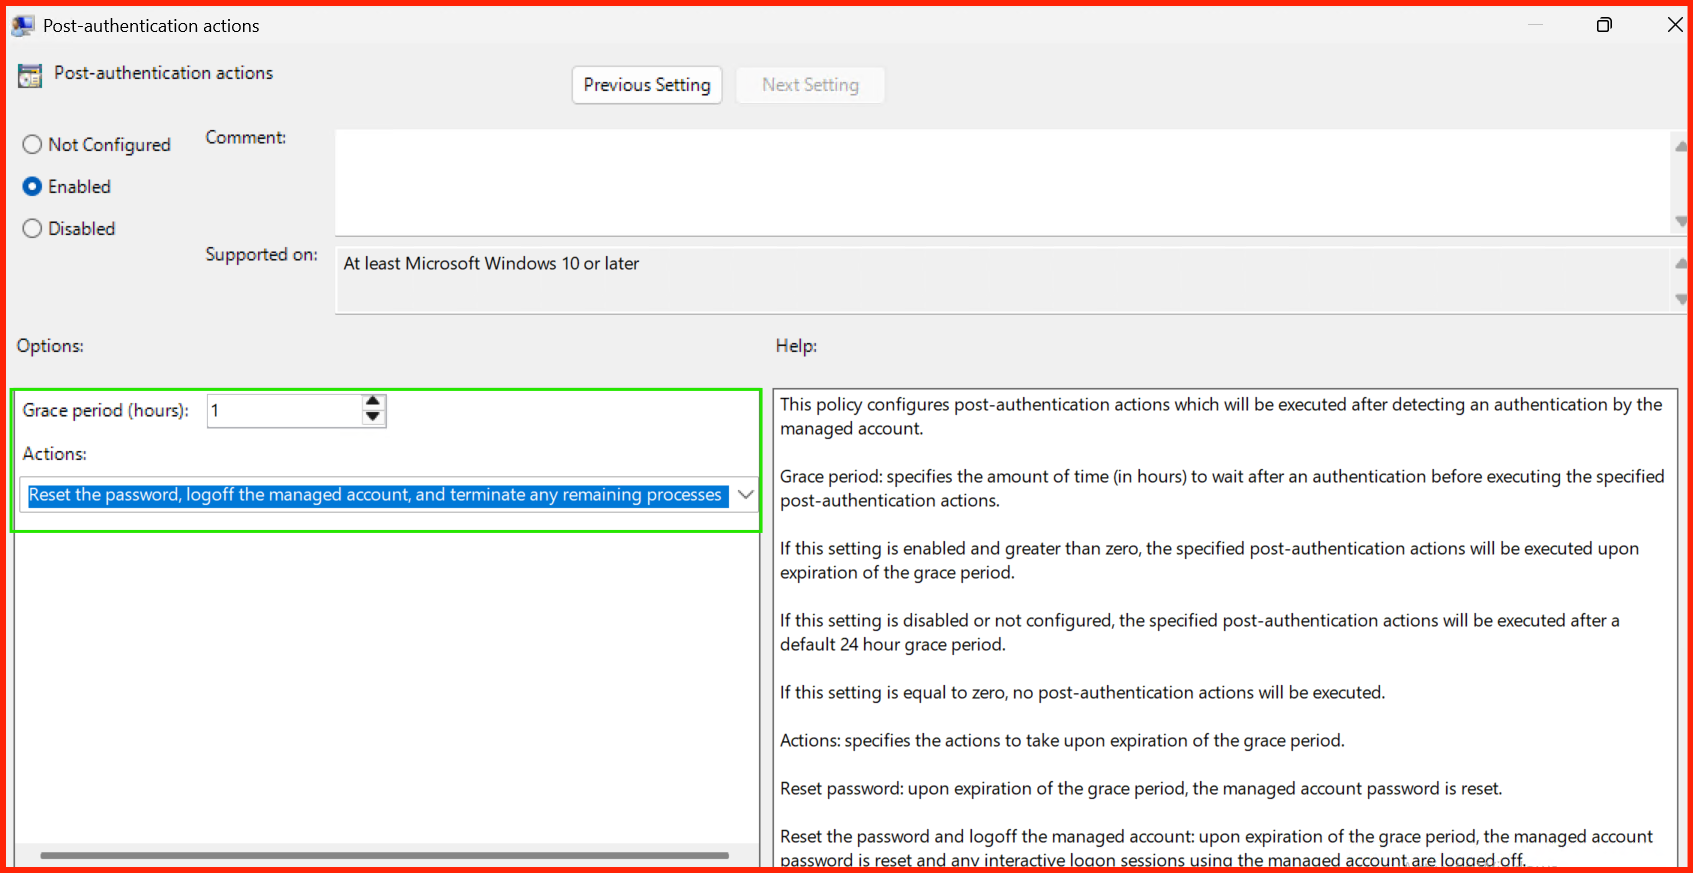
Setting: Post-authentication actions
📌 Description
This defines what happens after the local admin password is used to authenticate a user (interactive logon or network authentication). You can:
- Expire password immediately after use – forces a rotation on the next scheduled interval (or immediately if the password age policy allows).
- Run a custom script – e.g., log the event to a SIEM, or trigger an immediate reset.
📍 Where to apply
- High‑security endpoints – e.g., break‑glass workstations, critical servers, domain controllers (use with caution).
- Not recommended for general‑purpose workstations (too frequent rotations).
⚡ Impact / What happens
- Makes the password effectively one‑time‑use.
- If a user logs in with the LAPS password, LAPS immediately schedules a rotation.
- Massively reduces the risk of credential replay and lateral movement.
- Can cause disruption if not properly communicated – ensure helpdesk is aware.
📝 Step-by-step configuration
- Open GPMC and edit your LAPS GPO.
- Navigate to
Computer Configuration → Policies → Administrative Templates → System → LAPS. - Double‑click Post-authentication actions.
- Select Enabled.
- In the Options box, select Expire password immediately after use (or configure a custom script).
- Click OK.
- Run
gpupdate /forceon target machines.
Testing & Verification
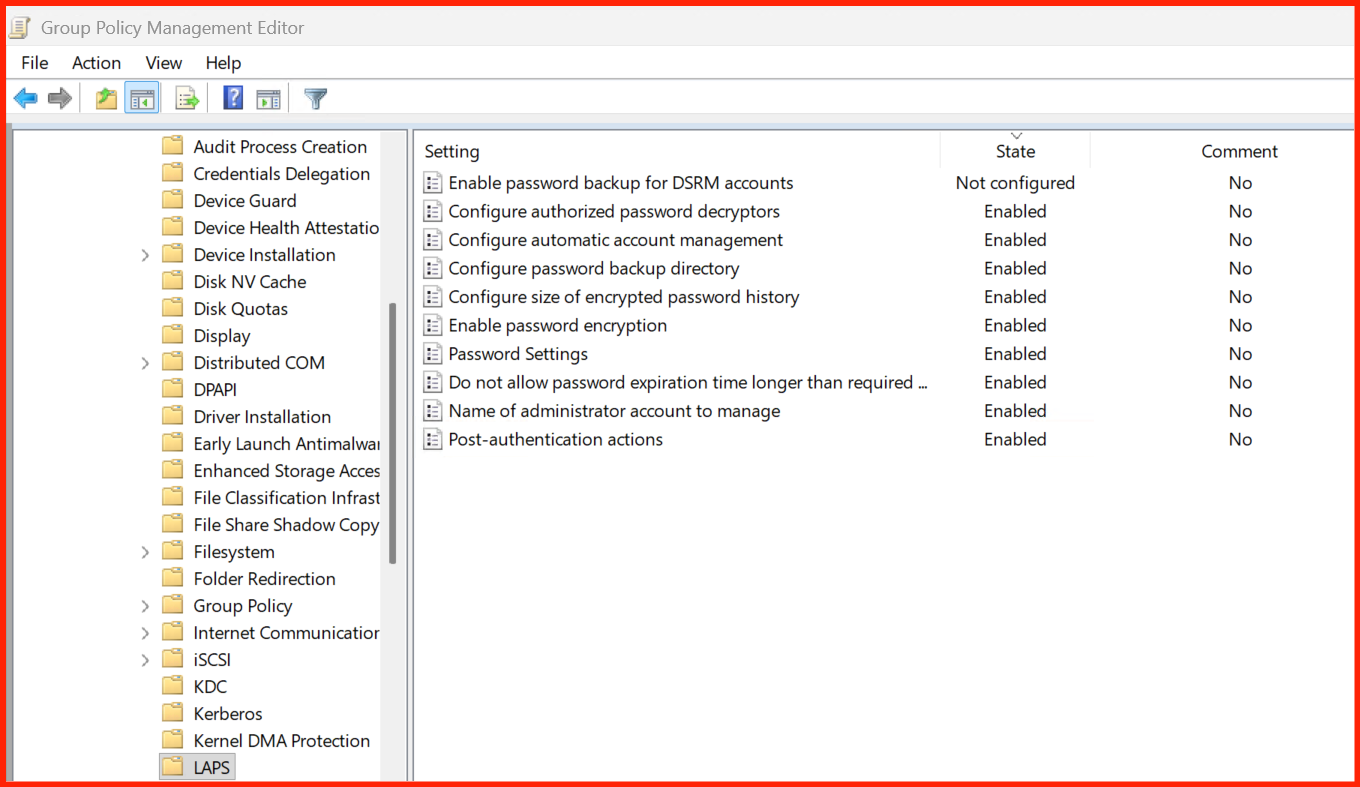
After applying all advanced policies, run gpupdate /force on your
clients and DCs. Then use the following PowerShell commands to verify everything.
Conclusion
With this deep‑dive, you have now mastered every LAPS Group Policy setting available in Windows Server 2025. You’ve configured:
- DSRM backup – securing Domain Controllers’ recovery passwords.
- Password history – a safety net for service disruptions.
- Encryption & decryptors – defence‑in‑depth and least privilege.
- Custom admin account – aligning with your naming convention.
- Expiration cap – enforcing strict rotation discipline.
- Post‑authentication actions – one‑time‑use passwords for high‑security endpoints.
Each policy adds a layer of security. When combined, your local administrator password management becomes one of the most robust in your organisation.
Happy securing! 🚀