Managing the Microsoft Teams Approvals App: A Complete Step-by-Step IT Guide
The Approvals app in Microsoft Teams serves as a vital hub to seamlessly create, track, and manage signatures or task sign-offs directly inside chats and collaboration channels. However, maximizing its efficiency requires structured administration—from standard deployment and white-labeling underlying environments to executing clean enterprise blocking rules if your organization relies on external compliance engines.
Stage 1: Deployment & The End-User Experience
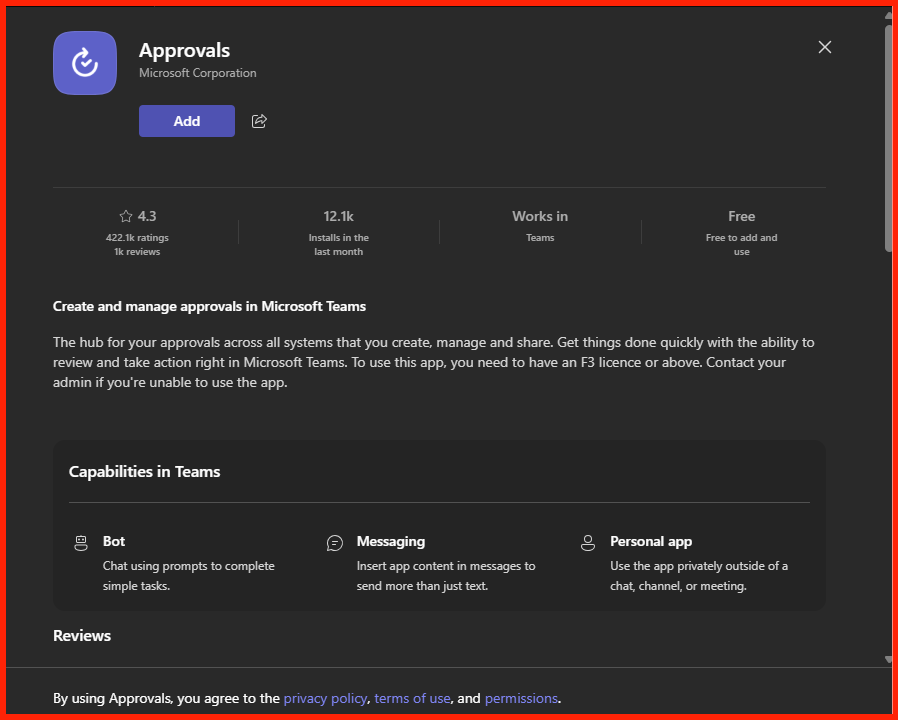
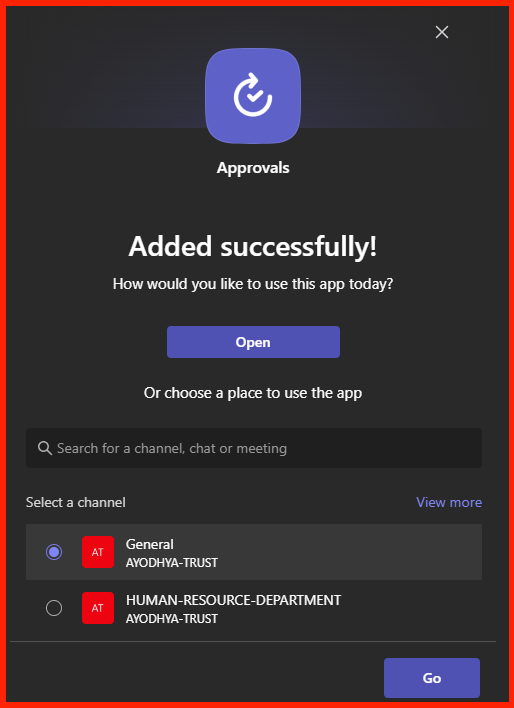
When configuring the app, users have the flexibility to target its presence into tailored groups or distinct localized channel ecosystems, making contextual approval tracking simple.
Step 1.1: Navigating the Dashboard & Creating a Request
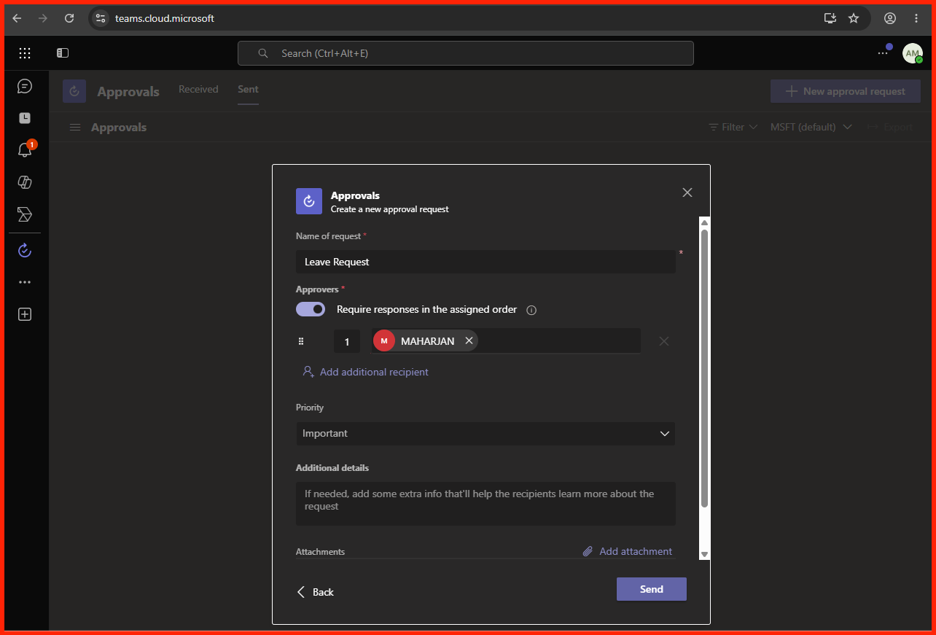
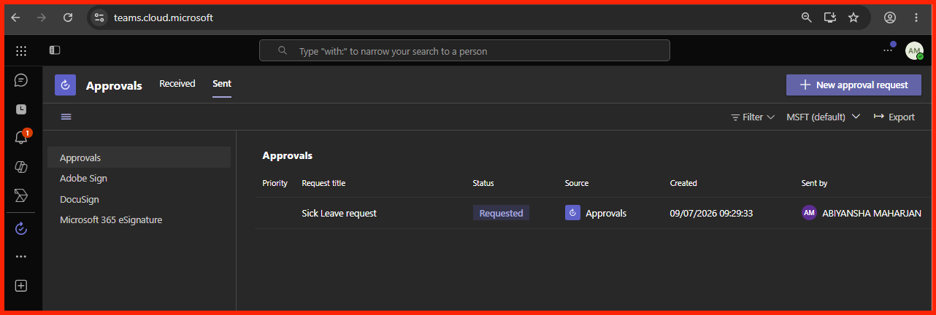
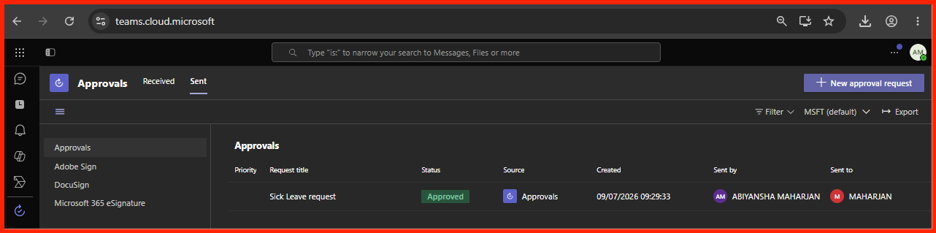
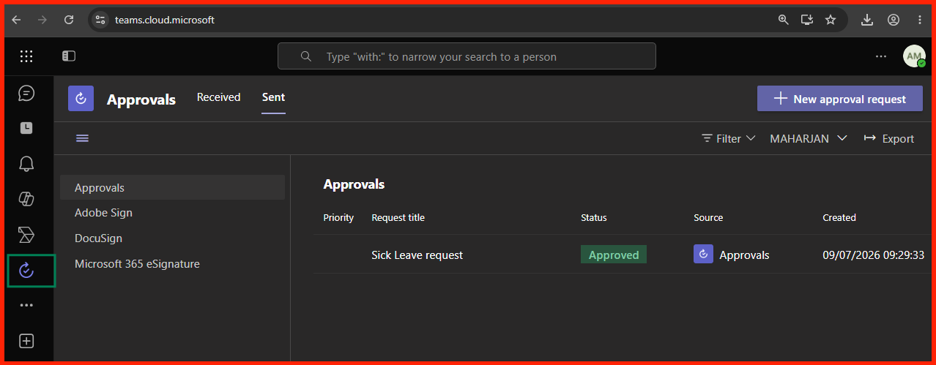
Once deployed, end-users interact with an intuitive core tracking dashboard cleanly split between incoming tasks and outgoing items. Creating a brand new request opens a streamlined, descriptive sidebar panel.
Step 1.2: Dynamic Status Tracking and Documentation Export
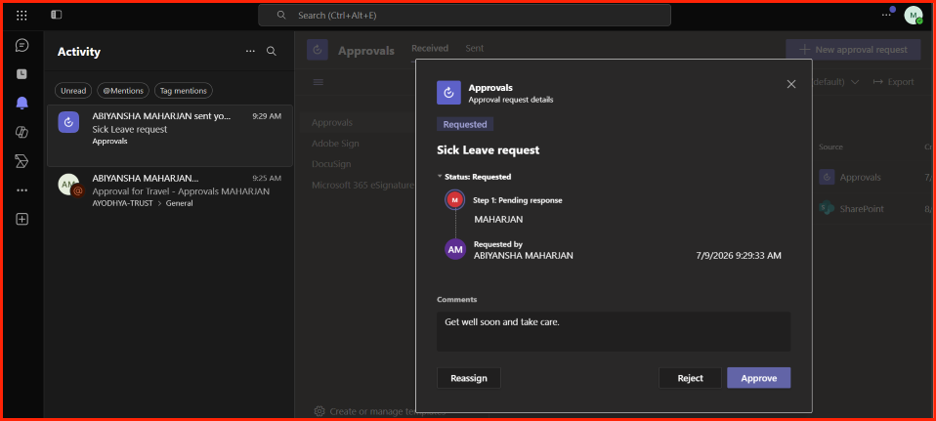
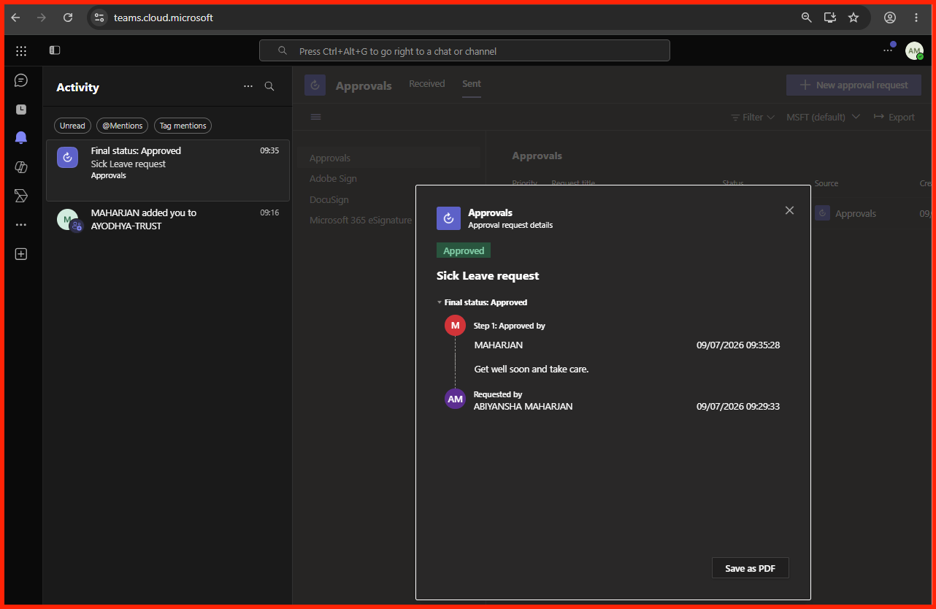
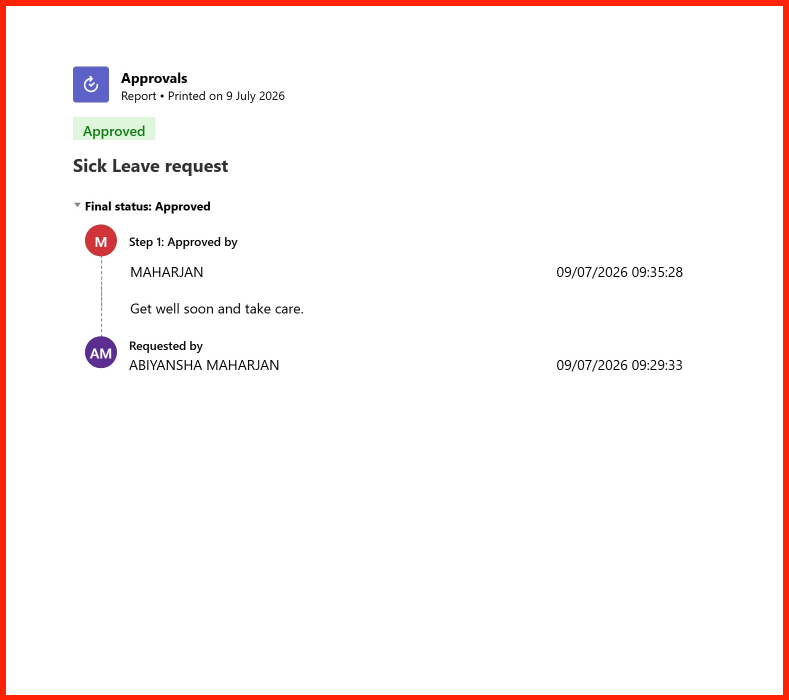
After submission, updates cascade down in real time. Managers can dynamically access action buttons (Approve, Reject, or Reassign), while the platform records precise data trails that can be exported out as compliance-ready PDFs.
Stage 2: Customizing the Power Platform Backend Environment
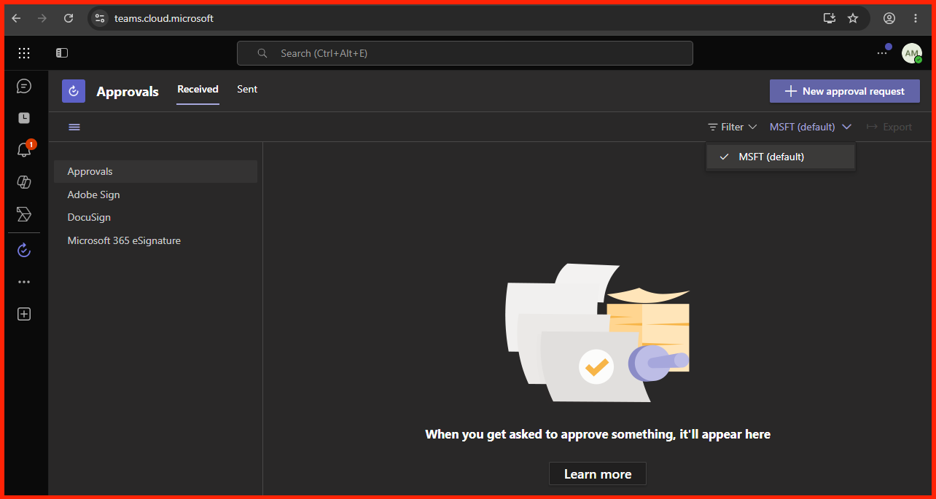
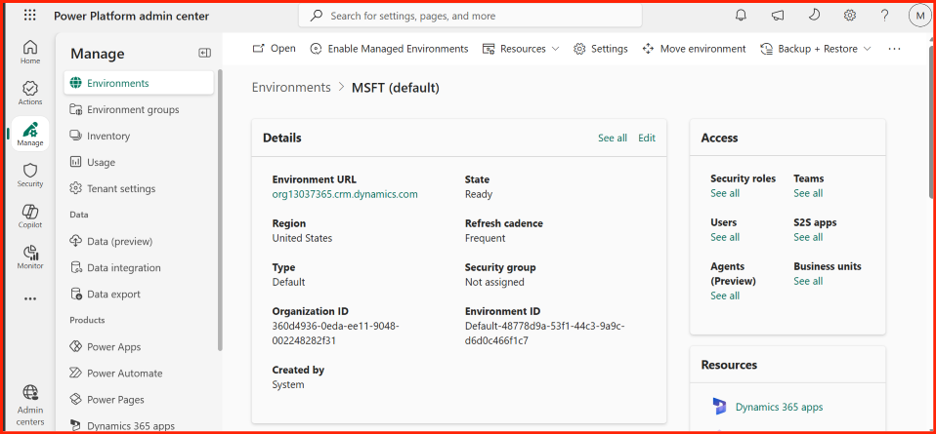
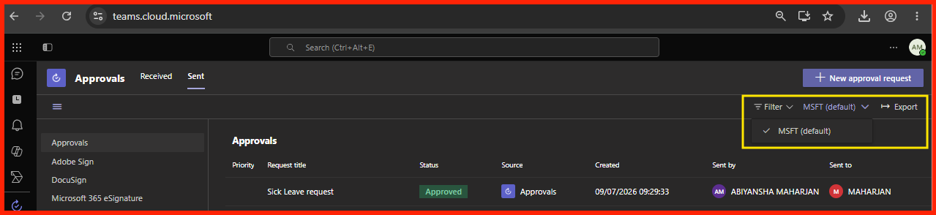
A common point of confusion for teams is encountering an environment filter selection box tagged with a generic label like MSFT (default).
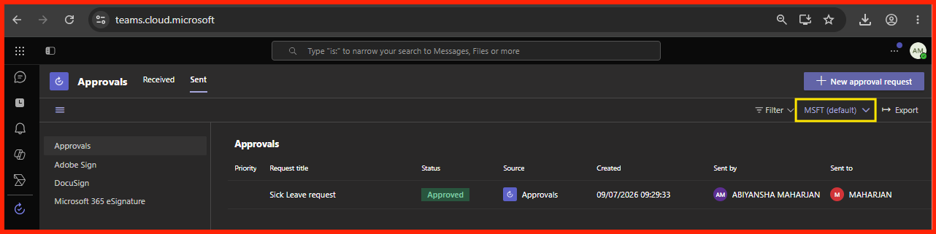
This occurs because the Approvals app relies completely on Microsoft Power Automate and Dataverse behind the scenes. Fortunately, this name can be securely altered to match your internal organization name.
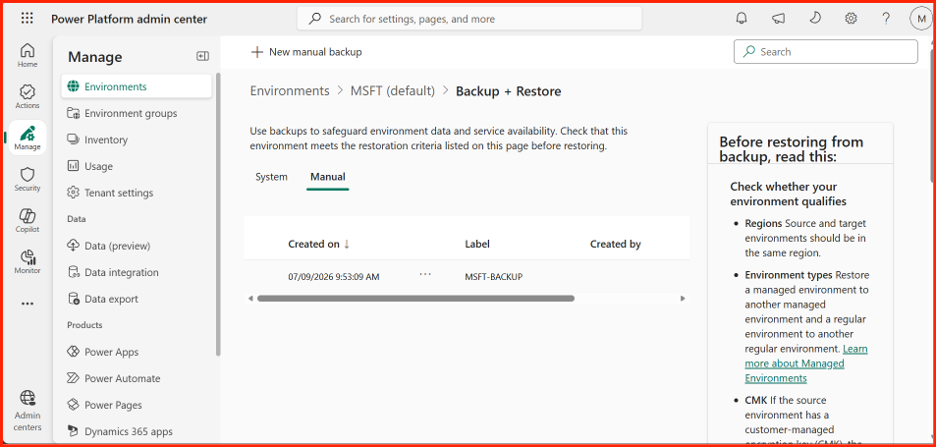
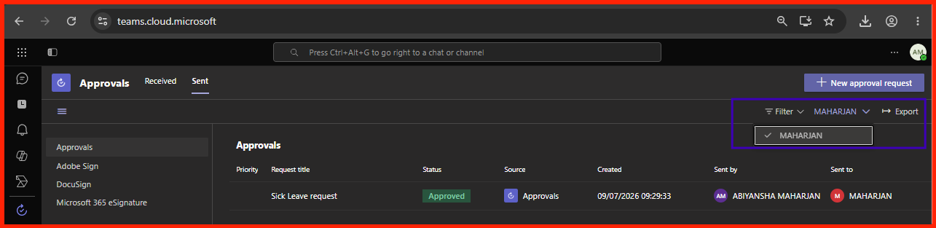
Altering this display title is a cosmetic configuration. It will not break active automations, separate integrations, or corrupt data fields. We highly recommend updating this to reduce confusion among end-users who may not recognize the term ‘MSFT’.
Step-by-Step Instructions to White-Label Your Workspace Environment:
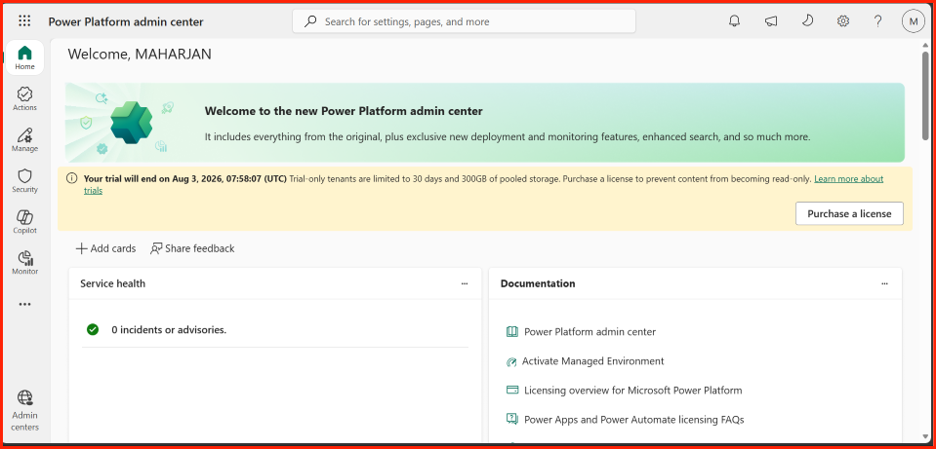
- Access Management: Log in to the Power Platform Admin Center using global or tenant admin permissions.
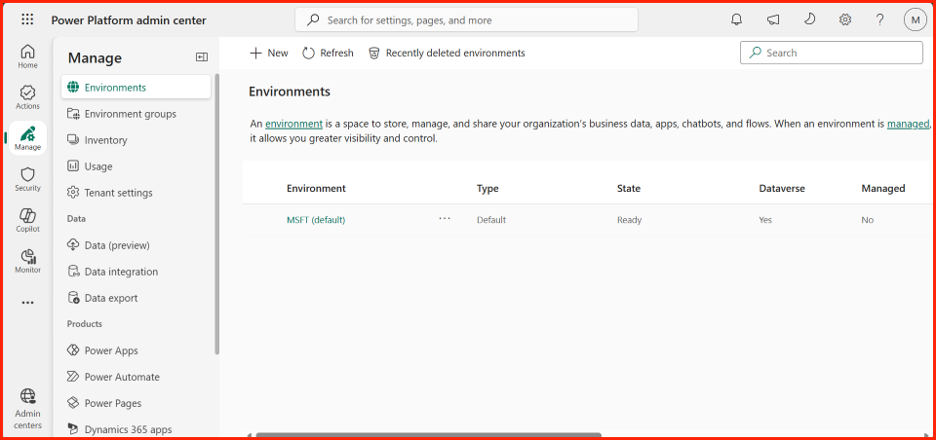
- Open Environments List: Expand the navigation tools on the left-side panel and click into Environments.
- Identify Default Root: Highlight the database entry labeled explicitly as
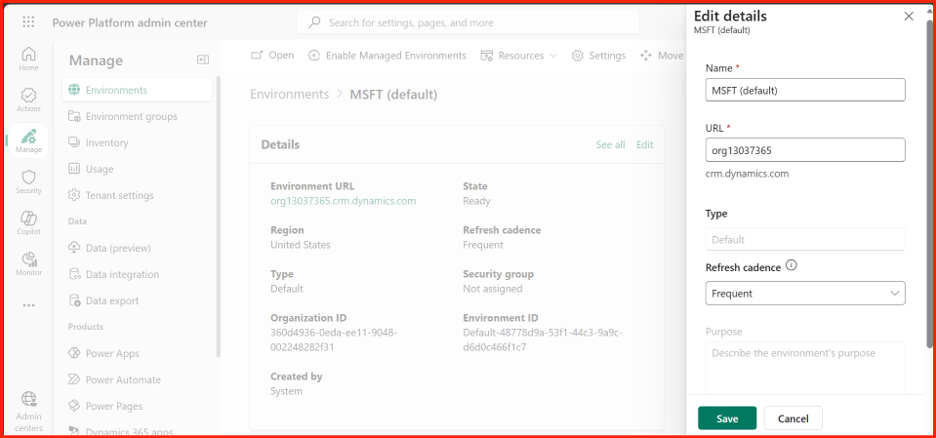
Defaultunder the environment type column. - Trigger Editing Panel: Click the Edit action button located on the top navigation rule-set menu banner.
- Apply Brand Name: Delete the legacy
MSFT (default)phrase and type in a clean, professional string (e.g.,[Your Company] Productivity Hub). - Commit Changes: Click Save at the bottom of the flyout options panel.
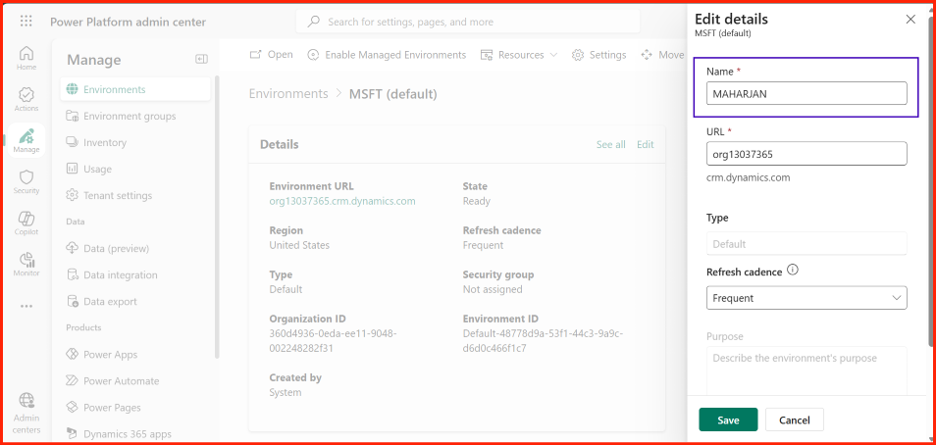
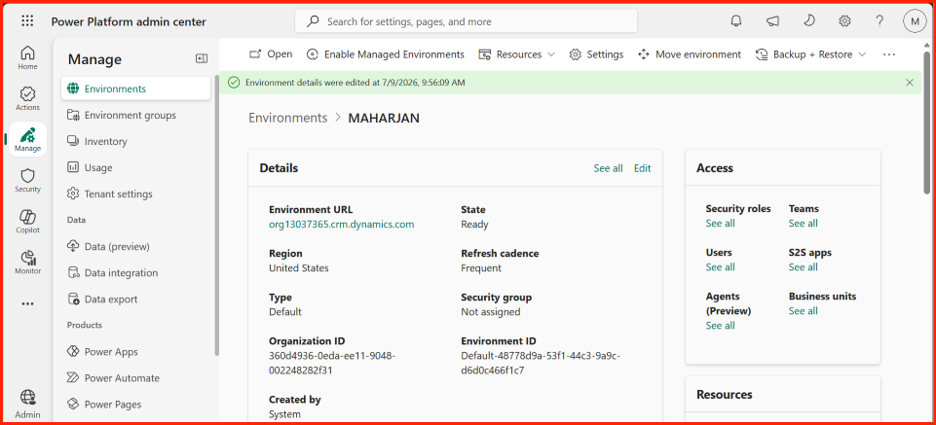
While backend system database writes are handled instantly by the Power Platform API engine, it can take anywhere from 10 minutes to 2 hours to cleanly reflect in the Teams frontend application client.
Stage 3: Restricting, Disabling, and Blocking the App Org-Wide
If your enterprise utilizes specialized third-party compliance software (like Workday or ServiceNow) to govern organizational sign-offs, keeping Approvals open inside Teams may create fragmented data silos.
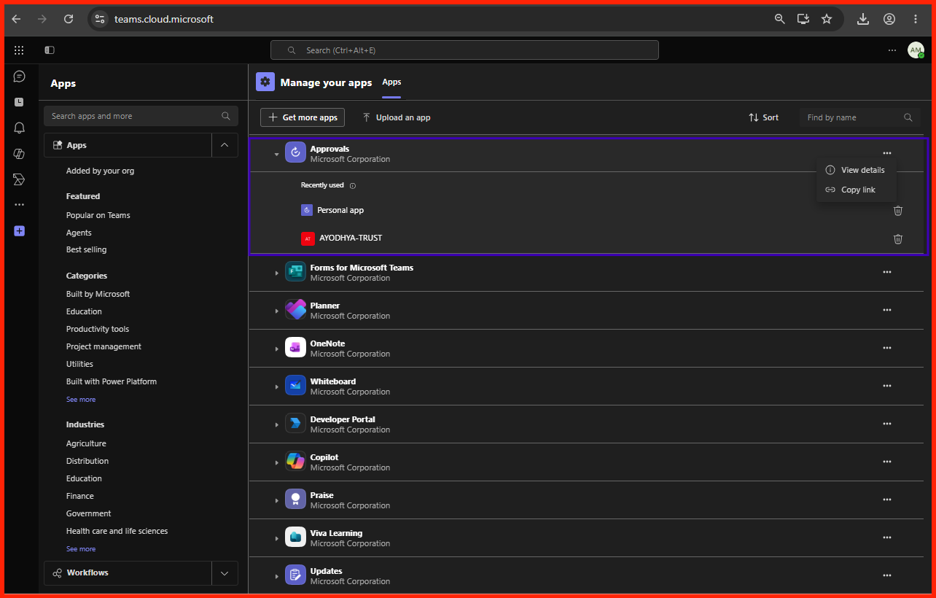
Step 3.1: Enforcing an Organizational Block via Teams Admin Center
To eliminate visibility and stop users from discovering or installing the module in chats and channel panels, admins should enforce a tenant-wide lock block rule.
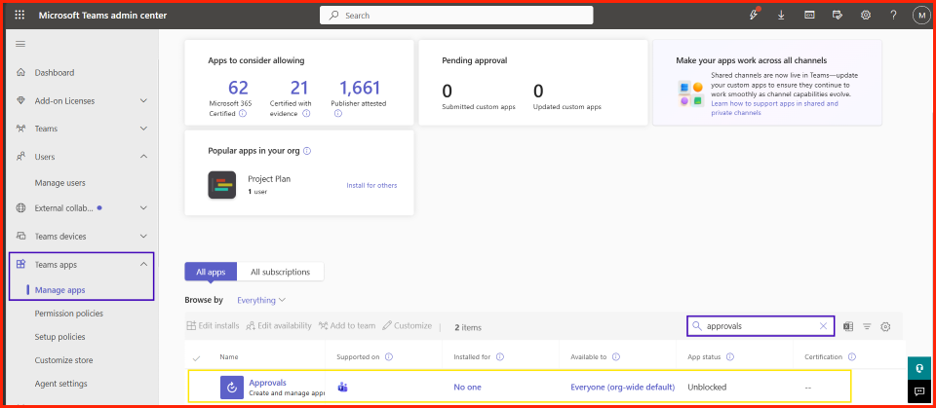
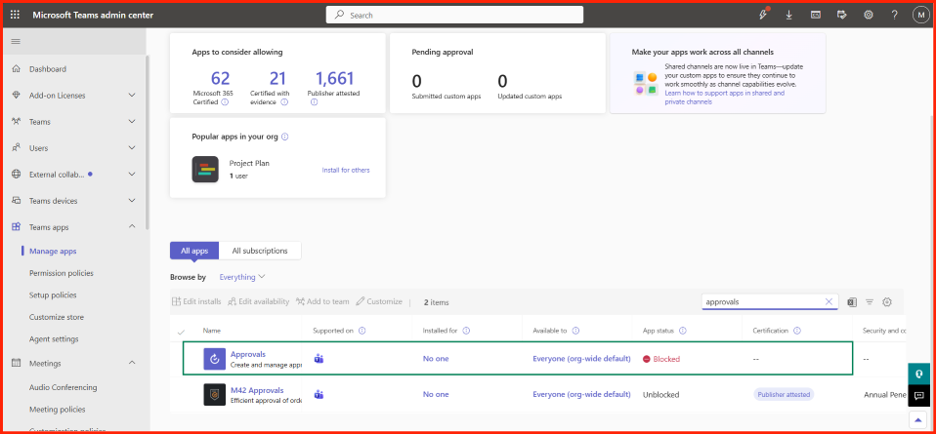
- Navigate to the Microsoft Teams Admin Center.
- In the sidebar menu panel, expand Teams apps and select Manage apps.
- Utilize the search text box field to look up
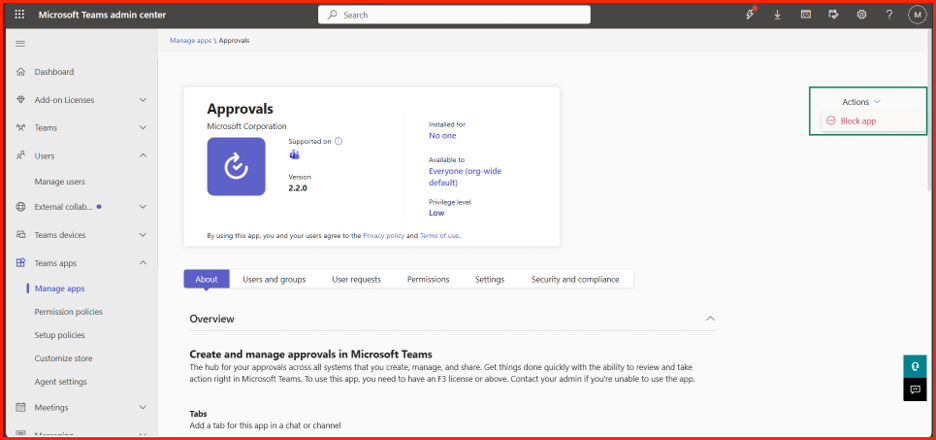
Approvals. - Click directly on the Approvals listing item entry (published by Microsoft Corporation).
- Expand the Actions menu bar container drop-down and choose Block app (or switch the status toggle to Disabled).
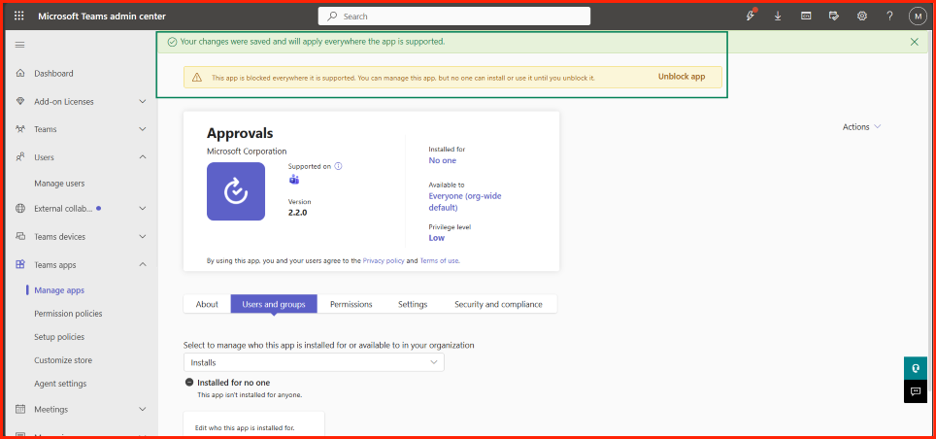
- Accept and validate the confirmation prompts displayed on screen.
Step 3.2: Replicating End-Client Search and Visibility States
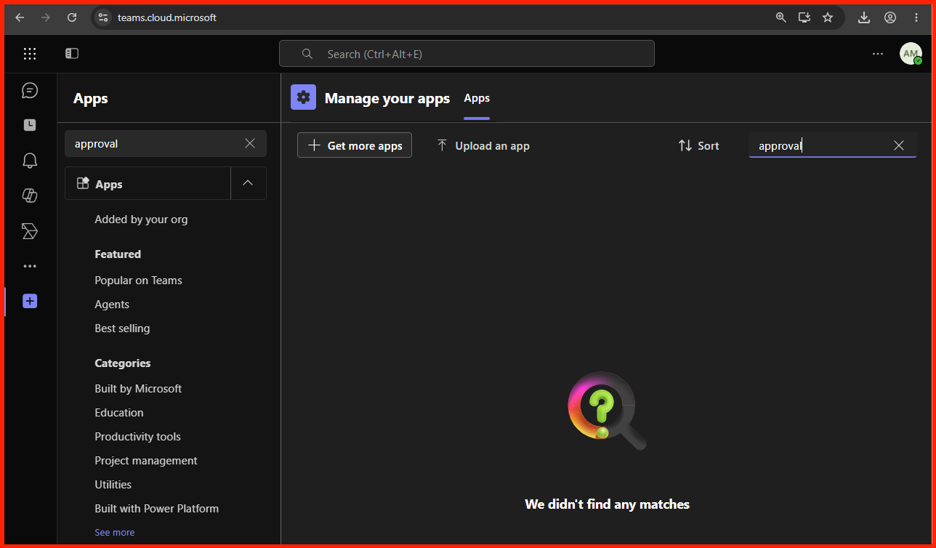
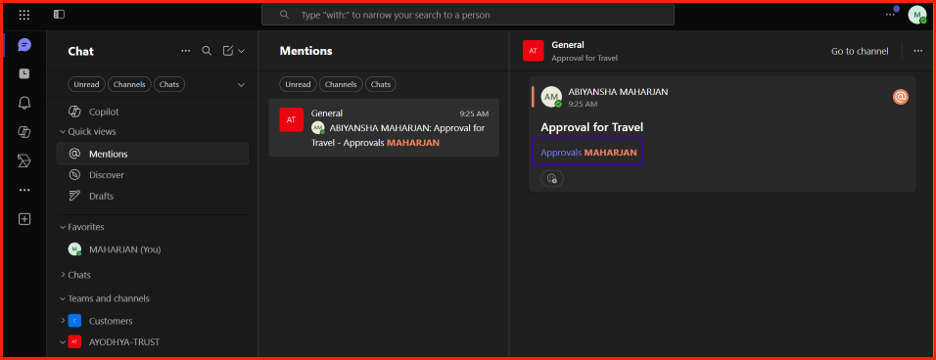
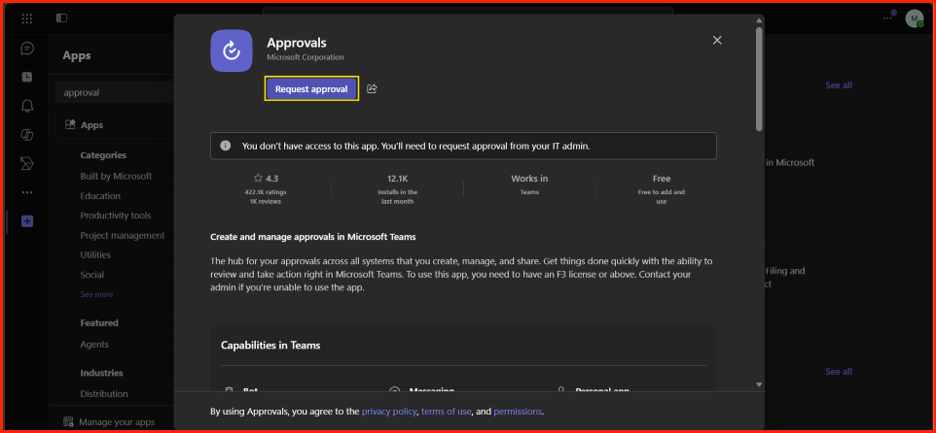
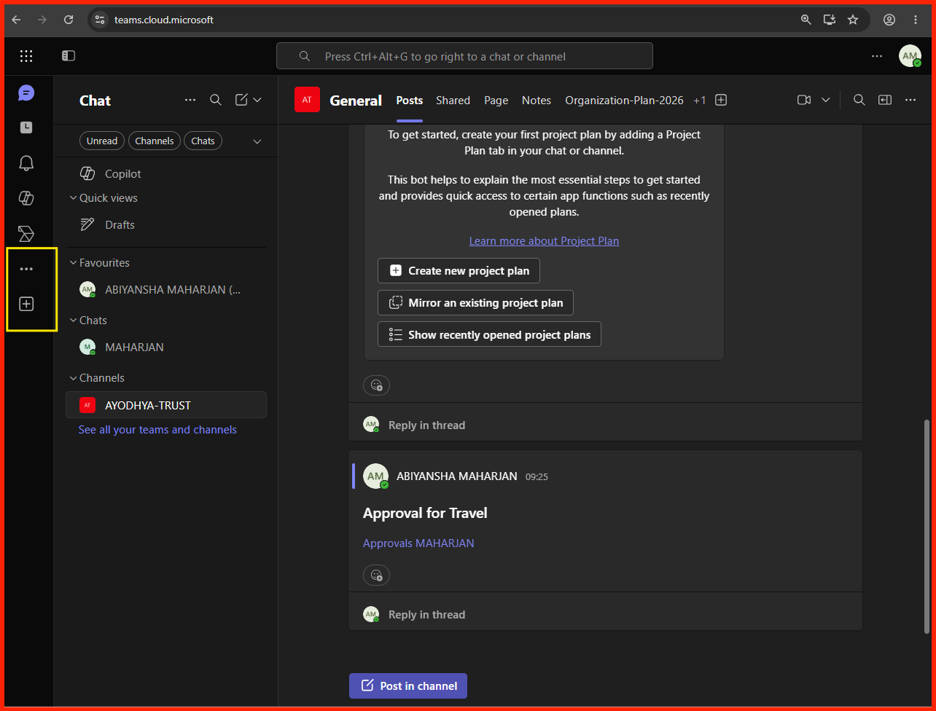
Once blocked, the client interface automatically hides the tool. Deep links and historical streams lock down to prevent users from accidentally initiating new workflows.
Step 3.3: Cleaning Setup Policies (Removing Sidebar Pinned Icons)
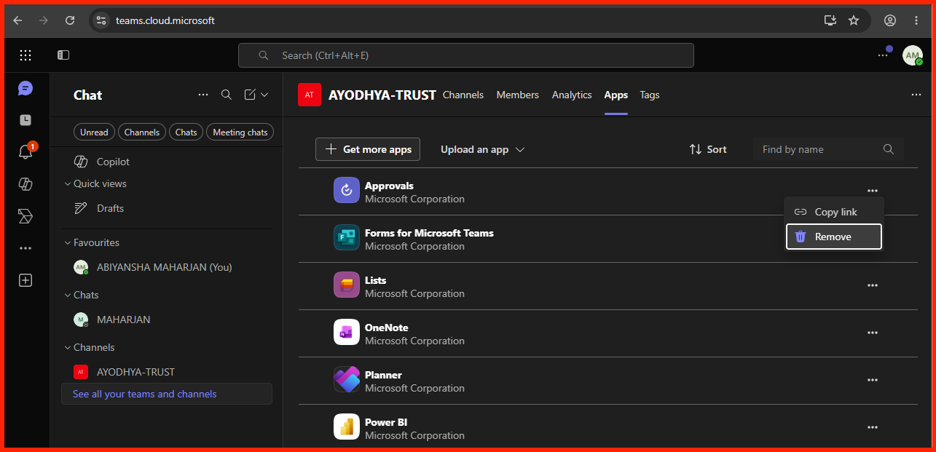
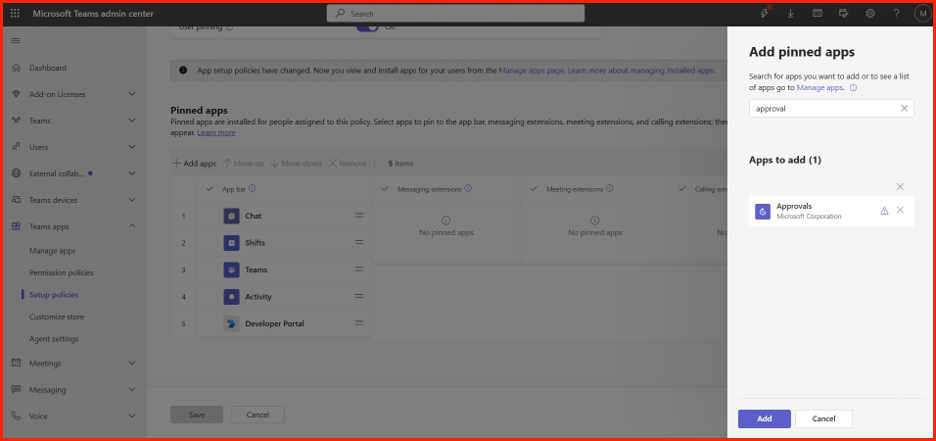
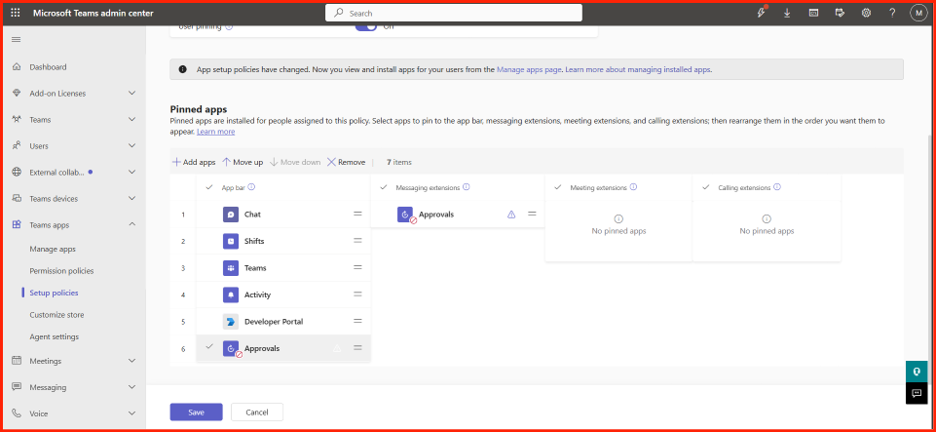
If the Approvals module was previously pushed to your staff’s side interface navigation panels through a global deployment setup rule, you need to clean up those setup policies.
- Inside the Teams Admin Center, jump to Teams apps > Setup policies.
- Open your default active profile (e.g.,
Global (Org-wide default)). - Scroll down until you locate the Pinned apps data grid matrix.
- Highlight the Approvals application text row item and click Remove.
- Click Save to commit your adjustments to the network cluster.
- Replication Policy Windows: It can take anywhere from a few hours up to 24 hours for security block modifications and sidebar setup policy wipes to filter cleanly across all client devices (web, desktop, and mobile).
- Underlying Data Retention Safety: Enforcing user-facing blocking rules safely hides the application, but it **does not** delete historical log files. All past transaction records remain securely stored inside your enterprise’s Microsoft Dataverse database instance for future legal or compliance audits.